
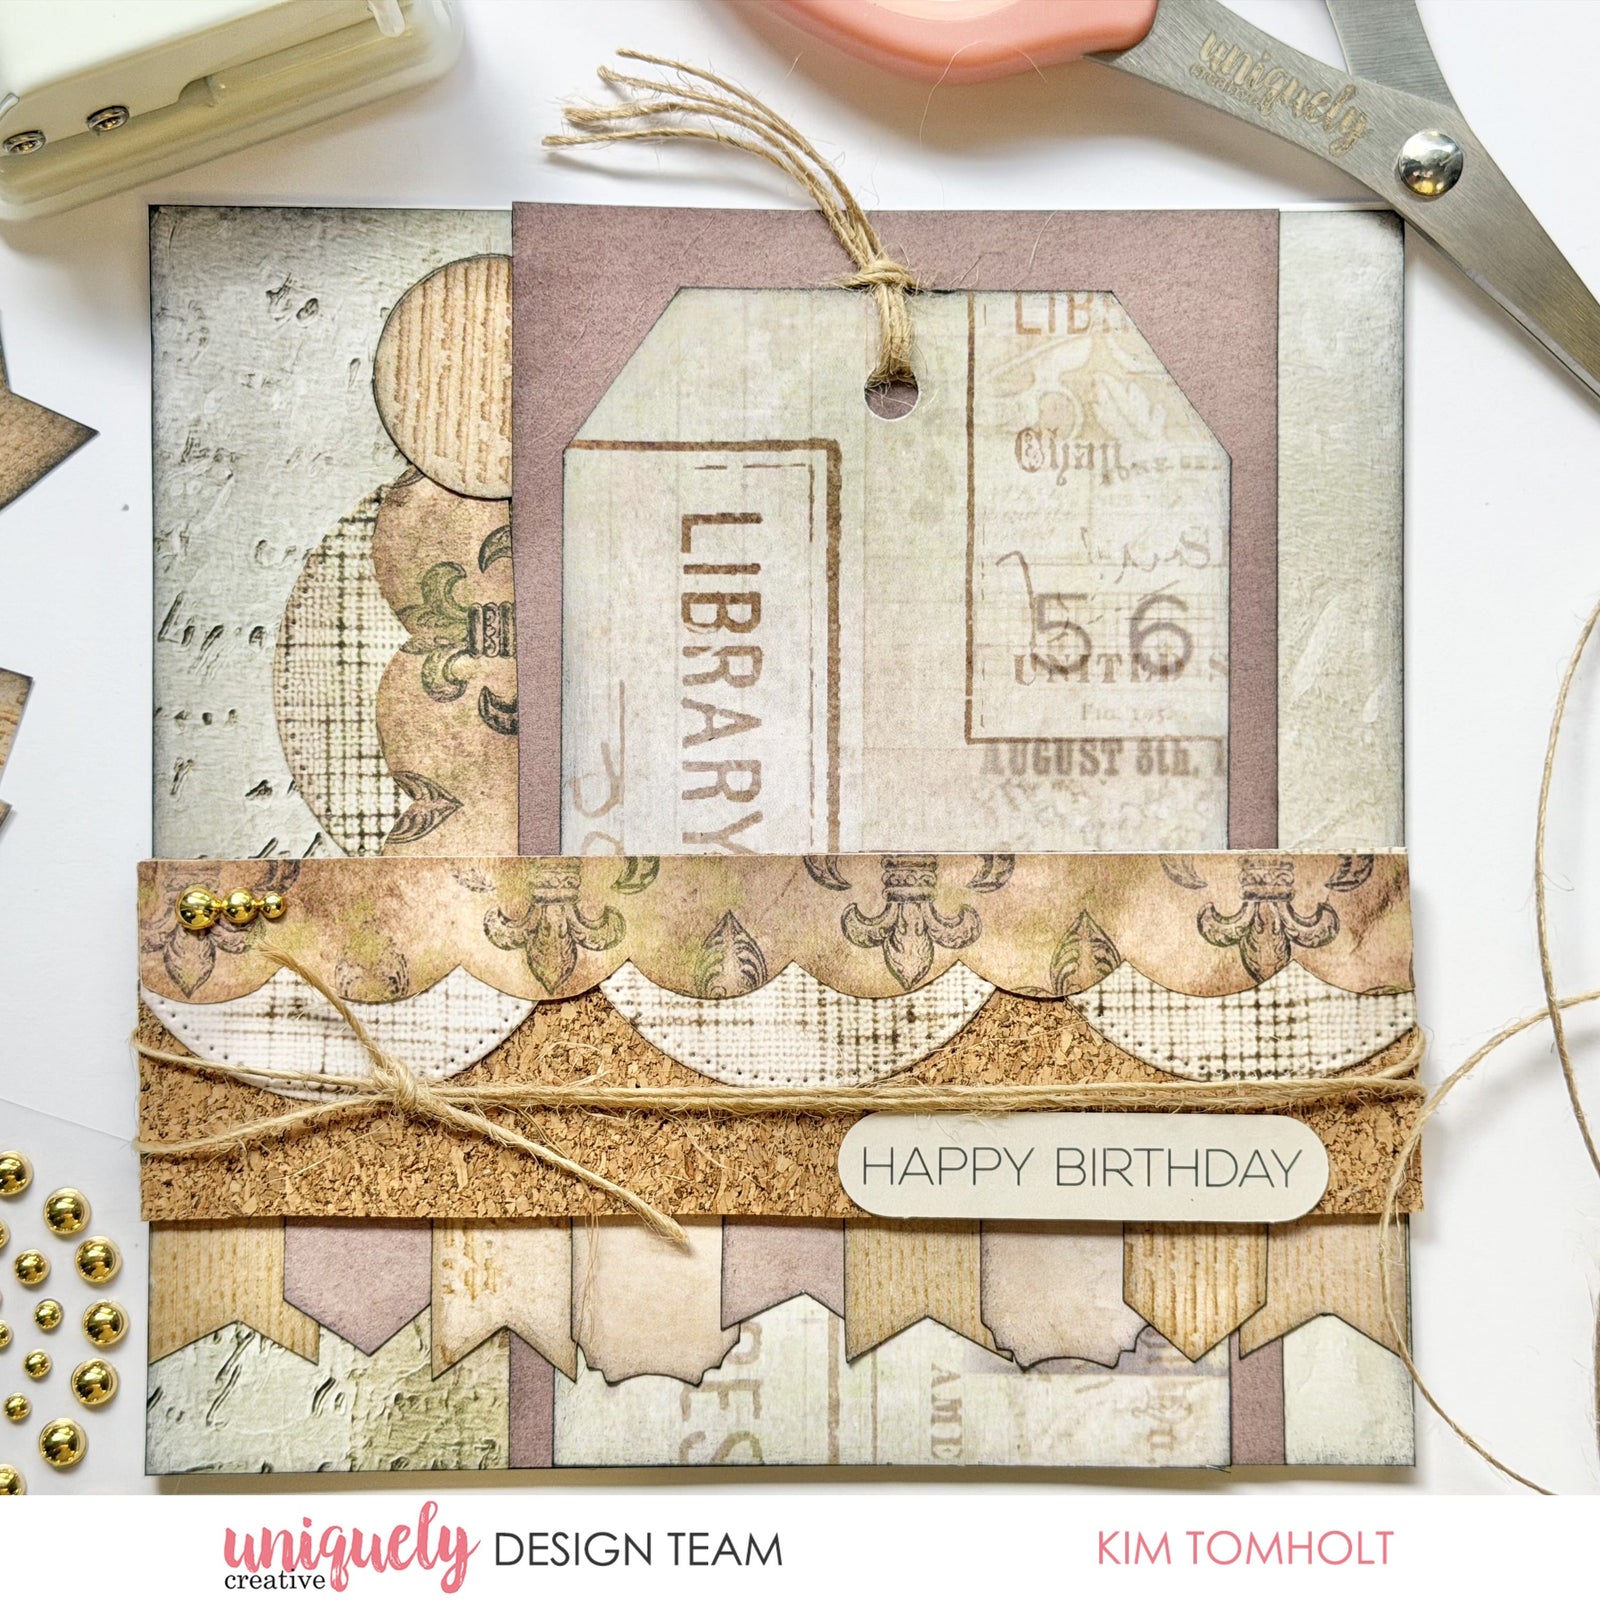

To recreate this great card created by Design Team member Kim Tomholt you can follow the steps below:
Uniquely Creative Products Used:
· UCP3130 The Botanist’s Journal Paper
· UCP3133 Forgotten Treasures Paper
· UCP3132 Curiosity Cabinet Paper
· UCP3136 Delighted Curiosities Creative Cuts
· UCCA1775 Chocolate cardstock
· UCD2208 Oversized Scallop Strip Die
· UCE1729 Gold Pearls
· UCE1744 12x12 Cork Sheet
· UCE1806 Square Cards & Envelopes
· UCE1858 3mm Double Sided Tape
· UCE1860 Natural Twine
· UCE1872 Fussy Cutting Scissors
· UCE2154 Hole Punch
· UCE2192 Paper Perfect Quick Dry Glue
· UCE2194 Paper Perfect Trimmer
Other Products Used:
· Ruler & Pen
· Black Ink
Card size: 13.5cm x 13.5cm
Step 1:
Cut 13.5 x 13.5cm square from the Botanist’s Journal and adhere to card base.
Cut 8.5cm x 13.5cm from Chocolate cardstock and adhered to base 1.5cm from the right hand side edge of the card.
Cut tag from Forgotten Treasures, punch a hole in the top of tag and add twine. Adhere to centre of Chocolate cardstock – See image 1
Step 2:
Using a ruler & pen, draw a horizontal line 3cm from the base of the card. Fussy cut arrows, tabs and tags from Curiosity Cabinet and adhere to card along the line – overlap pieces (Ink edges of tags with black ink if desired) * Cut long pieces in half – See Image 2
Step 3:
Cut scalloped pieces from Curiosity Cabinet (larger scallop piece cut with Oversized Scallop Strip Die) and adhere with double sided tape to 4cm x 10.5cm piece of cork. Tuck the larger scalloped piece under the smaller one as shown. Wrap twine around the cork and tie a knot – See image 3
Step 4:
Adhere cork to card base with double sided tape. Add sentiment, gold pearls and embellishments.
