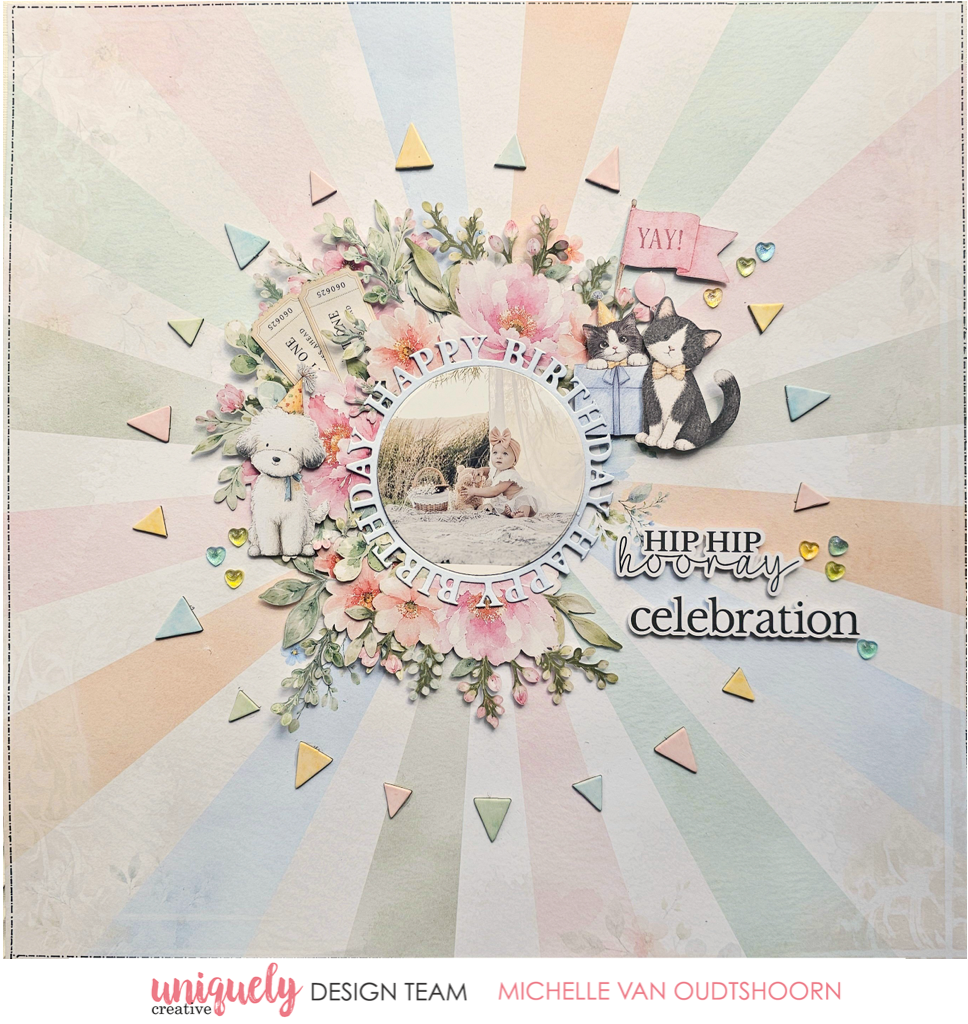

To recreate this amazing layout created by Design Team member Michelle Van Oudtshoorn, you can follow the steps below:
Uniquely Creative Products Used:
· UCP3223 Hip Hip Hooray Paper
· UCP3224 Here’s to you Paper
· UCP3230 Creative Cuts
· UCD2247 Birthday Circle Sentiments Die
· UCE2259 Party Time Dimensional Stickers
· UCE2190 Dew Drop Heart Stickers - Luminous
· UCE2194 Paper Perfect Trimmer
· UCE1872 Fussy Cutting Scissors
· UCE2192 Paper Perfect Quick Dry Glue
· UCE1803 Foam Mount Squares & Strips
Photo size: 4” x 6” (The Birthday Circle Sentiments die will cut the circle to size)
Step 1:
UCP3223 Hip Hip Hooray is the base of the paper, and a small bit of blue on the reverse side (Blue side) of the UCP3224 Here’s to You paper for the die-cut. The die cut will also cut a circle to fit inside the Happy Birthday circle sentiment, which I have used to size my photo.
Step 2:
Add the photo with foam tape to the centre of the page. Add the foam only to the centre, which allows the edges free to be able to add the Creative Cuts under the photo. Begin layering the flowers and leaves Creative Cuts around the photo with foam squares
Step 3:
Continue adding the Creative Cuts, and then adding in the cats and YAY! Banner from the Creative Cuts pack, as well as the tickets and the dog Creative Cuts. These have also been added with foam squares.
Step 4:
Add the circle sentiment “Happy Birthday” cut with the Birthday Circle Sentiments die, once all layering has been complete.
Step 5:
I used a small plate to draw a circle very lightly around the layers and photo, measured and marked off where I would place the Party Time Dimensional Stickers. Before adhering these, I added the words “Hip Hip Hooray” and “Celebrate” from the Creative Cuts pack, with foam squares first and then added the dimensional stickers, alternating with small and large-sized coloured triangles. Finish off by adding the Dew Drop Heart Stickers.