
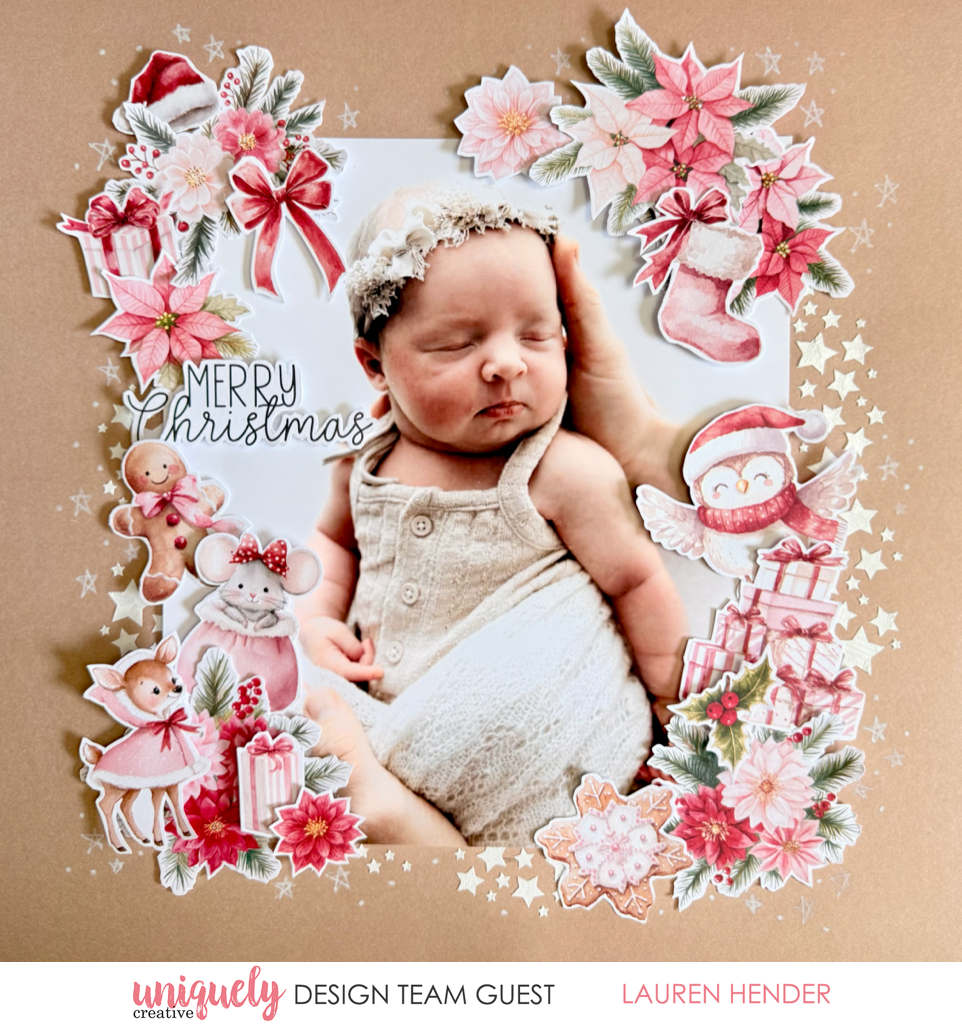

To recreate this sweet layout created by Design Team member Lauren Hender you can follow the steps below:
Uniquely Creative Products Used:
· UCCA1791 Cardstock Mocha
· UCP3195 Card Makers Collection Pack
· UCP3197 Scrapbooking Creative Cuts
· UCE2078 Uniqolour White Texture Paste
· UCE2077 Uniqolour Pearl Pigment Powder
· UCMM1796 Stencil Starfall
Other Products Used:
· Trimmer
· Adhesives including mounting foam
· Spatula and paint mixing tray
· White Pen
Photo size: 7.5" x 8.25"
Step 1:
Fussy cut all icon elements from the card makers collection pack.
Step 2:
As a guide place your photo in the centre of the Mocha cardstock.
Step 3:
Using a pencil mark the page with a few lines to assist your guiding of where you will place your stencil.
Step 4:
Using a paint palette mix the white texture paste with the pearl pigment powder. This will give the texture paste a little sparkle.
Step 5:
Using the stencil apply the texture paste surrounding the areas you have indicated with your pencil markings. Dry off with heat gun or let air dry
Step 6:
Adhere the photo in the centre of the page.
Step 7:
Using the picture of my layout as a guide adhere fussy cut icon elements from the Card Maker’s Collection Pack as well as the icons from the Scrapbooking Creative Cuts using a mix of foam tape and flat adhesive, to build and layer around the photo. Step 8:
To add the finishing touches to the layout use a white pen to add hand drawn stars in miscellaneous sizes .