
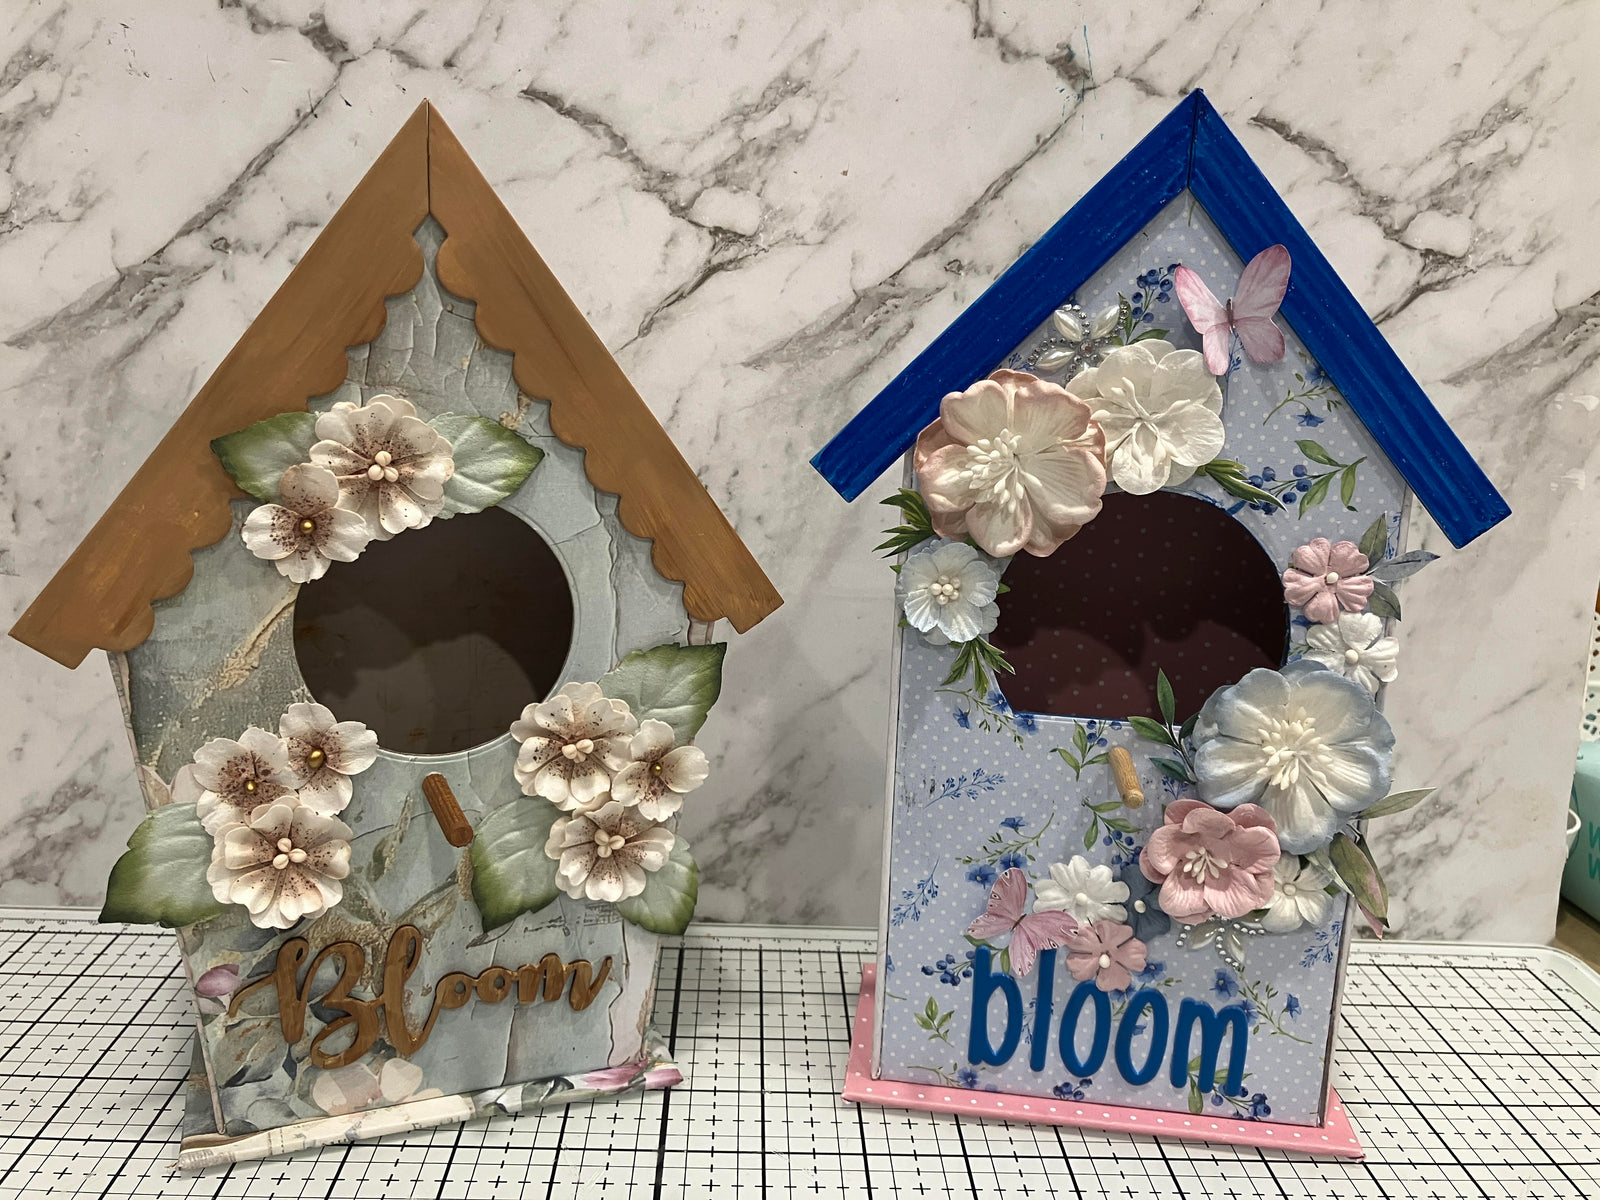

Instructions generously created and shared by Ngaire Ashdown
You will need:
Sort pieces into the three birdhouses – use the diagrams on back of packaging to help.
(We have not included the smallest birdhouse in these instructions)
BIRDHOUSE 1 (167mm x 215mm)
LABEL PIECES AS YOU GO
BACK -Trace the solid back piece onto thick card or chipboard.
Cut with a craft knife **cut just inside your pencil lines**
WALL PANELS
Cut 2 pieces of chipboard 5cm x 18cm
ROOF PANELS
Cut 2 pieces of chipboard 5cm x 8.5cm
BASE
Cut 1 piece of chipboard 13cm x 7cm (this will be larger than the bottom of house)
BIRDHOUSE 2 (138mm x 230mm)
LABEL PIECES AS YOU GO
BACK
Trace the solid back piece onto chipboard. Cut with craft knife **cut just inside your pencil lines**
WALL PANELS
Cut 2 pieces of chipboard 14cm x 5cm
ROOF PANELS
Cut 2 pieces of chipboard 11.2cm x 5cm
BASE
Cut 1 piece of chipboard 12cm x 7cm (this will be larger than the bottom of house)
BIRDHOUSE 3 (167mm x 215mm)
LABEL PIECES AS YOU GO
BACK
Trace the solid back piece onto thick card or chipboard. Cut with a craft knife **cut just inside your pencil lines**
WALL PANELS
Cut 2 pieces of chipboard 12cm x 5cm
ROOF PANELS
Cut 2 pieces of chipboard 12.5cm x 5cm
BASE
Cut 1 piece of chipboard 18.6cm x 7cm (this will be larger than the bottom of house)
TIP:
Keep each birdhouse kit separate in a plastic bag and cut the diagrams from the packaging and included the relevant diagram in each bag.
INSTRUCTIONS FOR THE JOINING PIECES
You will need 4 side pieces and 2 base pieces for EACH birdhouse.
I used Kraft cardstock for these pieces.
BIRDHOUSE 1
Measure side and roof and add these measurements together.
SIDE: 17.8cm
ROOF: 8.5cm
TOTAL: 26.3cm
Cut 4 pieces of Kraft cardstock to 26.3cm x 5cm.
Score on short side at 2.5cm.
On long side measure and mark 17.8cm on both long edges.
Score on long side at these marks. 
BIRDHOUSE 2
Cut 4 pieces of Kraft card stock 25.3cm x 5cm.
Score on short side at 2.5cm.
On long side measure and mark 14cm on both edges.
Score on long side at these marks.
Cut the “V” sections as in diagram.
BIRDHOUSE 3
Cut 4 pieces of Kraft card stock 24.5cm x 5cm.
Score on short side at 2.5cm.
On long side measure and mark 12cm on both edges.
Score on long side at these marks.
Cut the “V” sections as in diagram.
COVERING CHIPBOARD PANELS
BACK and FRONT PANELS
Choose your patterned papers for the front and back panels.
Glue the chipboard panels to the wrong side of your paper, leaving approx. a 2cm border all around.
Mitre the corners.
NOTE: With Birdhouse 2, you will need to just trim the paper as best you can so paper will fold and lay flat.
Fold flaps and glue over chipboard, trimming where needed to lay flat.
FRONT PANEL
Using a die cutting machine (or craft knife) cut a circle (or other shape) in one of these panels just above the centre of panel. I ran it through about 4 times!!! Do not use any shim.
The die will become embedded into the chipboard but don’t worry!
Remove the metal die and finish cutting with craft knife.
BACK PANEL
**This will line the inside back of house and we will adhere it later!
Using this panel as a template, cut a coordinating piece of patterned paper a little smaller than panel (i.e., leaving a small border all around)
Take one of the Kraft cardstock strips made earlier and glue one long side to the right-hand side of inside back panel leaving a small border of patterned paper. Match the fold in the strip to the junction of wall and roof. TRIM, AS NEEDED.
Repeat for left-hand side of panel. Glue patterned paper liner to inside. Glue strips to inside front panel the same way. 
SIDE PANELS
Glue chipboard side panels to wrong side of patterned paper, leaving about 2cm border all around. Mitre corners. Fold and glue paper around panel.
ROOF AND BASE PANELS
Cover with patterned paper as before.
Cut an extra piece of matching base patterned paper a bit smaller than base and glue to cover chipboard on bottom.
CONSTRUCTION
Use a strong glue to adhere the covered panels to make house.
Glue side panel to front panel flap making sure sides are flush and equal to front panel. Repeat with other side panel.
Then glue side panels to back panel, making sure panels are flush and equal.
Glue roof panels to top.
(Use a piece of dowel, bone folder to help adhere the flaps to the panels.)
Glue the house to base keeping structure centred on the base panel.

DECORATING TRIMS
I coloured the trims with Faber-Castell PITT Artist pen (Cobalt Blue). I liked the “wood grain” effect.
You could also paint the trim. Don’t forget the edges!
You can also cut a shape out of patterned paper or cardstock to cover edge of opening to hide any rough edges from cutting hole.
Add flowers, word, ink edges etc to your liking.
A lot of possibilities to make it your own.
Use a small length of dowel to act as a perch. 