A Floral Thanks Tutorial - Ashleigh Newton-Spence

Uniquely Creative Products Used:
- UC1879 Spring Stamp
- UCD2069 Spring Die
- UCD1974 Stitched Nesting Rectangle Die
- UCD1975 Scalloped Nesting Rectangle Die
Other Products Used:
- Copic Markers
- BG05, B06
- YG63, G94, G46
- YR27, E99
- R08, V15, YR65
- Y08, Y19
- Sakura Gelly Roll Pen – White
- Tombow Mono Liquid Glue
- Nuvo Drops – Ebony Black
- X-Press It Blending Card
- Hero Arts Intense Black Ink
- Versafine Onyx Black Ink
- White Cardstock
- Black Cardstock
- MISTI Stamping Tool
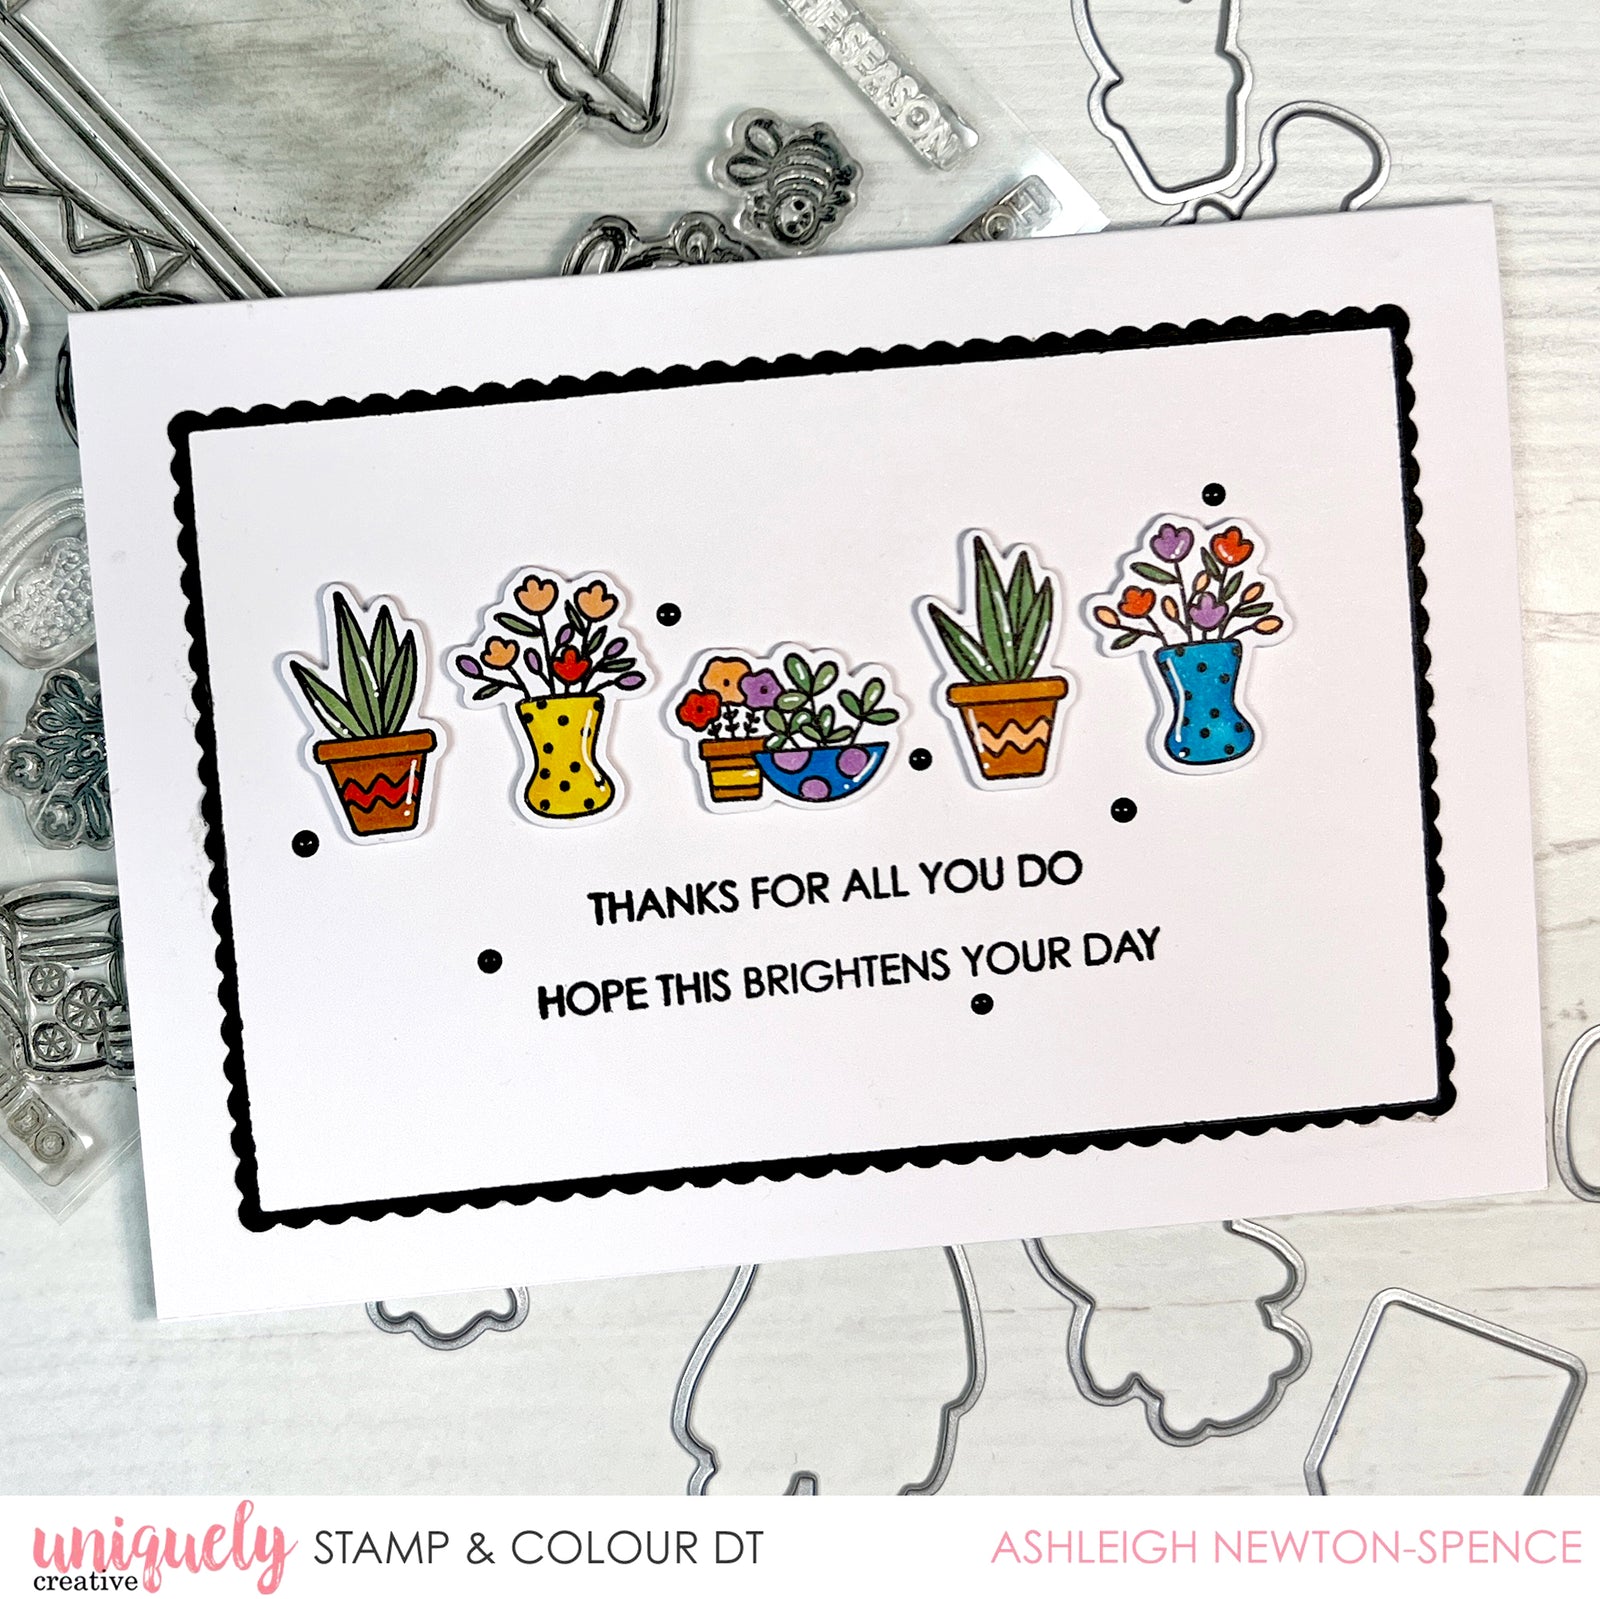
Instructions:
1. Using a Copic friendly ink, stamp out two of each of the plant images in the stamp set. Using markers, colour the images in and cut them out with their matching dies.

2. Also using the matching dies, cut out two additional of each of the shapes. Tip: use these behind the coloured ones to give a bit of stability to the images.

3. To make a very skinny flat border cut a scalloped rectangle out of black cardstock, then cut a rectangle out of that. This gives a much less dimensional result, rather than stacking rectangles. You can achieve a similar result though by stacking a stitched rectangle on top of a scalloped one.

4. Stamp out the sentiment using a stamp positioner. As there are two sentiments, line them up in the middle, and in the bottom third of the card.

5. Line up the plant images. Use a ruler or a straight edge to ensure they are lined up straight. Using a washi or low tack tape, temporarily tape them in that line to make it easy to put on your card.

6. Glue the images down, and then finish the card with a few sporadic black nuvo drops or small black rhinestones.
