ADVENTURE AWAITS LAYOUT TUTORIAL - LISA AMIET

To recreate this fantastic layout created by Design Team member Lisa Amiet you can follow the steps below:
Uniquely Creative Products Used:
· UCP2957 Pocket Notes Paper
· UCP2958 Northline Paper
· UCP2961 Wild Terrain Paper
· UCP2962 Coordinates Paper
· UCD2124 Tree Ring Slice – Decorative Base Layer
· UCP2965 Field Notes Creative Cuts
· UCE2126 Camping Tickets & Titles Ephemera
· UCMM1786 Waypoint Stencil
· UCD2202 Slimline Chevron Strip Die
· Cut-a-part Sheet
· Fussy Cutting Scissors
· Blending Brush
· Black Soot Distress Ink
Other Products Used:
· Die Cutting Machine
· Glue, Double Sided Tape, Foam Mounts
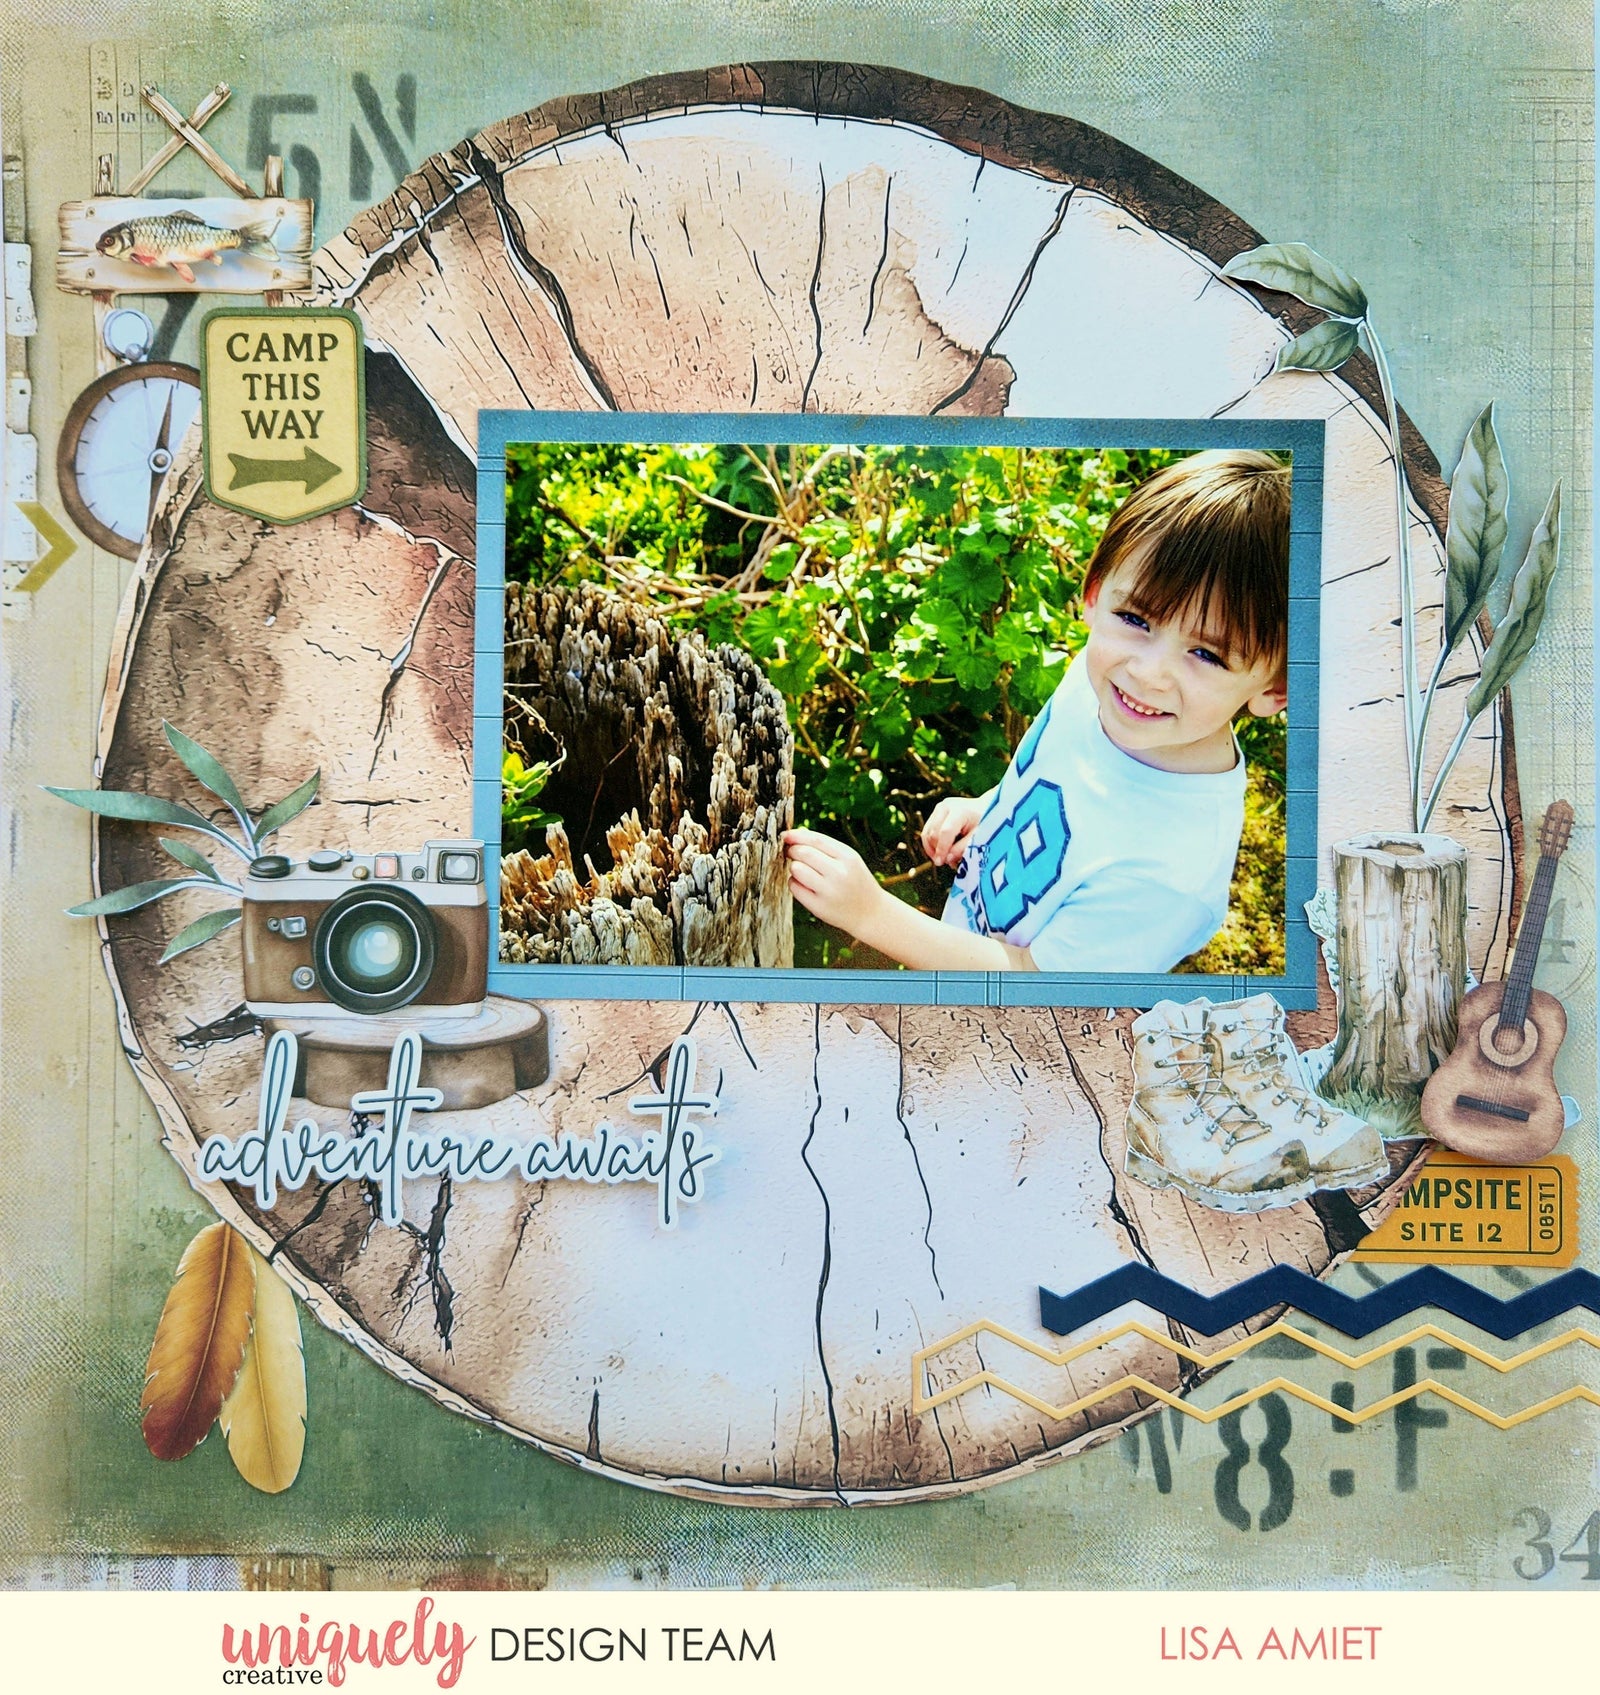
Photo Size: 4” x 6”
Step 1:
Use Northline paper as your base page. Remove cut-off strip. Use the Waypoint Stencil, black ink, and blending brush to lightly stencil in top left and bottom right corners of your page. Fussy cut compass from Coordinates paper and adhere to top left corner. Adhere ticket from the Camping Tickets & Tiles Ephemera to bottom right corner. Adhere the Tree Ring Slice – Decorative Base layer to your base page, overlapping previous pieces – See image 1.
Step 2:
Adhere signpost Creative Cut, and camping ticket from the Camping Tickets & Titles Ephemera to top left corner, overlapping previous pieces. Adhere fish Creative Cut to the sign using Foam Mounts – See image 2.
Step 3:
Cut an 11.5cm x 16.5cm piece of Pocket Notes paper. Adhere photo to this piece and adhere to the centre of your page. Fussy cut foliage, tree stump and boots from Coordinates paper and adhere to bottom right corner of your photo. Adhere guitar Creative Cut with Foam Mounts, overlapping tree stump - See image 3.
Step 4:
Use the Slimline Chevron Strip dies to die cut yellow and navy chevrons from the Cut-a-part Sheet. Cut a 13cm piece of yellow outline die-cut and adhere it under the bottom cluster. Cut a 10.5cm piece of solid navy chevron die-cut and adhere above yellow strip – See image 4.
Step 5:
Fussy cut leaves, wood slab and camera from Coordinates paper and adhere and layer at the bottom left corner of your photo. Adhere title from the Camping Tickets & Titles Ephemera under this, using Foam Mounts. Fussy Cut feathers from Wild Terrain paper and adhere under title, tucking under wood slice – See image 5.