Be Merry Christmas Card Tutorial - Ashleigh Newton-Spence

Do you still have more Christmas cards to make? Ashleigh Newton-Spence has created two gorgeous cards using Uniquely Creative's Elf Christmas collection, with a great technique using the Candy Stripe Cover Plate die. Read on to see how Ashleigh created these effective cards.
Uniquely Creative Products Used:
- UC1881 Elf Christmas Stamp Set
- UCD2077 Elf Christmas Die
- UCD1994 Candy Stripe Cover Plate Die
- UCD2064 Stitched Nesting Oval Die
- UCD2065 Scalloped Nesting Oval Die
- Foam Mounts - Squares & Strips
Other Products Used:
- Kokuyo Dotliner Glue Tape
- X-Press It Full Adhesive Sheet
- Sakura Gelly Roll Pen – White 0.8
- Tim Holtz Distress Ink – Prize Ribbon
- Black Cardstock
- Gold Cardstock
- X-Press It Blending Card
- Silver Cardstock
- White Cardstock
- Full Foam Sheet
- Double Sided Tape
- Hero Arts Intense Black Ink
- MISTI Stamping Tool
- Blue Version - BG45, BG49, R37, R27, R83, R85, Y28, Y26, E00, E01, R20, N1, 0, B39
- Pink Version - E00, E02, T5, T1, RV19, RV09, G05, YG09, R11
Card Size: 14.8cm x 10.5cm (UC Rectangle Card)
Instructions:
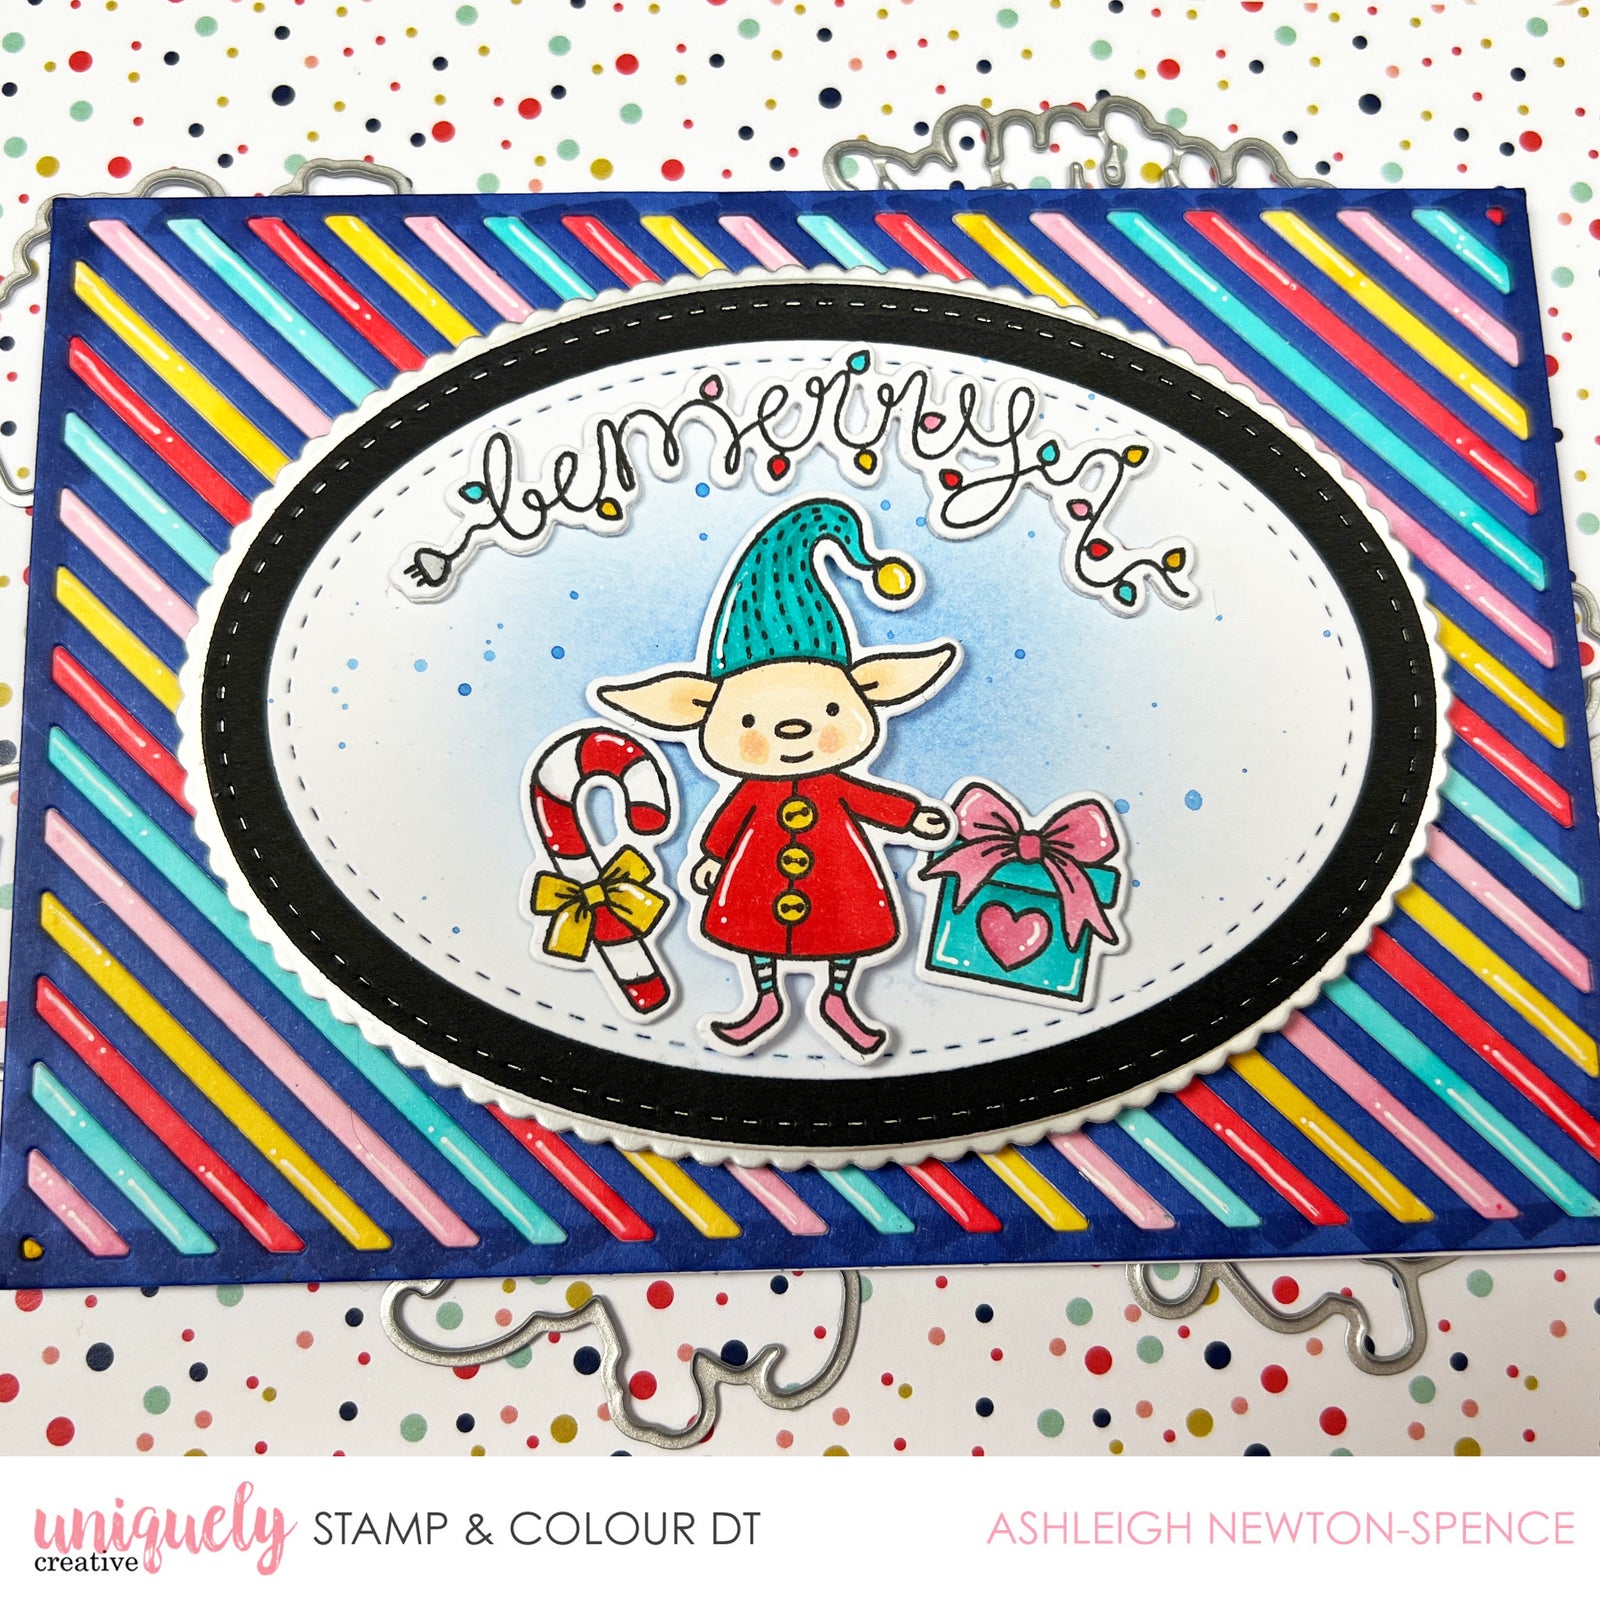
1. Add a sheet of adhesive to the back of a piece of plain white cardstock. Die cut the Candy Stripe cover plate from this piece of cardstock. This will make doing our inlay technique much easier.

2. Using Copic Markers, colour in the main frame (solid piece) with your main colour, in this case blue. Then, with your secondary colours, colour in the insert pieces with additional markers.

3. Stamp out one of the Elf images from the Elf Christmas stamp set, along with some of the accessories. Use the same colour markers you used for the background to colour these in and die cut with the matching dies.

4. From white cardstock, die cut the second largest stitched oval. Die cut the largest stitched oval from black cardstock. Using the largest of the scalloped ovals, die cut a piece of matte silver cardstock.

5. Blend some Prize Ribbon Distress Ink into the middle of the white cardstock oval. Add some texture with water and ink splatters.

6. Adhere the three ovals together in a nesting format and add a piece of craft foam behind the stack to provide more dimension from the background. Glue this to the candy stripe panel

7. Assemble the images in the centre of the ink blended oval. Use Uniquely Creative foam mounts behind the main elf and then a thinner foam tape behind the accessories. Die cut multiple sentiment pieces using the matching die and adhere together for dimension. Add white highlights to the images and to the candy stripes on the background for more interest.

Would you like to keep creating? This is a great card to replicate in different colours. Using the same technique in a colour combination like pink and green adds a different spin to the classic Christmas card - The possibilities are endless!
 |
 |