BEAUTIFUL LAYOUT TUTORIAL - KIM EWINS

Shop the products
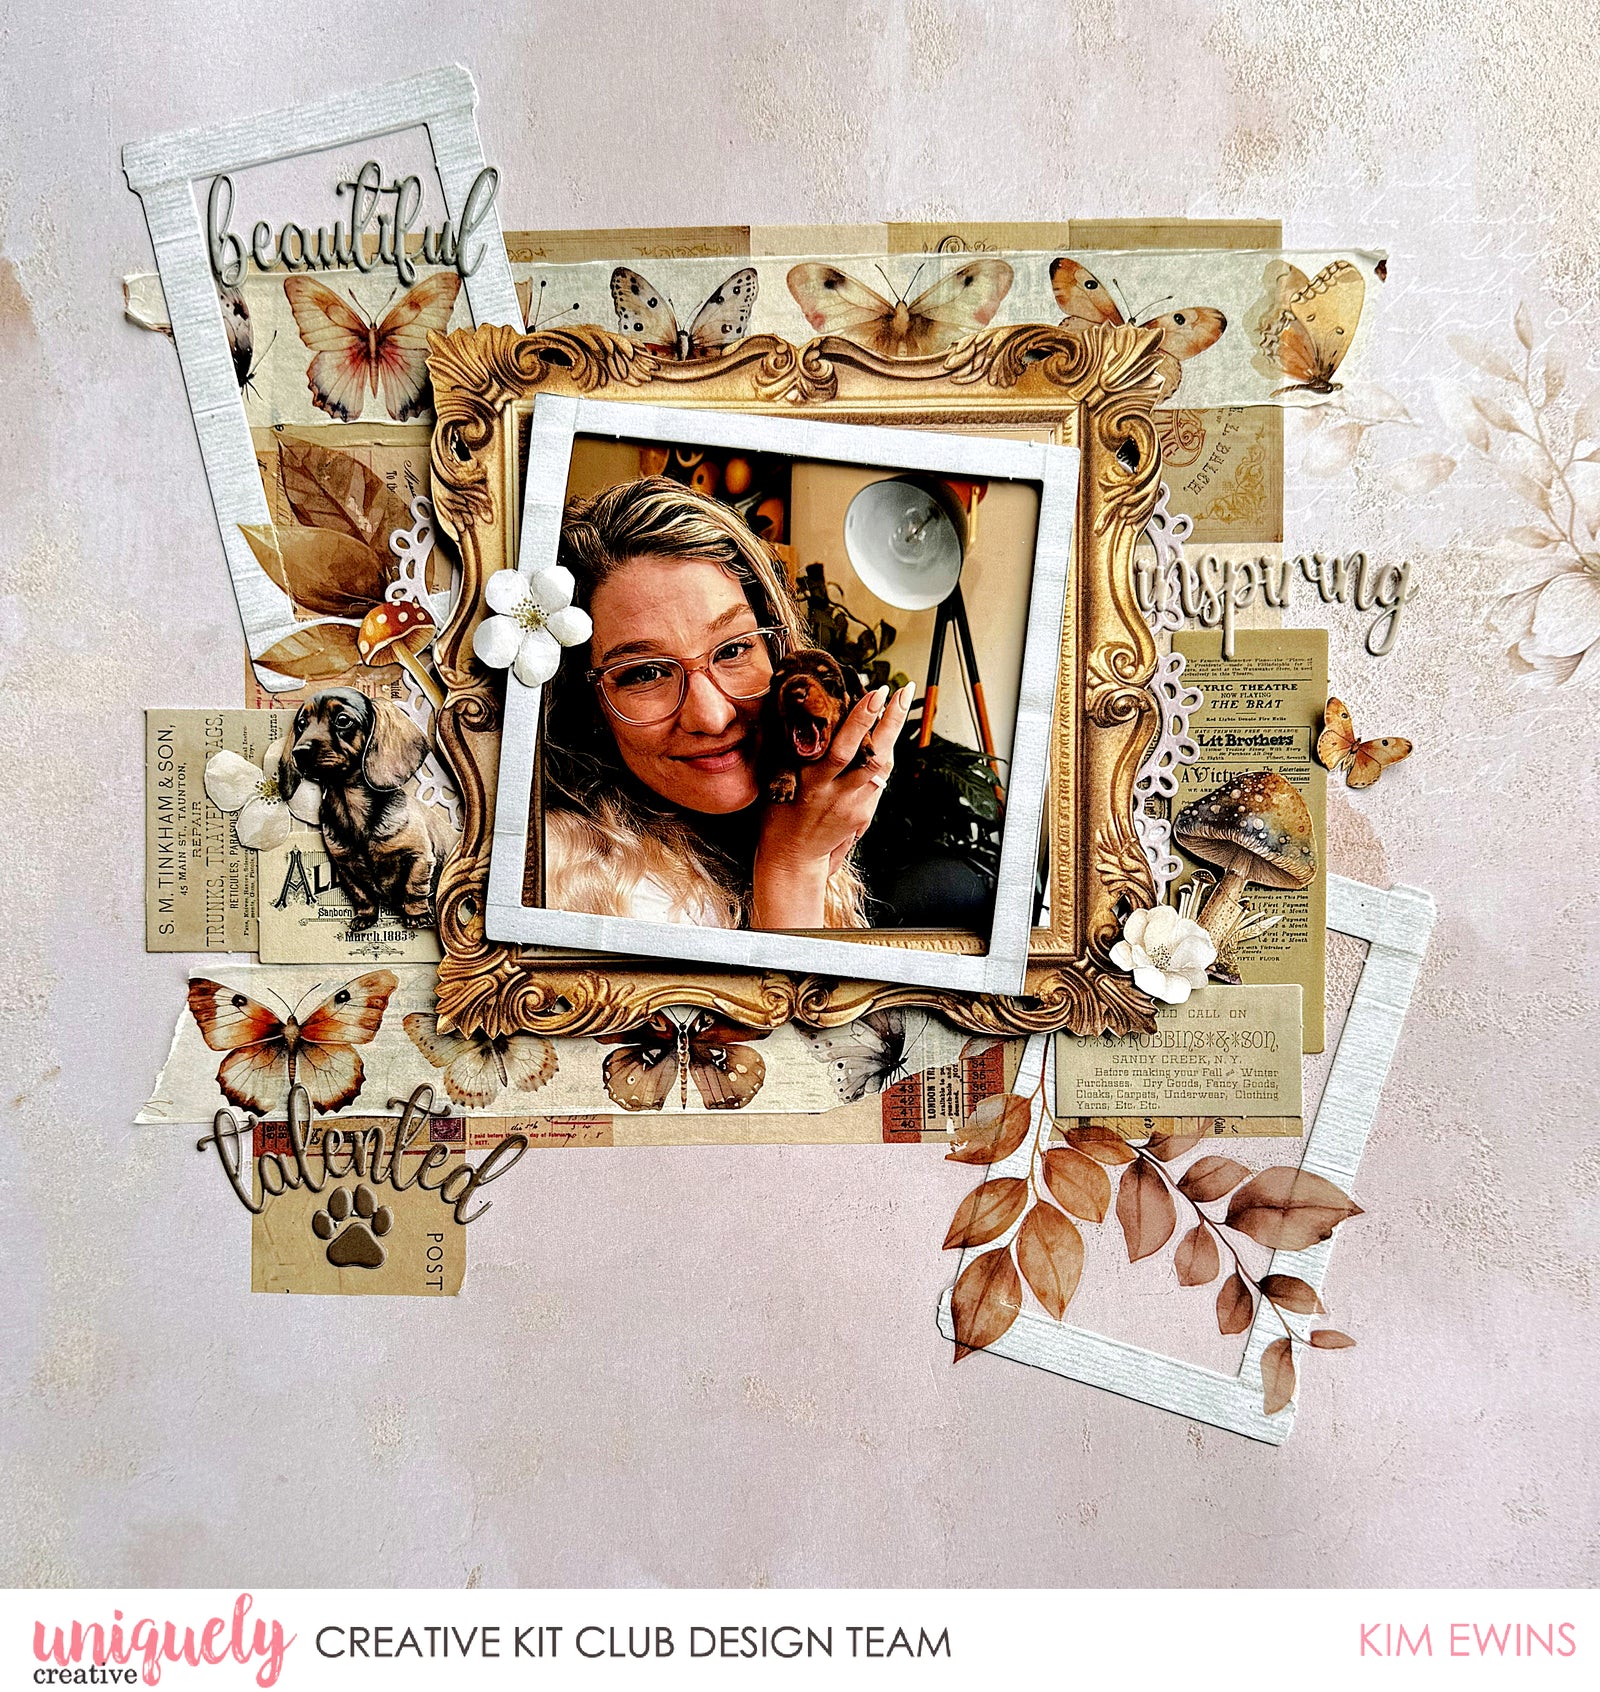
Uniquely Creative Products Used:
- UCP2757 Max Paper
- UCP2758 Ruby Paper
- UCP2759 Indie Paper
- UCP2760 Willow & Grace Creative Cuts
- UCE2012 Willow & Grace Rub-ons
- UCE2013 Willow & Grace Puffy Alpha Stickers
Add-ons:
- UCE2015 Willow & Grace – Vintage washi
- UCD2149 Lace Bunting die
- UCP2761 Willow & Grace Creative Cuts – Dogs
Other Products Used:
- Trimmer, scissors,
- Adhesive tape, glue
- Cardboard, 3D foam mounts
- Die cut machine
Photo size: 9.5cm x 9.5cm
Instructions:
-
Add washi tape to ‘Ruby’ paper.

-
Fussy cut elements from ‘Indie’ paper

-
Grab Creative Cuts and locate 2 of the narrow white frames, adhere in place on layout.
-
Add rub-ons over creative cut frames.

-
Adhere cardboard or 3D foam mounts to the back of frame cut from ‘Indie’ paper. Stick in place on layout.
-
Die cut one of the large buntings from the spot side of ‘Max’ paper – trim down to fit under edge of stuck down frame.

-
Add cardboard or 3D foam mounts to the back of the photo, adhere photo to centre of stuck down frame.

-
Take the large creative cut frame, add 3D foam mounts to the underside, adhere on an angle over photo. Tuck and glue other creative cuts and fussy cut elements around photo.
- Stick a selection of Willow & Grace alpha word stickers in place around layout.