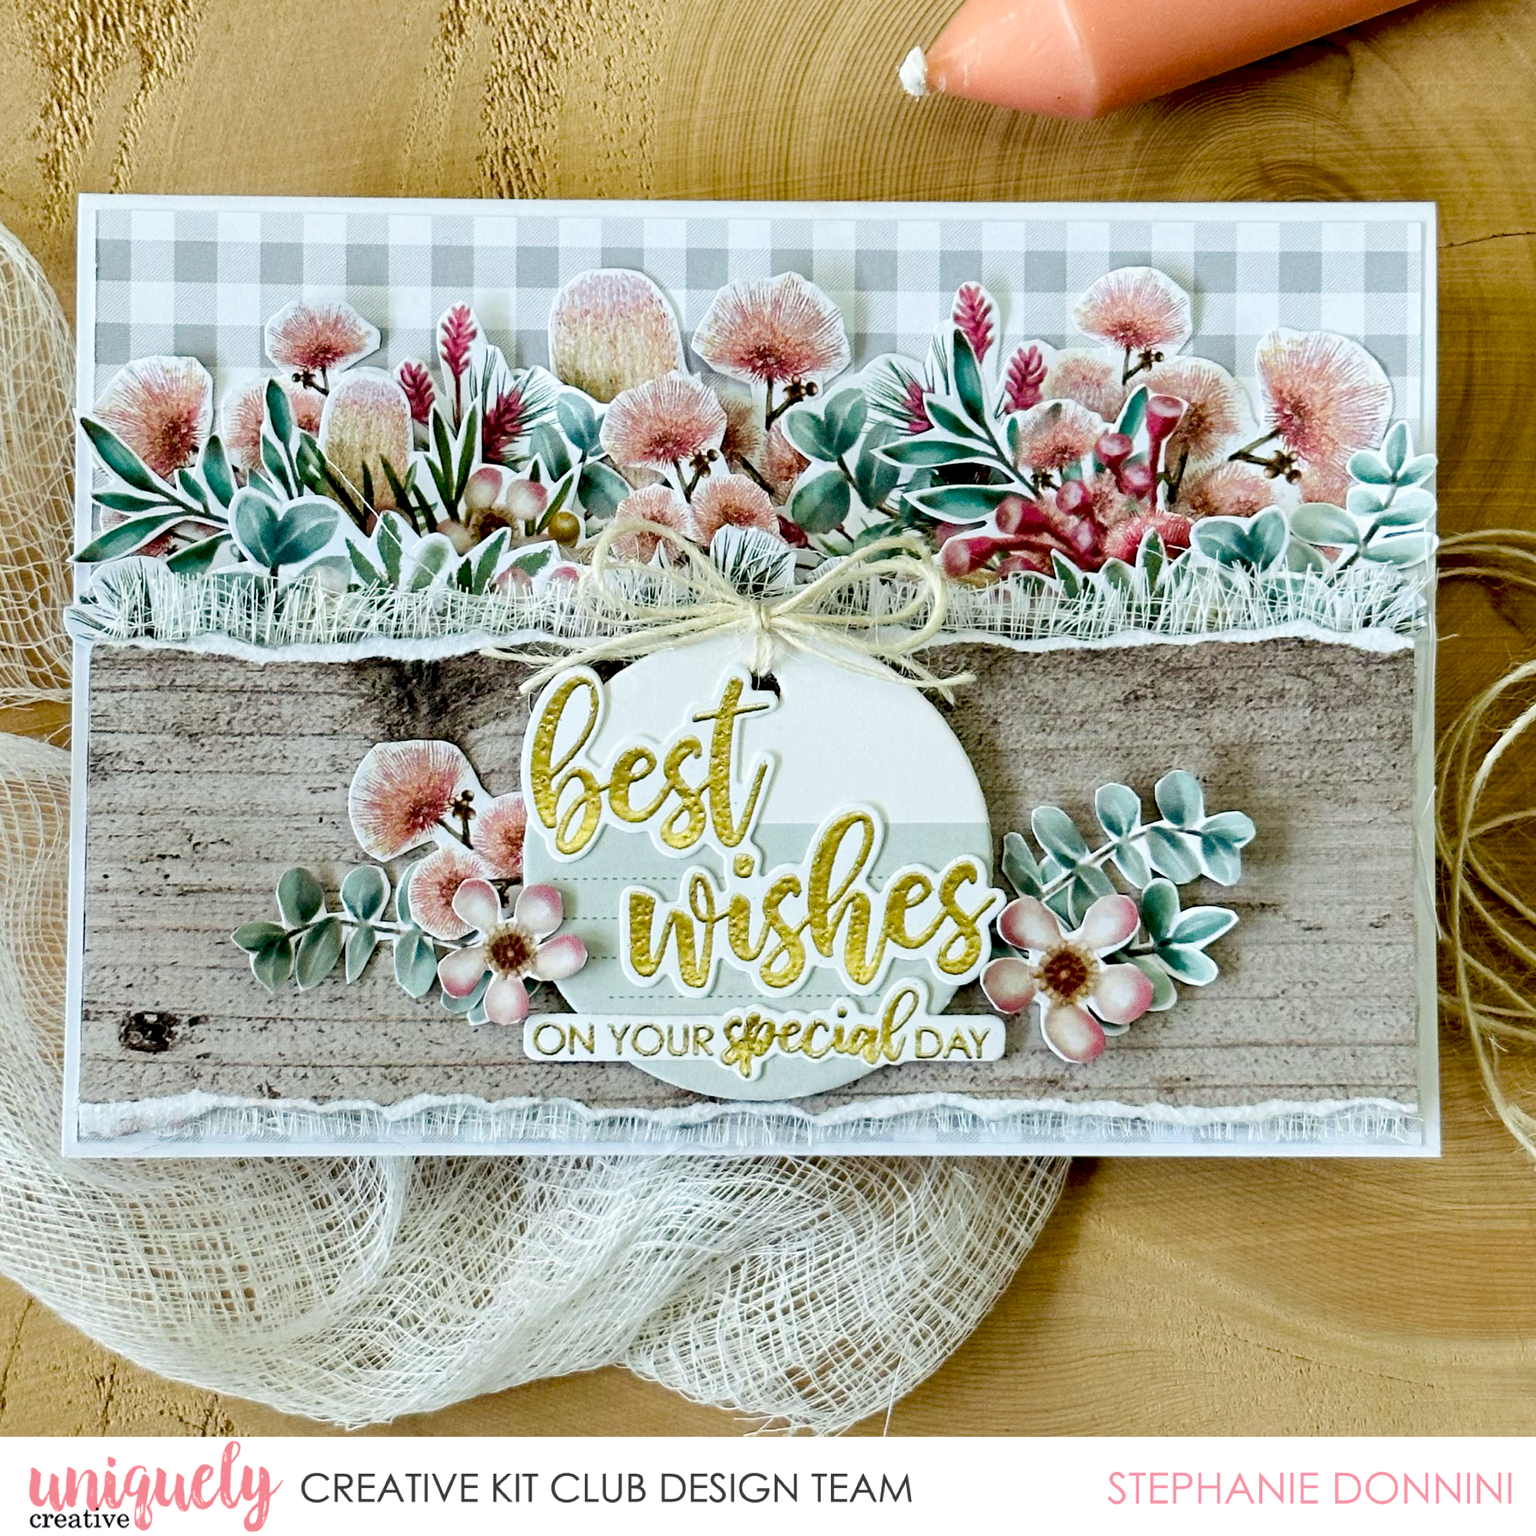
Best Wishes Tutorial - Stephanie Donnini

Uniquely Creative Products Used:
UCP2535 Native Garden UCP2530 Bush Flowers -
UCP2536 Flora & Fauna - Fussy Cuts -
UC E1955 Muslin -
UC 1885 Australian Native Stamp -
UCP 2538 Bushland Boutique Collection pack UCE1805 White twine - UCD2087 Australian Natives die
Other Products Used:
- Trimmer
- Scissors
- Double Sided Tape - Foam Tape
- Die cutting machine
- Gold embossing powder
- Embossing ink
- Heat Gun
Instructions:
1. Take a standard white rectangle card base and layer with the gingham side of the bush flowers paper.

2. Tear a strip of wood panel paper from the Native Garden paper sheet. Cut the strip to the length of the card base and glue a slightly larger strip of muslin cloth behind it. Foam mount this panel onto the card base for extra dimension.

3. Fussy cut a bunch of flowers and leaves from the Flora and Fauna fussy cut sheet.

4. Once you have cut out all your flowers, adhere them behind the wood panel. For the larger bunches of flowers, cut them in half so you have multiple layers of flowers to add. This creates a full, lush look.

5. Stamp the sentiments from the Australian Native stamp set with versa mark ink. Cover with gold embossing powder and melt with a heat gun. Die cut sentiments out using the coordinating dies.

6. Use a circle tag from the Bushland Boutique collection pack to adhere the sentiments too. For some finishing touches, add a double looped twine bow to the tag and foam mount some fussy cut flowers to either side.
