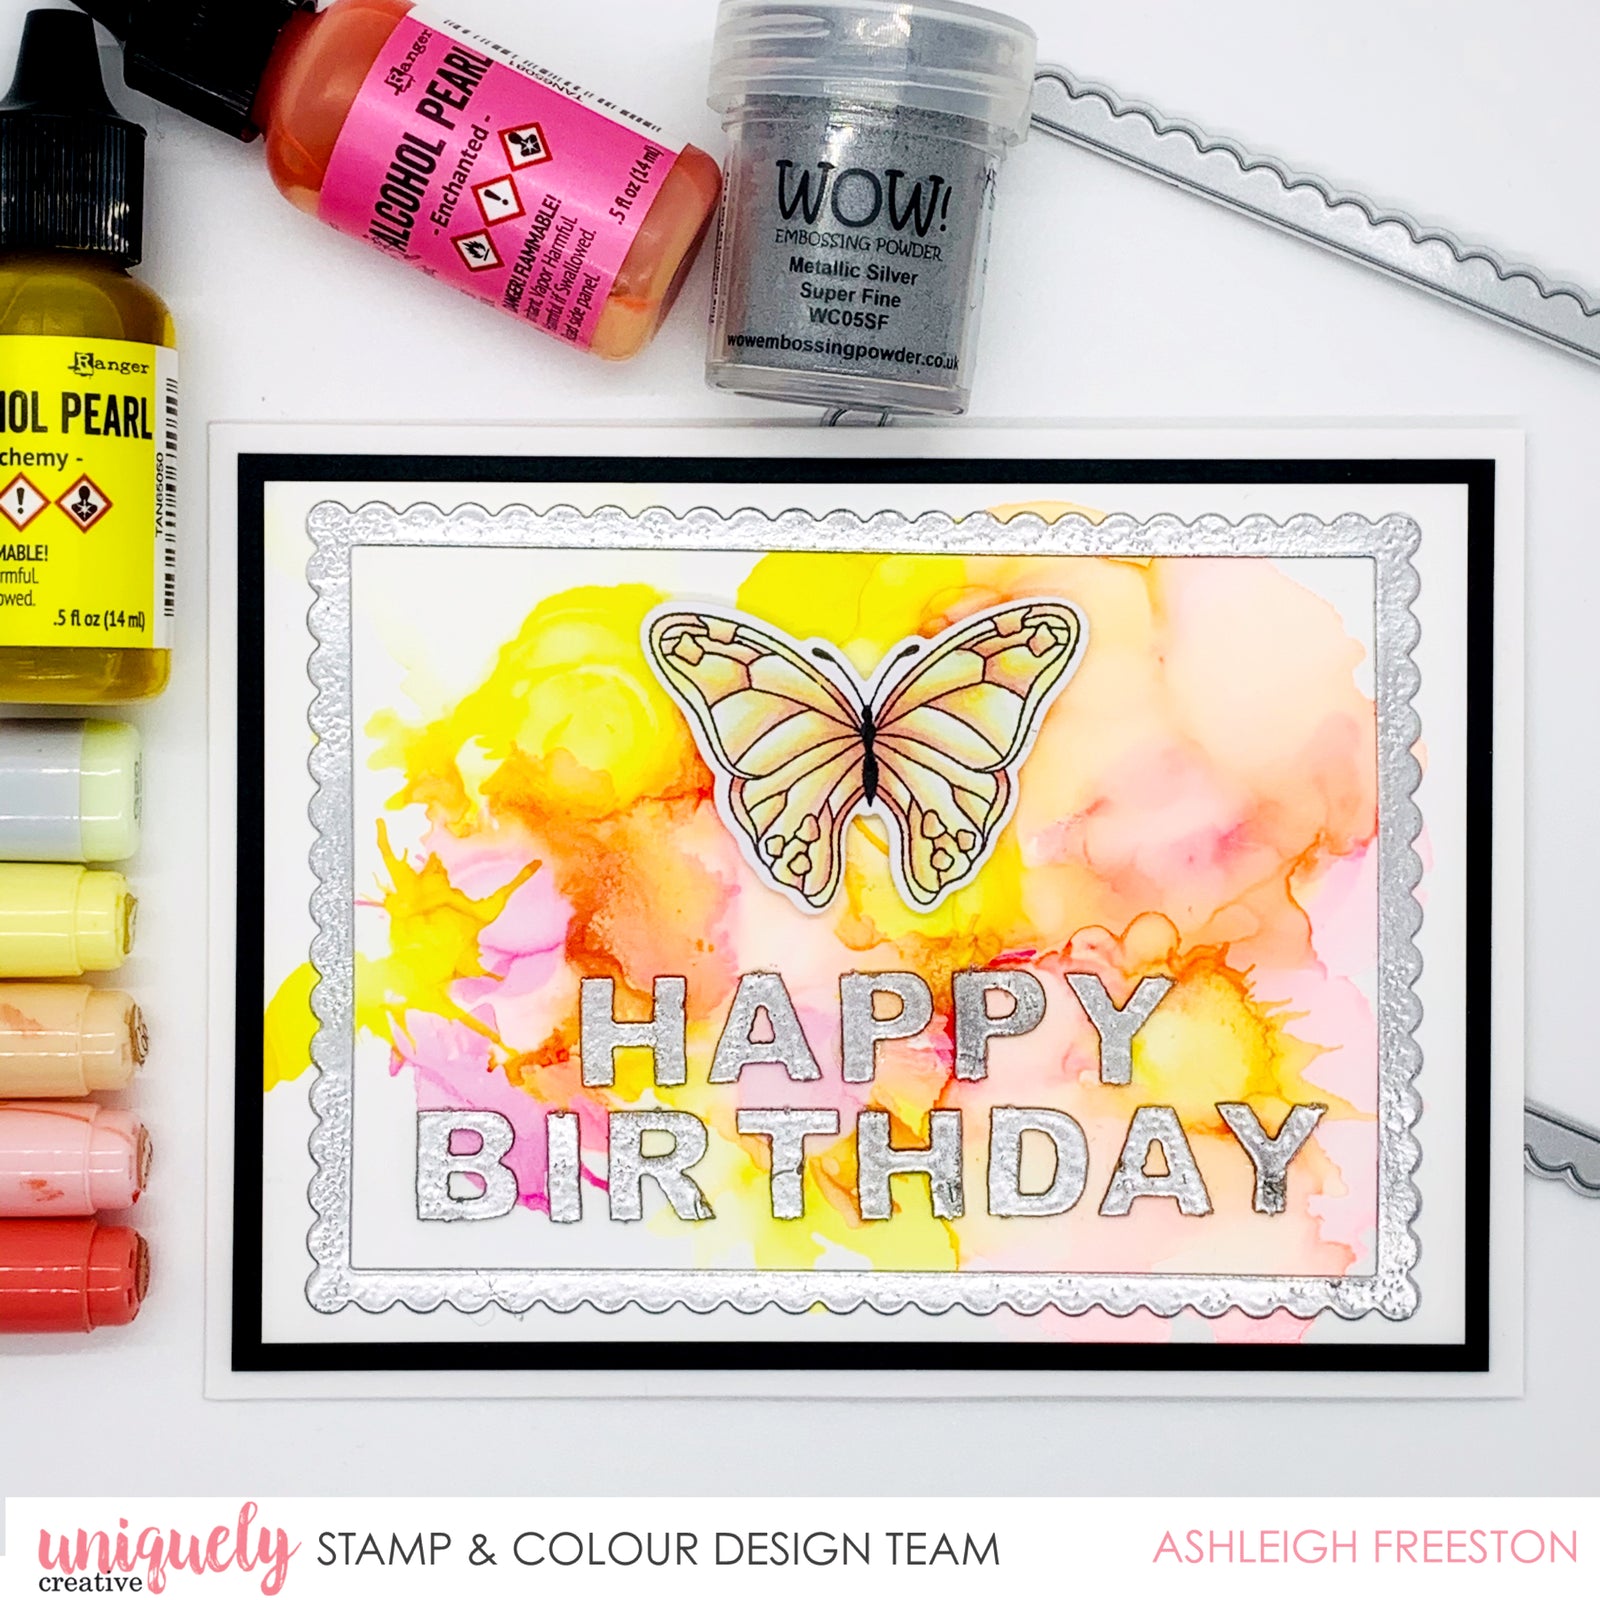
Birthday Butterfly - Ashleigh Freeston

Card Size: 4 1/4" x 5 3/4"
Uniquely Creative Products Used
Butterflies Stamp, Butterflies Die, Butterflies Cut-a-Part Sheet, Butterflies Laser Cut, Frames Die
Other Products Used
Smooth white cardstock, black cardstock, white card base, blending card, Yupo paper, alcohol ink blending solution, Enchanted & Alchemy Alcohol Ink Pearls, silver embossing powder, Versamark embossing ink, adhesives
Colours Used
Copic Markers:
Butterfly – R22, R20, YR00, Y11, G20
Instructions
1. Cut base card down to 5 3/4” high.
2. Cut black cardstock to 4” x 5 ½””. Cut Yupo card to 3 ¾” x 5 ¼”.
3. Squeeze a couple of drops of Enchanted Alcohol Ink onto Yupo and add some blending solution. Use a straw/air blowing tool to move the ink around. Repeat process with Alchemy Alcohol Ink until you are happy with the final result. Leave aside to dry.

4. Die cut largest scallop frame form white cardstock. Push out all letters from laser cut and file down/cut off any excess from the edges.
5. Ink all letters and frame die cut with Veramark embossing ink. Sprinkle silver embossing powder all over and heat set.

6. Stamp your image onto blending card, and colour in with the colouring medium of your choice (I used Copic markers). Die cut with the matching fussy cutting dies.

7. Assemble the card by adhering background piece onto black cardstock. Adhere the frame and happy birthday lettering. Foam mount the butterfly.