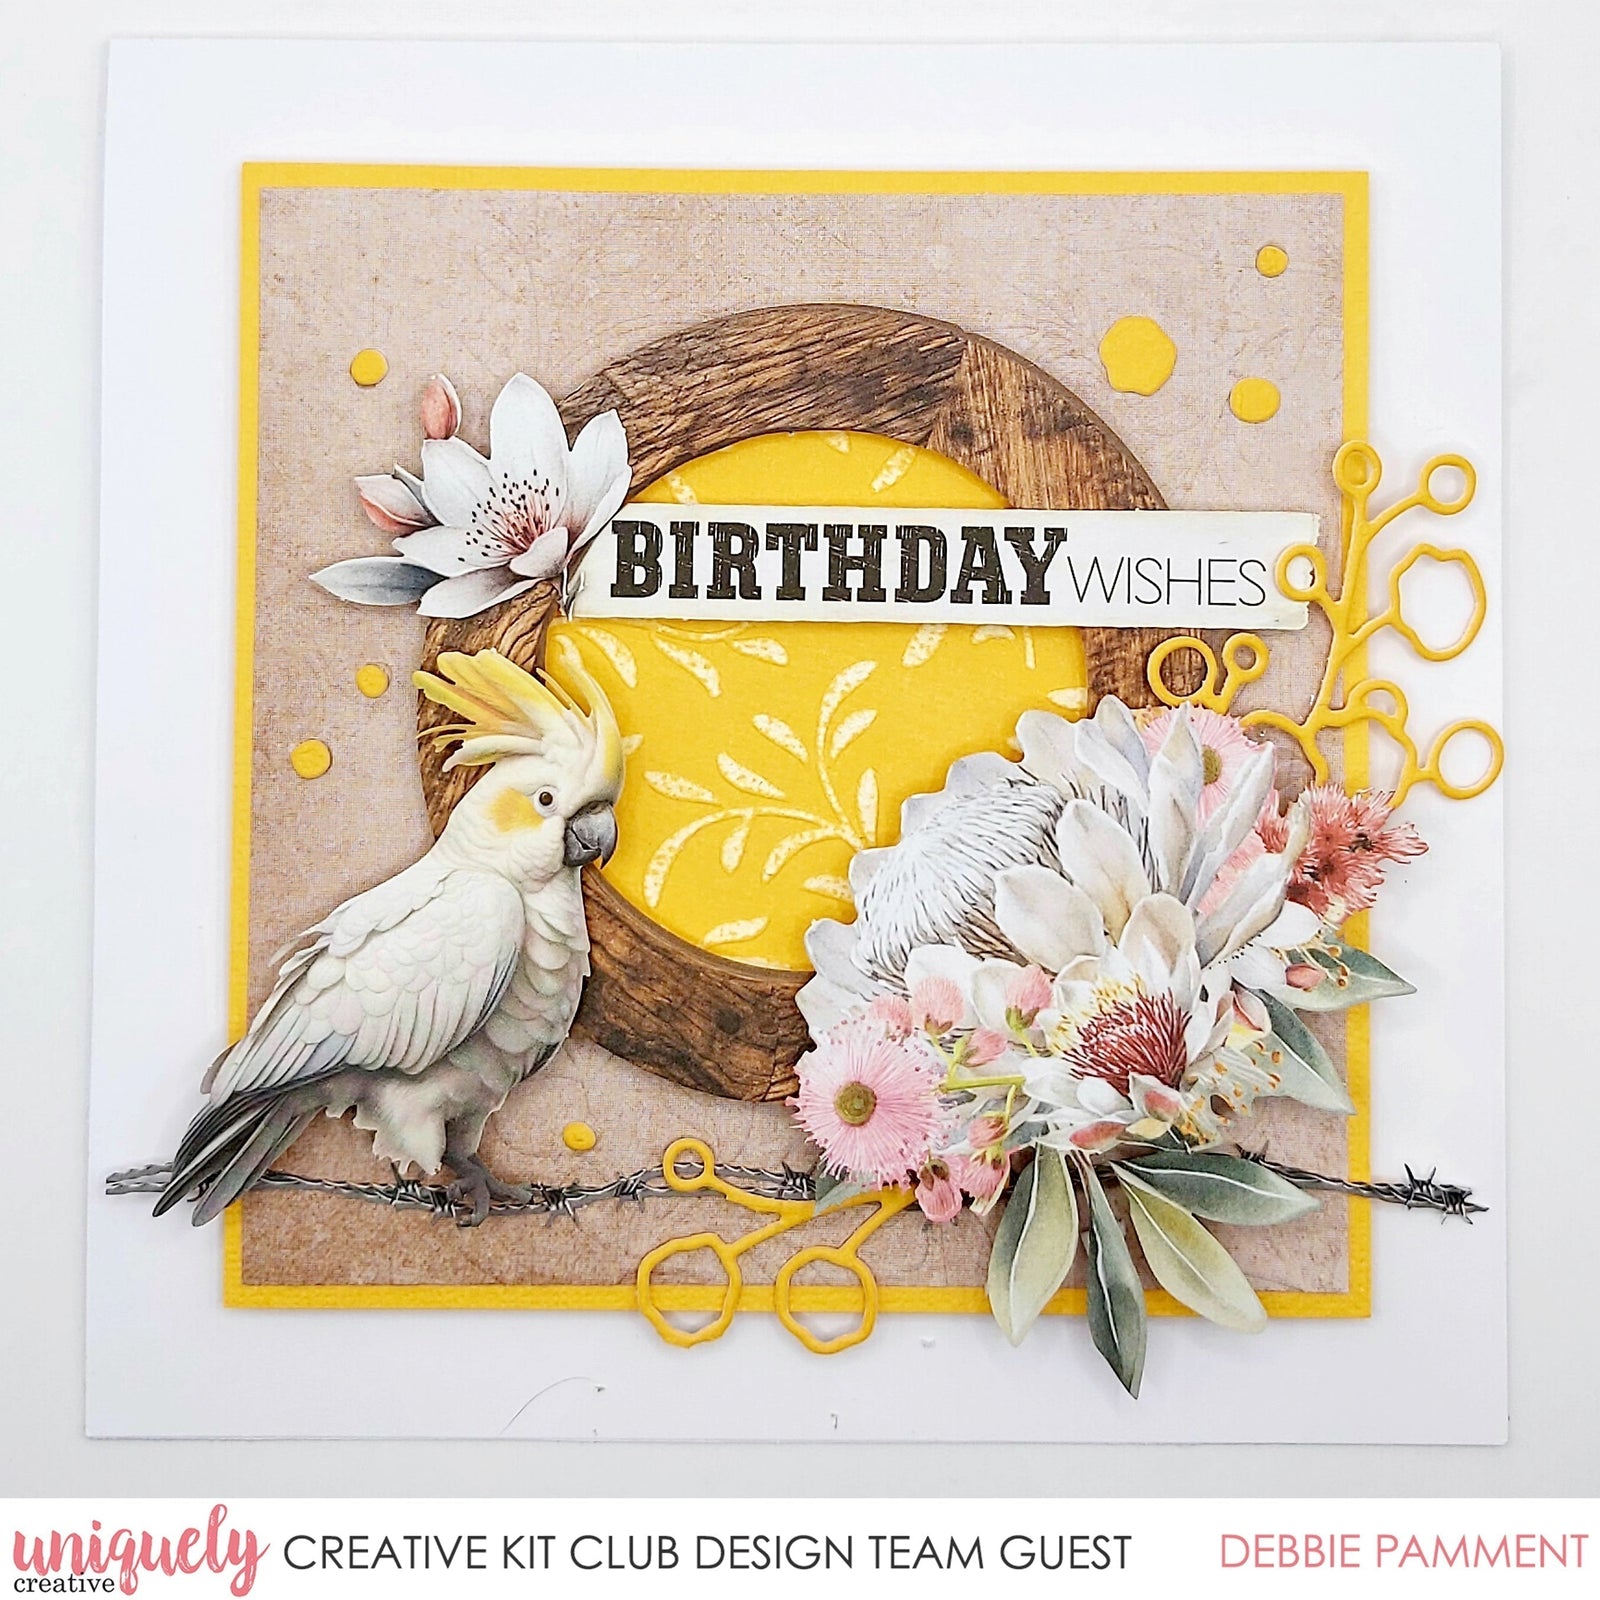
BIRTHDAY WISHES CARD TUTORIAL - DEB PAMMENT

To recreate this great card created by Design Team member Deb Pamment you will need the products listed below:
Uniquely Creative Products Used:
· UCP2916 Echoes of the Outback 12x12 Paper Collection Pack
· UCP2918 Echoes of the Outback Creative Cuts
· UCD2183 Wattle Branch Die
· UCEF2024 Foliage Embossing Folder
· Sunny Days Cardstock
Other Products Used:
· White Cardstock
· Double-Sided Tape
· 3D Foam Tape
· Sanding Block
· Trimmer, Die Cutting Machine
Photo Size: 14cm Square
Step 1:
Cut an 11cm square from the UCP2908 Golden Wattle paper and emboss it using the Foliage embossing folder – See image 1. Mat onto a square of Sunny Days cardstock and attach to the card front using 3D foam.
Step 2:
Cut and emboss an 8cm square of Sunny Days cardstock. Use a sanding block to reveal the white core of the cardstock on the raised sections. Trim to fit behind a circular frame from the UCP2918 Creative Cuts and attach using 3D foam – See image 2. Attach to the centre of the card front
Step 3:
Using elements from the UCP2918 Creative Cuts, glue a barbed wire strand under the frame before attaching a cockatoo and floral spray using 3D foam – See image 3. Attach a sentiment under the frame on the left and over on the right. Add a small flower where the frame meets the sentiment on the left.
Step 4:
Die cut the Wattle Branch die in Sunny Days cardstock, saving some of the flower inners. Cut the stem into 2 pieces – See image 4.
Step 5:
Tuck and glue the larger die cut wattle piece under the top right of the flower spray and the smaller piece under the spray on the bottom left – See image 5.
Step 6:
Glue on the saved wattle flower inners onto the card front to finish off – See image 6