30 day change of mind returns available
30 day change of mind returns available
Add description, images, menus and links to your mega menu
A column with no settings can be used as a spacer
Link to your collections, sales and even external links
Add up to five columns
Add description, images, menus and links to your mega menu
A column with no settings can be used as a spacer
Link to your collections, sales and even external links
Add up to five columns
Birthday Wishes Tutorial - Ngaire Ashdown
July 03, 2023
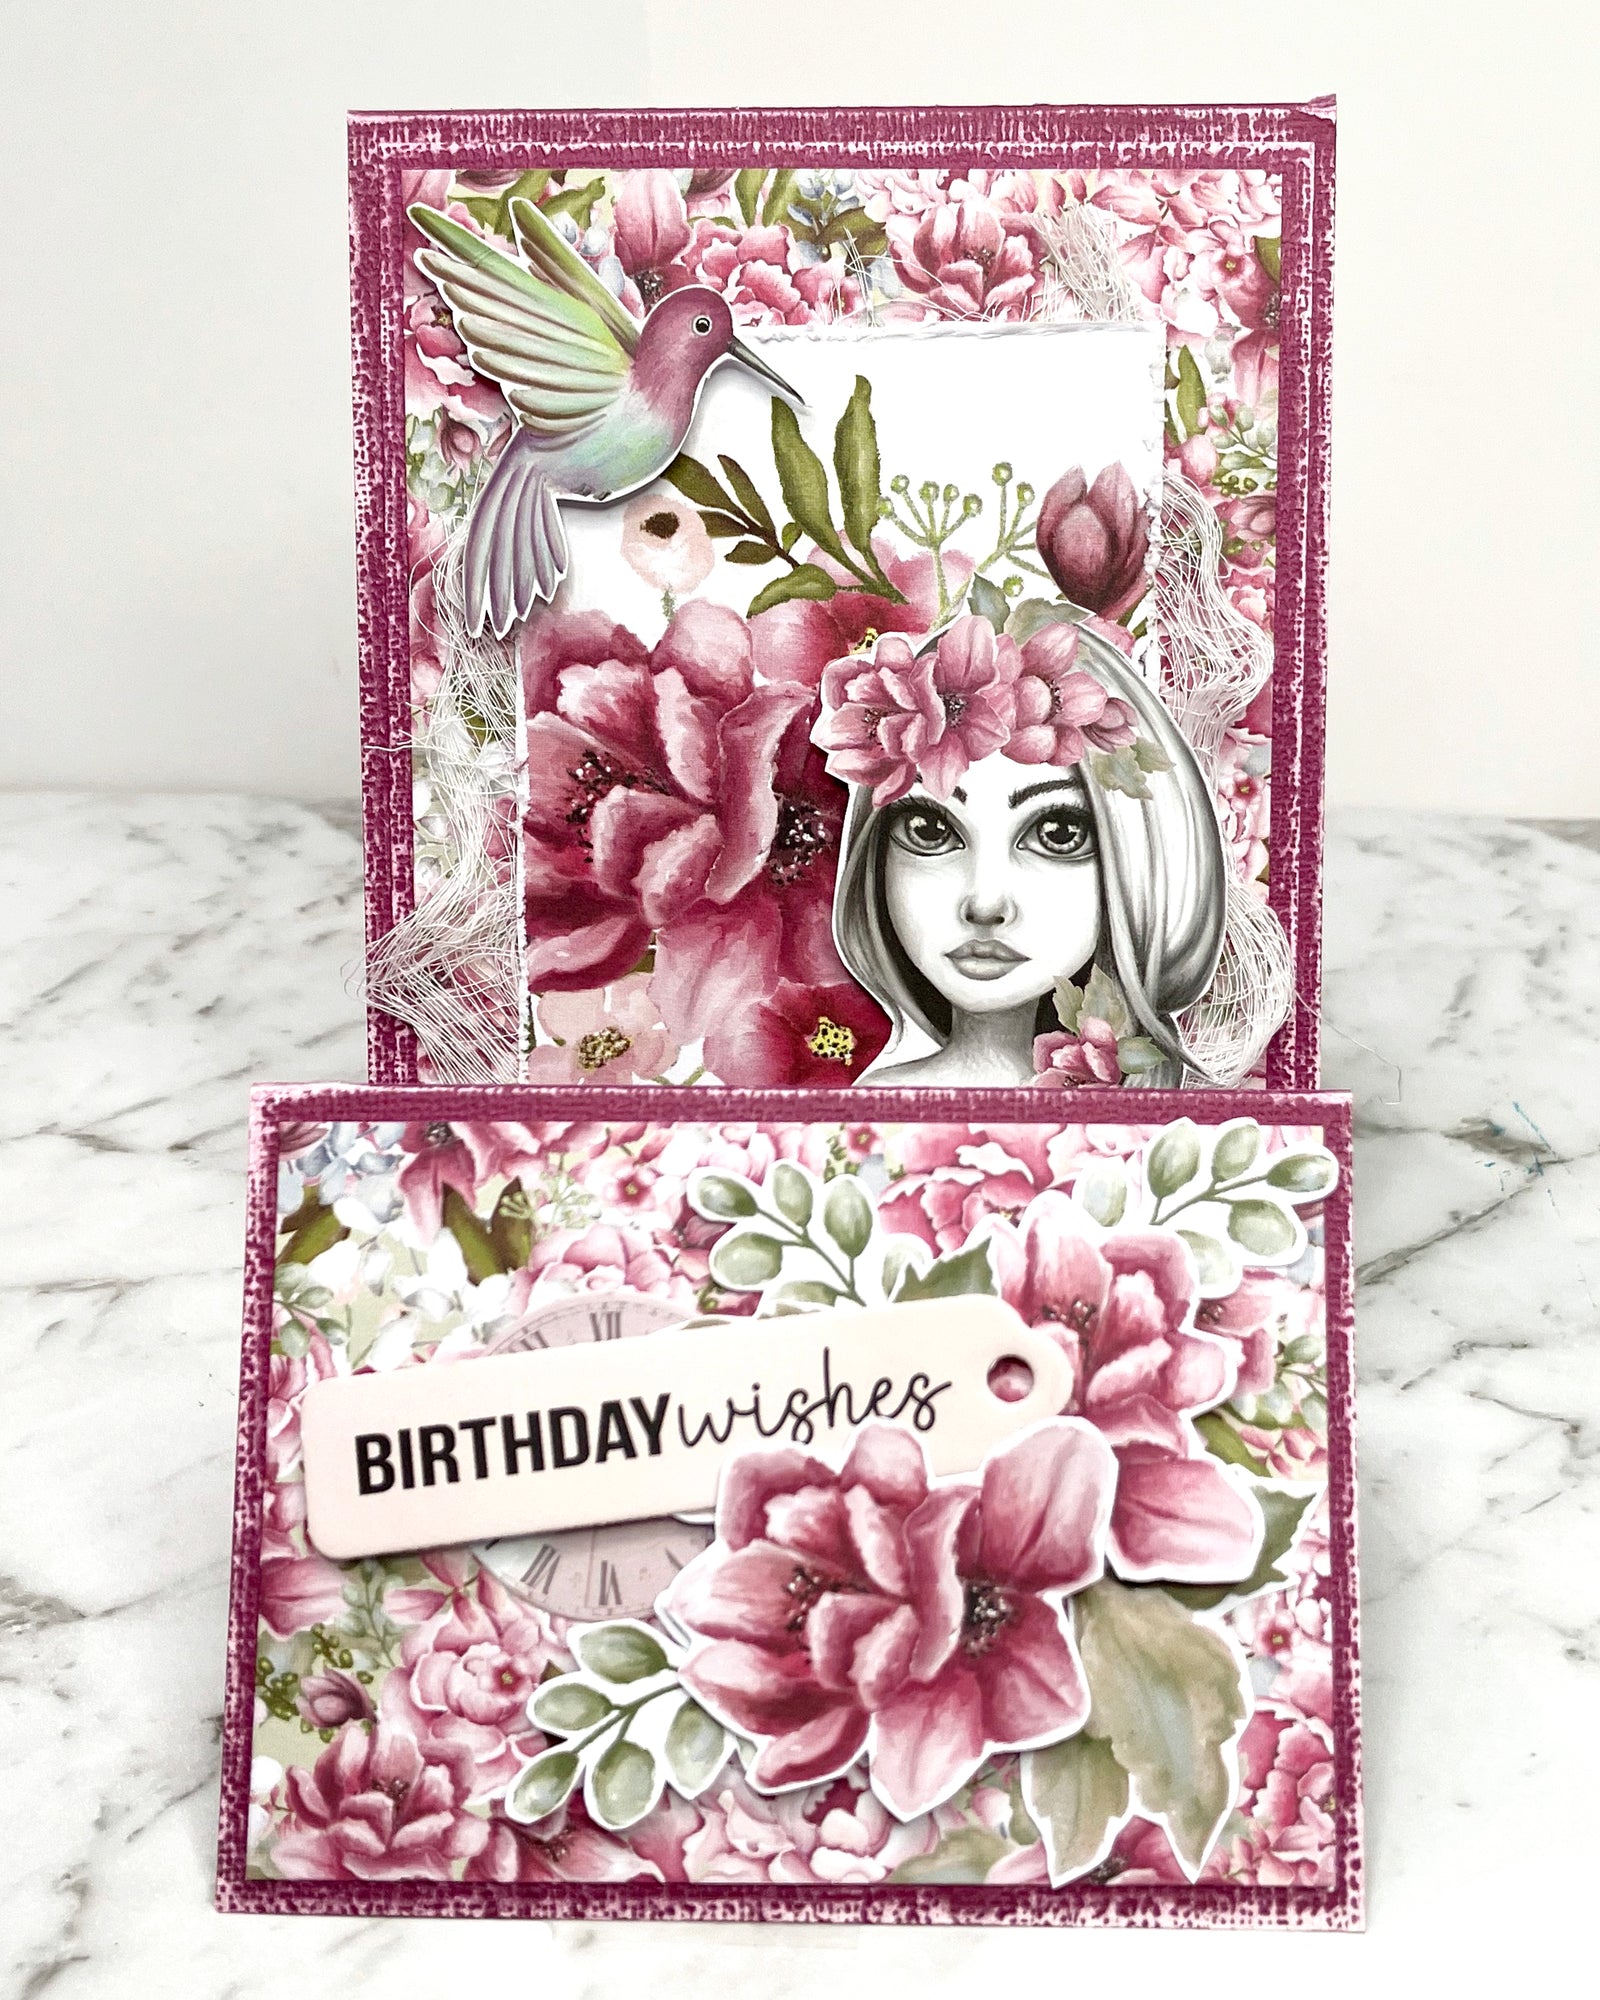

Uniquely Products Used:
- UCCA1737 Peony cardstock
- UCP2572 Beautiful Memories paper
- UCP2567 Wonderful Day paper
- UCP2573 Colour Me Pretty paper
- UCP2576 Creative Cuts
- Muslin cloth
Other products:
- Sharp scissors
- Paper trimmer
- Score tool
- UC Sanding block or distressing tool
- Double-sided adhesive tape or liquid glue
- Foam dots
Instructions:
1. Cut 2 pieces of the Peony cardstock for the card base.12” x 4 1/2” and score at 6”, 11 7/16” x 4 ¼” and score at 5 ¾” and 8 5/8”. Use a bone folder on the folds to burnish them and make them crisp.

2. Gently sand the edges of the 2 pieces of cardstock as shown.

3. Using liquid glue or double-sided tape, adhere the B piece of cardstock to the A piece, leaving a small border on all sides.

4. Cut 2 pieces of the Wonderful Day paper: 4 ½” x 5 ½”, 4” x 2 ¾” and adhere the larger piece to the card base and the smaller piece to the front of the card as shown in photo.

5. Cut the coloured floral panel from the B side of the Colour Me Pretty paper and distress the edges. Cut a small piece of muslin cloth and layer this behind the floral panel. Adhere this panel to the centre of the large, patterned paper.

6. Select a few elements from the Creative Cuts pack and fussy cut flowers and leaves from the Beautiful Memories paper.


7. Using the main photo as a guide, arrange the elements on card using foam tape to raise some of them up for dimension.
8. Cut a piece of the Beautiful Memories B side 3” x 4” and adhere on the inside of the card ready for your personal message. (optional: distress the edges before adhering to card.)
Leave a comment
Newsletter
Join our mailing list and never miss an update …