BOHEMIAN FLORALS LAYOUT TUTORIAL - KIM TOMHOLT
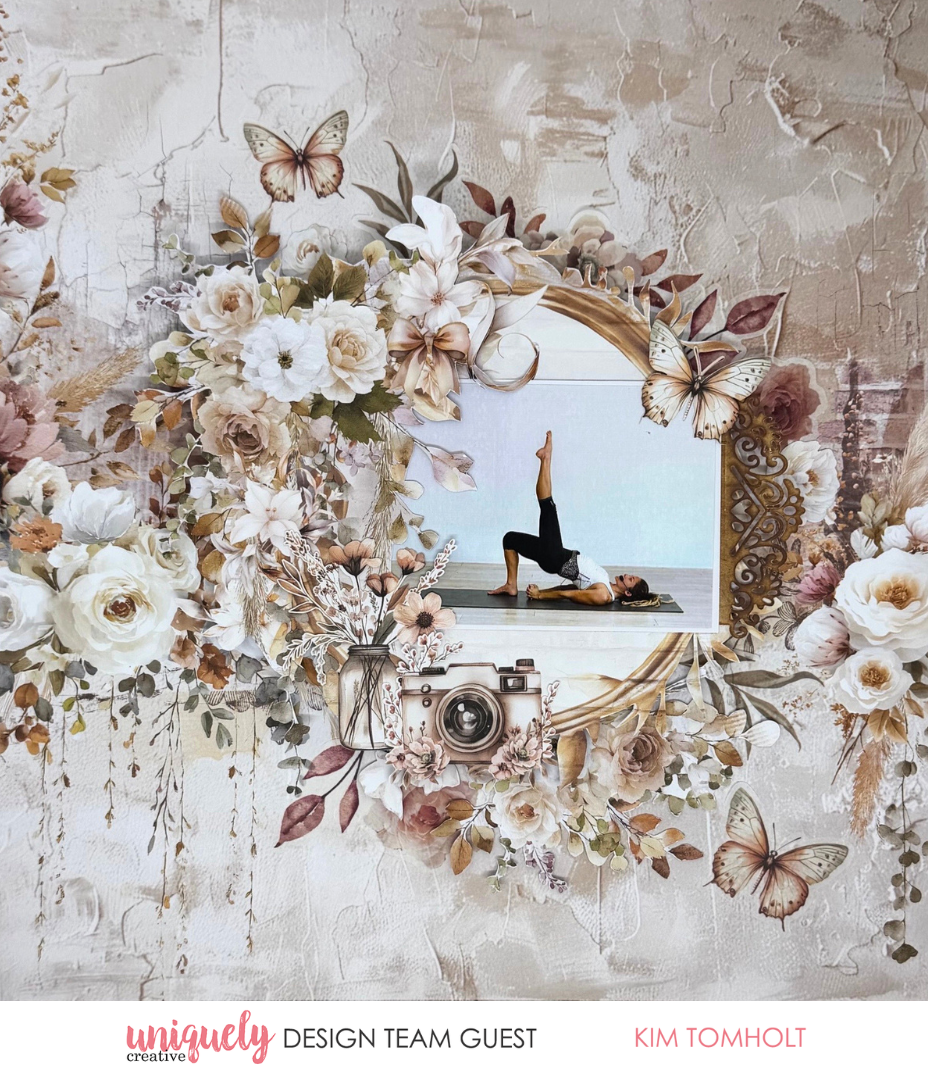

To recreate this beautiful layout created by Design Team member Kim Tomholt you can follow the steps below:
Uniquely Creative Products Used:
· UCP3039 Endless Escape Paper
· UCP3040 Lazy Afternoon Paper
· UCP 3048 Bohemian Escape Creative Cuts
· UCP 3050 Bohemian Escape Vellum Creative Cuts
· UCD2219 Decorative Topper Die
· UCE1803 Foam Mount Squares and Strips
· UCE1872 Fussy Cutting Scissors
· Distress Oxide Ink: Vintage Photo
Other Products Used:
· Sponge/Dauber
Photo size: 3"x4"
Step 1:
Cut off strip of Endless Escape paper (base page).
Step 2:
Fussy cut circle & flowers and the floral cluster from Lazy Afternoon Paper. NB: cut close to the circle starting at the top of the page so you have enough paper left over to cut frame – See image 1
Step 3:
Using sponge/dauber, colour Decorative Topper die cut with Vintage Photo ink and adhere behind 3”x4” photo. You can use a blending brush, but be careful. “Pouncing” up and down with a sponge/dauber is easier than trying to do circles with such an intricate die – See Image 2
Step 4:
Starting at the top of the circle of flowers, fussy cut the inside floral elements
Step 5:
Slide photo & Die cut underneath – See Image 3.
Step 6:
Raise floral circle up with foam mounts (optional) but keep them away from the edges so you can add more embellishments underneath. Gather the following Vellum Creative Cuts and Creative Cuts – See Image 4.
Step 7:
With the extra fussy cut floral cluster left over from the Lazy Afternoon paper, and along with the Creative Cuts above, tuck them under the floral circle – See Image 5.
Step 8:
Congratulations! You are done 😊