Butterfly Birthday Slimline Card + Bonus Layout - Lydell Quin

Uniquely Creative Products Used
UCP2116 Something Blue Collection Pack, UCP2118 Something Blue Creative Cuts, Something Blue Cut-a-Part Sheet, UCE1720 Iridescent Pearls, UC Blending Block
Other Products Used
Tim Holtz Distress Oxide: Faded Jeans, Paintbrush
Instructions
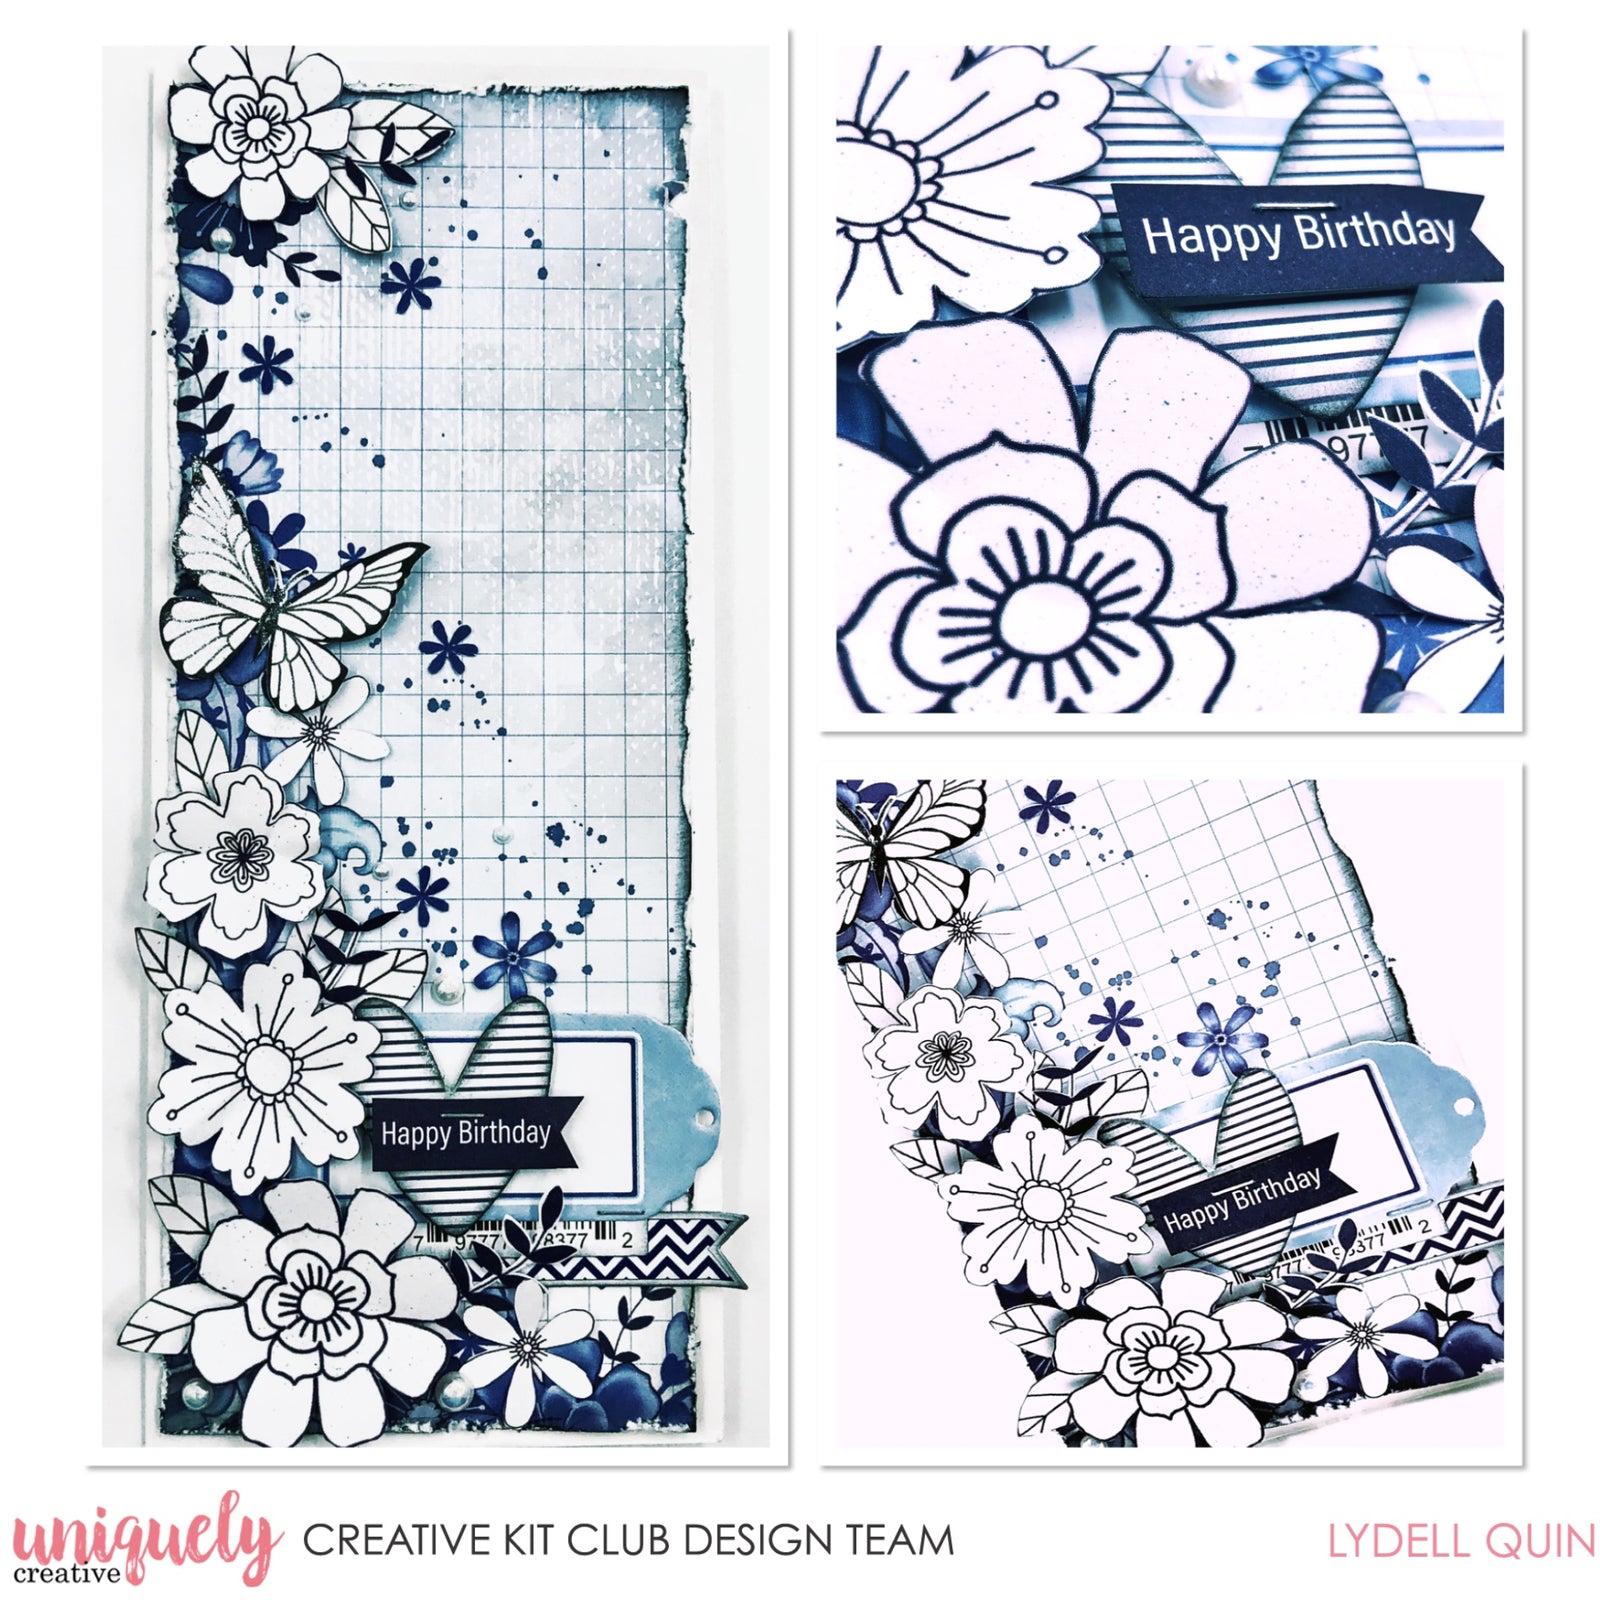
1. Cut a card base measuring 7” x 8.5” out of white cardstock (score @ 3.5" on the 7" side)
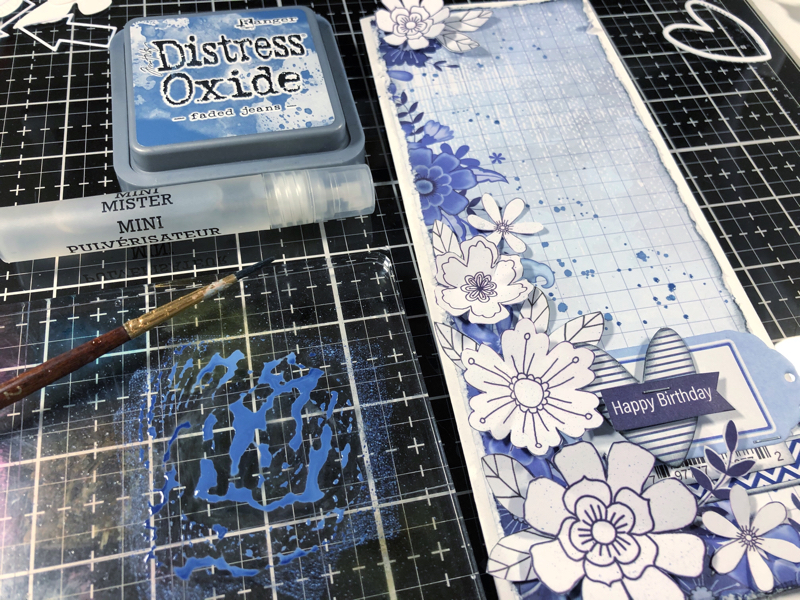
2. Using paper UCP2112, use the floral corner on the left bottom of the printed paper to use as a base on your card. Cut a mat sized 3.25” x 8.25”. Ink and scruff up the edges with a distressing tool
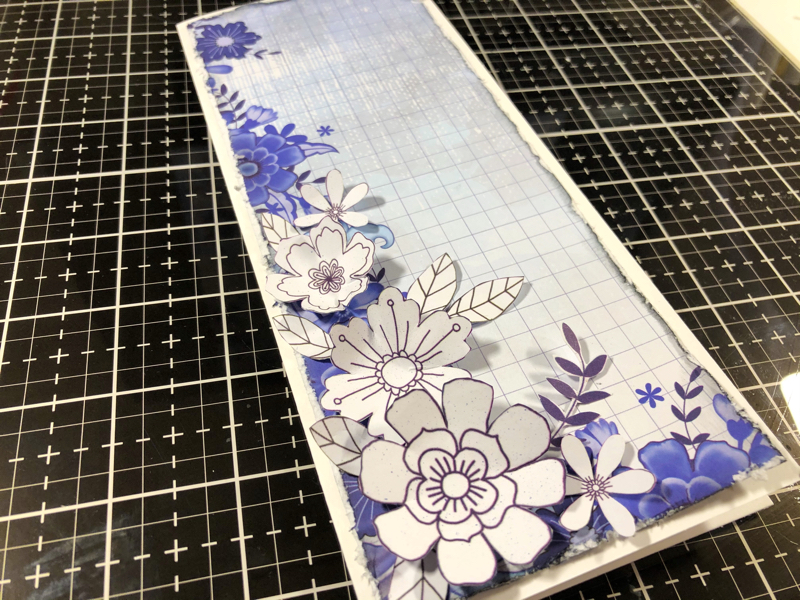
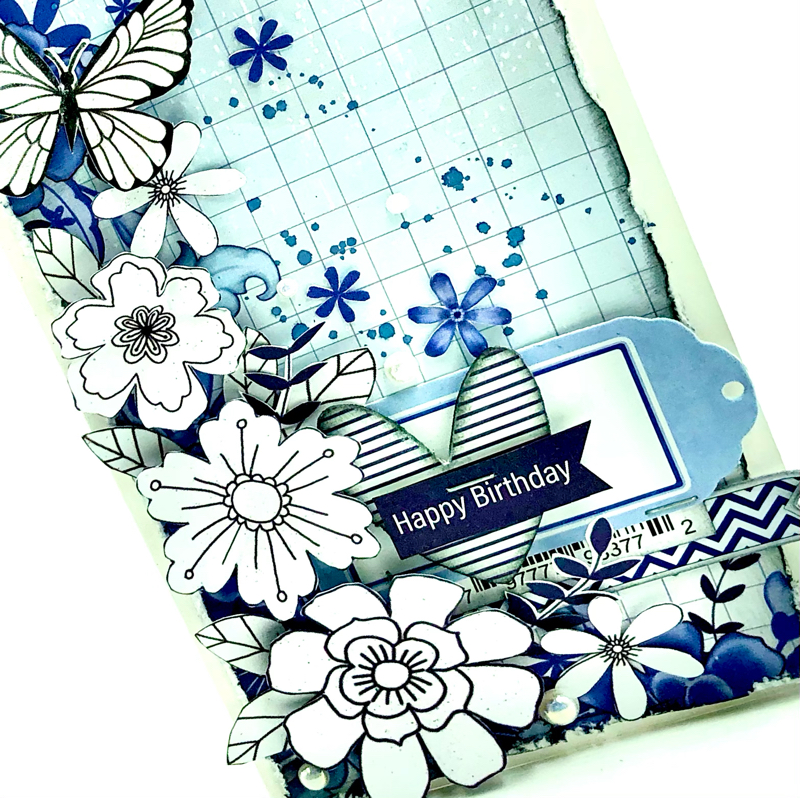
3. Cut out several of the black line flowers, leaves, and a butterfly from UCP2114 and arrange on the front of your card to get placement. Locate tiny blue flowers and fussy cut these also.
4. Add clear glimmer using the Sparkle Brush to the black line butterfly and set aside to dry
5. Tap Oxide Ink onto a Blending Block and add a spritz of water. Pick up with a paintbrush and add splatters to the Background. Remove florals if you don't want them splattered as well!
6. Build a layered element using the pieces in the reference photo. You’ll need a tag and a heart (use mounting tape to raise the heart a little) from the creative cuts pack, a flagged label from the cut-a-part sheet, a barcode, and a birthday strip from paper UCP2114. Ink each piece and glue together lightly. Add staples as desired.

7. Start adding dabs of glue behind the flowers and slip in your layered element.
Add Iridescent Pearls amongst the florals.
BONUS LAYOUT

Uniquely Creative Products Used
UCP2116 Something Blue Collection Pack, UCP2118 Something Blue Creative Cuts, UC1824 Grungy Graph Mini Stamp, Watercolour Cardstock, Something Blue Cut-a-part Sheet, UCE1720 Iridescent Pearls, UCE1720 Clear Sparkle Brush, UCD1954 Delight Die, Cut-a-Part Essentials Dies
Other Products Used
Tim Holtz Distress Oxide: Faded Jeans
The Something Blue Creative Kit lends itself to create very pretty monochromatic layouts with ease.
Sometimes it's nice to create freely, knowing that everything is going to match because you've pre-chosen all elements with similar tones!
I am including below 3 of my best tips for creating your layouts below....have fun creating!

TIP 1-
Fussy cut all your fussy cut pieces from the papers in the Collection and select all the embellishments and motifs from the Cut-a-part sheets and Creative Cuts that match your chosen background paper in the kit. Now you can just build your page freely without concerning yourself with items matching....only whether or not you wish to include it on your page!.....and you don't have to stop and cut out items which can sometimes put a halt to your creative flow!
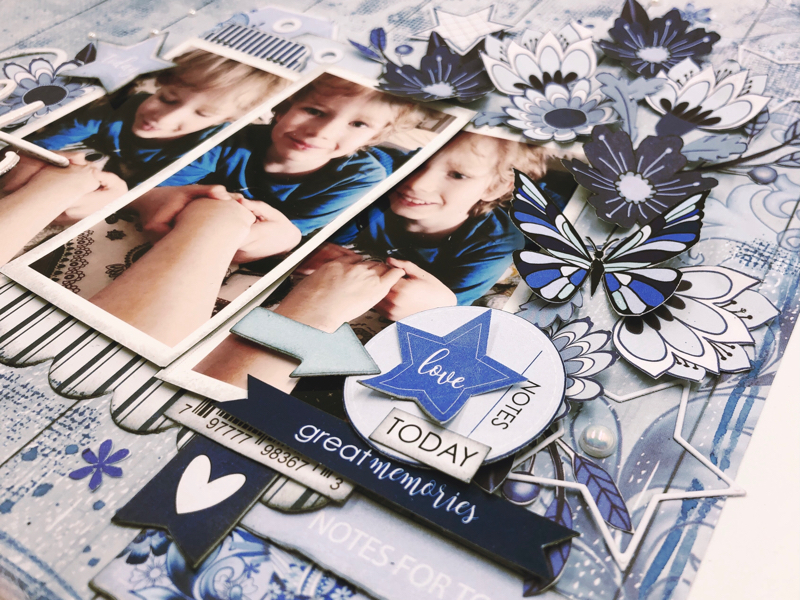
TIP 2-
Work at layering embellishments from cut-a-part sheets, creative cuts and fussy cut elements from the papers. Use foam dots and only place glue in the centres of motifs and twist up edges to create dimension. Offset elements and keep bits and pieces touching or close together to create little groupings of items as focal points of interest on your layout.

TIP 3-
Cut 3-4 die-cut words and glue together to create a thicker more dimensional title. Cover with a layer or two of the clear Sparkle Brush to make it stand out. Adhere certain areas of the die-cut word to items beneath that are already dimensional to make your title really stand out, rather than adhering flat direct to page.
We hope you have enjoyed the Something Blue collection this month!