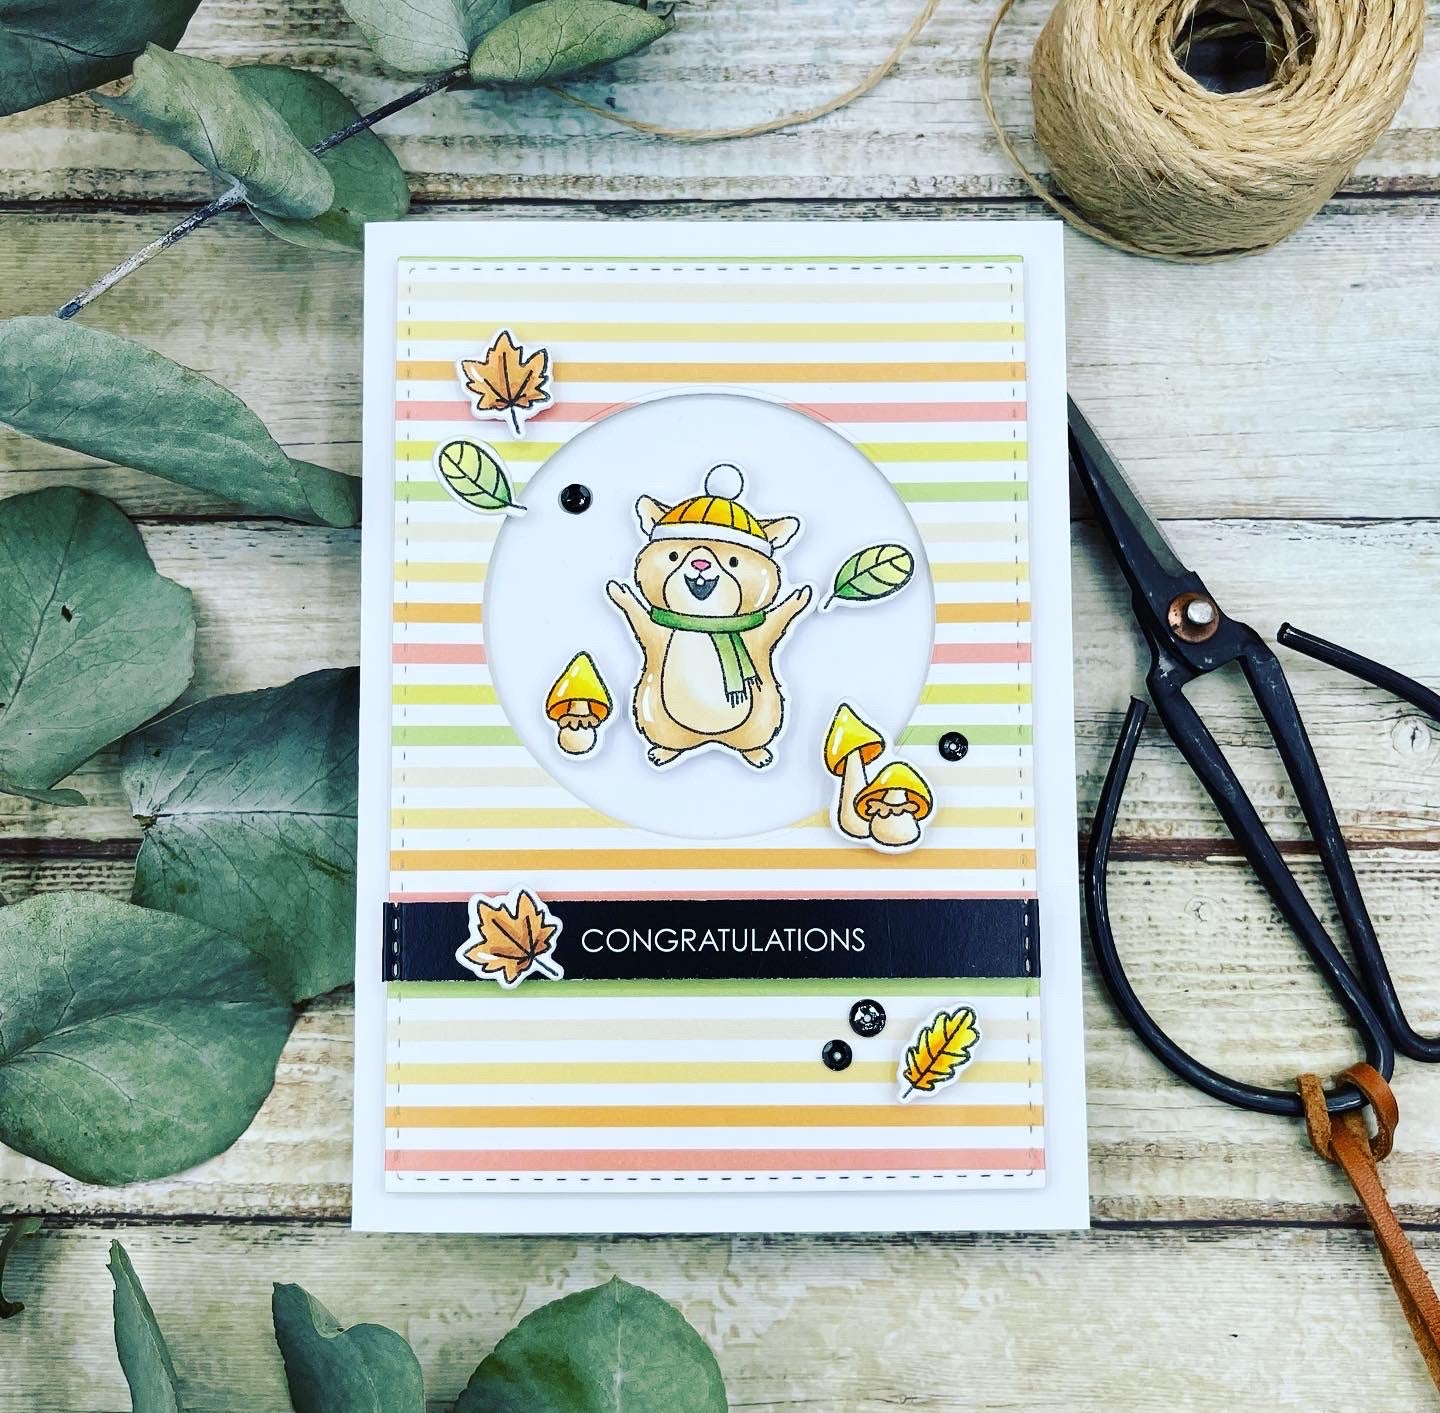
Congratulations Tutorial - Rachel Finn

Uniquely Creative Products Used:
- UC1861 Autumn Stamp Set
- UCD2045 Autumn Die
- UCD2003 Stitched Nesting Circle Die
- UCD1947 Stitched Nesting Rectangle Die
- Autumn Mini Kit Pattern Papers
- Cut-A-Part Sheet
Other Products Used:
- Foam Squares
- White Card Base
- Glue
- Double Sided Tape
- White Ball Pen
- Black Sequins
-
Copic Sketch colours used: Animal fur – E50, E51, E53, E31, Nose – RV14, Mouth – N5, Hat – Y02, Y15, YR68, Y17, Hat Pom Pom and trim – N0, N1, N2, Scarf – YG21, YG61, G07, Mushrooms - E50, E51, E53, E31, E34, Y02, Y15, YR68, Y17, Green Leaves – G07, YG61, YG21, Orange leaf - Y02, Y15, YR68, Y17, Brown Leaves -E55, E17, E97
Instructions:
1. Fold a piece of white card in half for your card base.
2. Select the striped paper and sentiment of choice from the kit. Use the Stitched Nesting Rectangle Die and the Nesting Circle Die to cut out the striped paper. Cut your sentiment from the sentiment page and place the Nesting Rectangle Die over it to create an edge on the sentiment piece.

3. Placing foam mounts on the back of the striped paper and sentiment, attach to the card base.

4. Select the animal of choice, leaves and mushroom and stamp on white card ready to colour in. A handy tip is to stamp out the character a couple of times just in case you’re not happy with its colours.

5. Once you have finished colouring now use the Die Cuts and cut your animal, leaves, and mushroom out.

6. Place foam squares on the back of the items that you have coloured in, leaving one green and brown leaf without. Turn them over and stick them down. The two you left out will have glue on the back which make them flat.
7. Use a white ball pen to add highlights to the leaves, mushroom, and little animal. The mushrooms are a good example of this.
8. Finish off by scattering some black sequins on the card.
