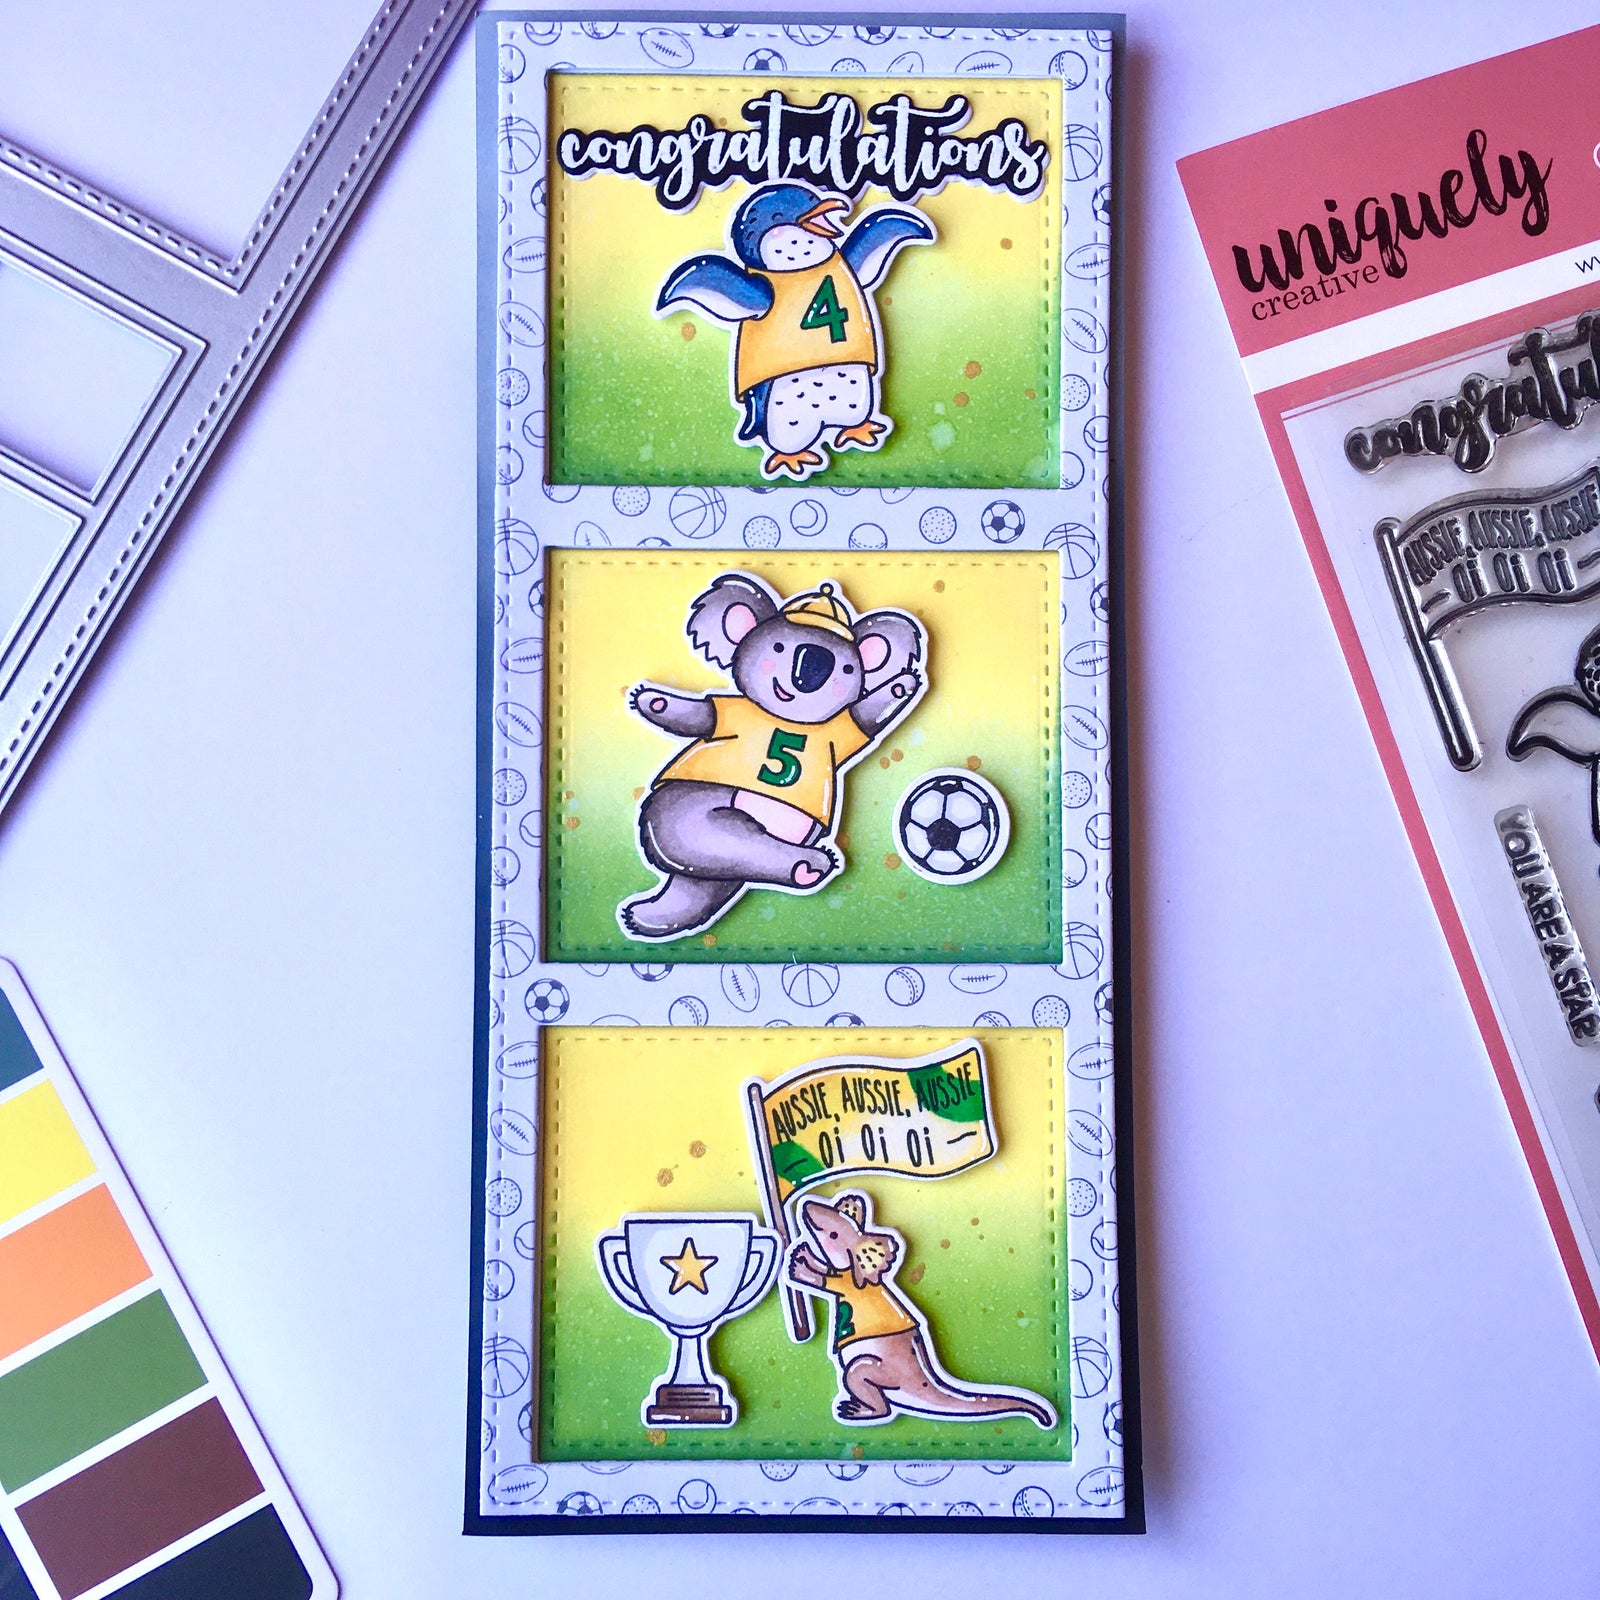
Congratulations Tutorial - Vita Thai

Uniquely Creative Products Used:
- Patterned Papers - White Sports Balls
- UC1884 Aussie Winners Stamp
- UCD2086 Aussie Winners Die Set
- UCD1964 Slim 3 Window Die
Other Products Used:
- Memento Tuxedo Black
- Sakura white Gelly Roll pen
- Distress Oxide Mowed Lawn, Squeezed Lemonade, Hickory Smoke, Black Soot
- Blending brush
- Tonic Studio glass mat
- Gansai Tambi Starry watercolour
- White cardstock
- White embossing powder
- Heat gun
- Trimmer
- Tape runner
- Liquid adhesive
- Foam tape adhesive
- Copic Markers: Chameleon markers WG7, WG3, NU2, NU00, NU3, NG4, CG9, CG8, BL6, BL3, BR1, BR5, GR3, YO3, YO2, OR4, CB
Instructions:
1. Create a card base by cutting a white cardstock to 7 ½” x 8 ½” then folding it in half to create a slimline 3 ¾” x 8 ½” card base. Use the leftover white cardstock to cut a Slim 3 Window using UCD1964 Slim 3 Window die. Cut another 2 inner stitched window from another piece of white cardstock and a frame from white sports balls pattern paper from the Aussie Sports mini kit.

2. Blend green and yellow colours on to the 3 pieces of stitched inner windows, using the Distress Oxide Mowed Lawn and Squeezed Lemonade, about halfway each colour.

3. Add some gold splatter on the inner windows using Gansai Tambi Starry watercolour. I chose Blue Gold.

4. Stamp, cut and colour images from Aussie Winners. Stamp, emboss, and cut the sentiment. I have mounted the sentiment on another cut out from white cardstock for shadow effect.

5. Cut a base panel of 3 ¾” x 8 ½” from white cardstock. Blend the edges with Distress Oxide Hickory Smoke and Black Soot, halfway each colour. You can also cut a panel from grey cardstock instead and skip blending.

6. Adhere the white frame and all 3 inner windows onto the base panel. Adhere the sentiment and images onto the inner windows using foam adhesive for dimensions.

7. Adhere the pattern paper frame on top of the white frame using foam tape adhesive for added dimension. Lastly, adhere the panel onto the card base.
