Our Warehouse is Now Closed for Christmas - All Orders will Ship from 7th January 2026
Our Warehouse is Now Closed for Christmas - All Orders will Ship from 7th January 2026
Add description, images, menus and links to your mega menu
A column with no settings can be used as a spacer
Link to your collections, sales and even external links
Add up to five columns
Add description, images, menus and links to your mega menu
A column with no settings can be used as a spacer
Link to your collections, sales and even external links
Add up to five columns
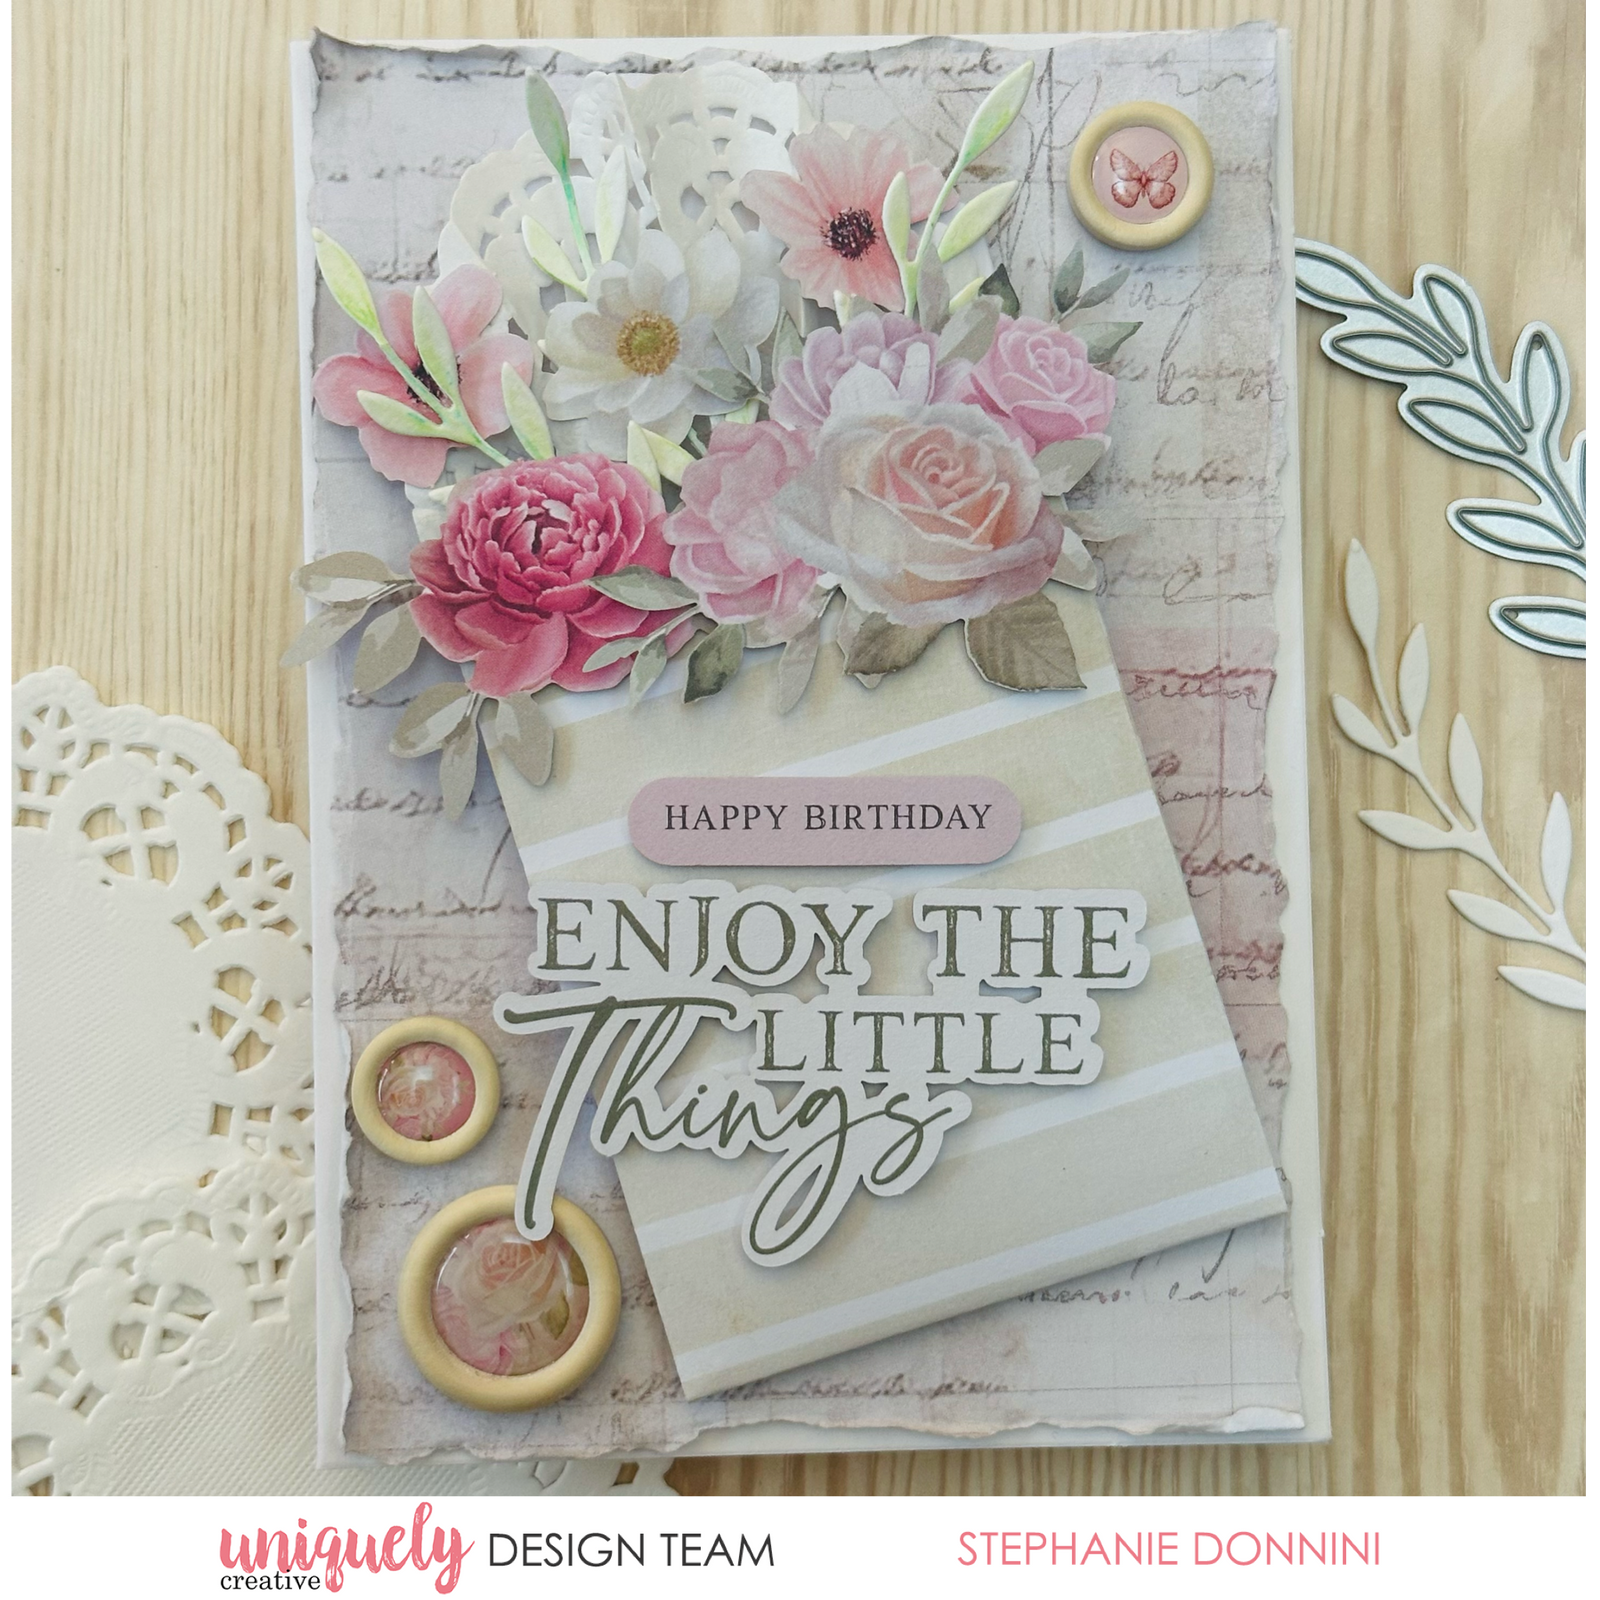
ENJOY THE LITTLE THINGS CARD TUTORIAL - STEPHANIE DONNINI
June 04, 2025

To recreate this beautiful card created by Design Team member Stephanie Donnini you can follow the steps below:
Uniquely Creative Products Used:
· UCP2922 Documenting paper
· UCP2926 The Story-Folio Bits paper
· UCE2100 Dear Diary Wooden buttons
· UCE1807 Paper Doilies
· UCP2929 Dear Diary Creative Cuts
· UCD2197 Leafy Stem Die
· UCD2195 Folio Pocket Die
· Uniqolour Woodless Watercolour Pencils
· Uniqolour Waterbrush
· UCE1811 Rectangle Cards & Envelopes
· UCE1803 Foam Mounts Squares & Strips
Other Products Used:
· Die Cutting Machine
Card size is 10.5cm x 14cm
Step 1:
Die cut a folio pocket out of The Story-Folio Bits paper
Step 2:
Fold a doily accordion style and place a small amount of glue to the bottom point to keep its shape. Assemble the pocket folio and glue the doily into the opening. 
Step 3:
Die cut some leafy stems from white cardstock. Add shades of green watercolour pencils and blend with a water brush.
Step 4:
Use foam mounts and glue to adhere flowers to the folio pocket. Insert leafy stems to create a lush bouquet.
Step 5:
Tear a rectangle from the Documented paper and foam mount it to the card base.
Step 6:
Adhere the folio pocket to the front of the card. Finish the card with some wooden buttons and sentiments from the Creative Cuts pack.
Leave a comment
Newsletter
Join our mailing list and never miss an update …
