Enjoy Tutorial - Kary Lim

Uniquely Creative Products Used:
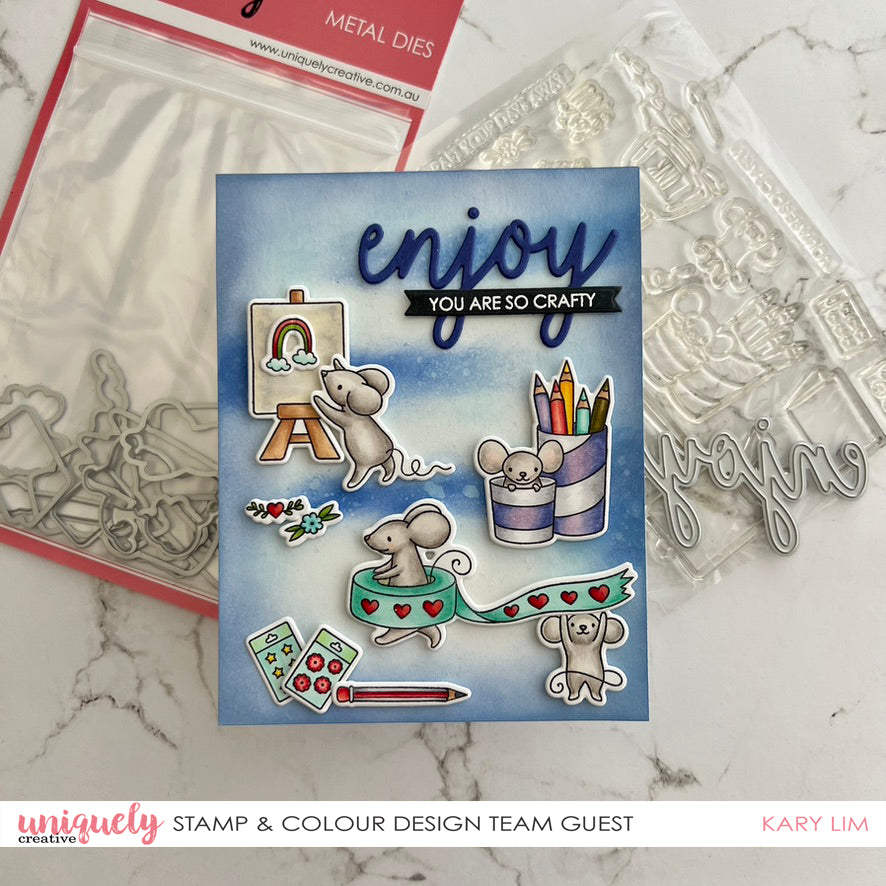
UC1856 Arty Stamp Set, UCD2031 Arty Die, Arty Cut-A-Part Sheet, UC1857 Crafty Stamp Set, UCD2032 Craft Die Set
Other Products Used:
Distress Inks : Blueprint Sketch, Tumbled Glass, Stormy Sky, Sparkle Shimmer Spritz, Memento Tuxedo Black, Versamark, White Embossing powder, Foam Adhesive, Glue
Copic Colours:
Rainbow – R24, R22, YG17, YG03, BG11, BG10
Canvas & Easel – E33, E31, E30, W00, YR30
Mice – W3, W1, W00, R000
Colour Pencils & Holder – BV04, BV02, BV000, N3, N1, N0, YG97, YG95, YG91, BG32, BG11, BG10, Y17, Y15, Y13, R35, R32, R30
Ribbon – BG32, BG11, BG10, R32, R32
Pencil – R35, R32, R30, N3, N1, N0
Heart & Flower – YG17, YG03, BG11, BG10, R35, R32
Stars & Floral embellishments – YG11, BG10, Y15, Y11, R35, R32
Instructions:
1. Stamp the images on white cardstock with memento tuxedo black and colour the images with copic markers.
2. Cut your images out with the coordinating dies.

3. On the white cardstock measuring 4.25” x 5.5”, apply the Distress Ink Blueprint Sketch with a small ink blending brush.

4. Add Distress Oxide Tumbled Glass to the cardstock, a little over to blend with Blueprint Sketch and around the cardstock.

5. Spritz some water onto the cardstock and leave it to dry. Alternatively, you can also use a heat gun to dry the cardstock. When dry, add some sparkle shimmer spritz to the cardstock for some sparkle.

6. To finish off the background, add Distress Ink Stormy Sky around the edges of the cardstock to give it some definition.

7. Add foam adhesive to the stamped images and assemble and adhere them to the inked cardstock as shown.
8. Die cut the sentiment “Enjoy” on blue cardstock 3 times and adhere the layers together. Place the sentiment on the top right corner as shown.
9. Stamp the sentiment “You are so crafty” with versamark ink on black cardstock and heat emboss using white embossing powder. Die-cut the sentiment. Adhere the sentiment just underneath the word “Enjoy” with foam adhesive.
