EXPLORE LAYOUT TUTORIAL - LISA AMIET
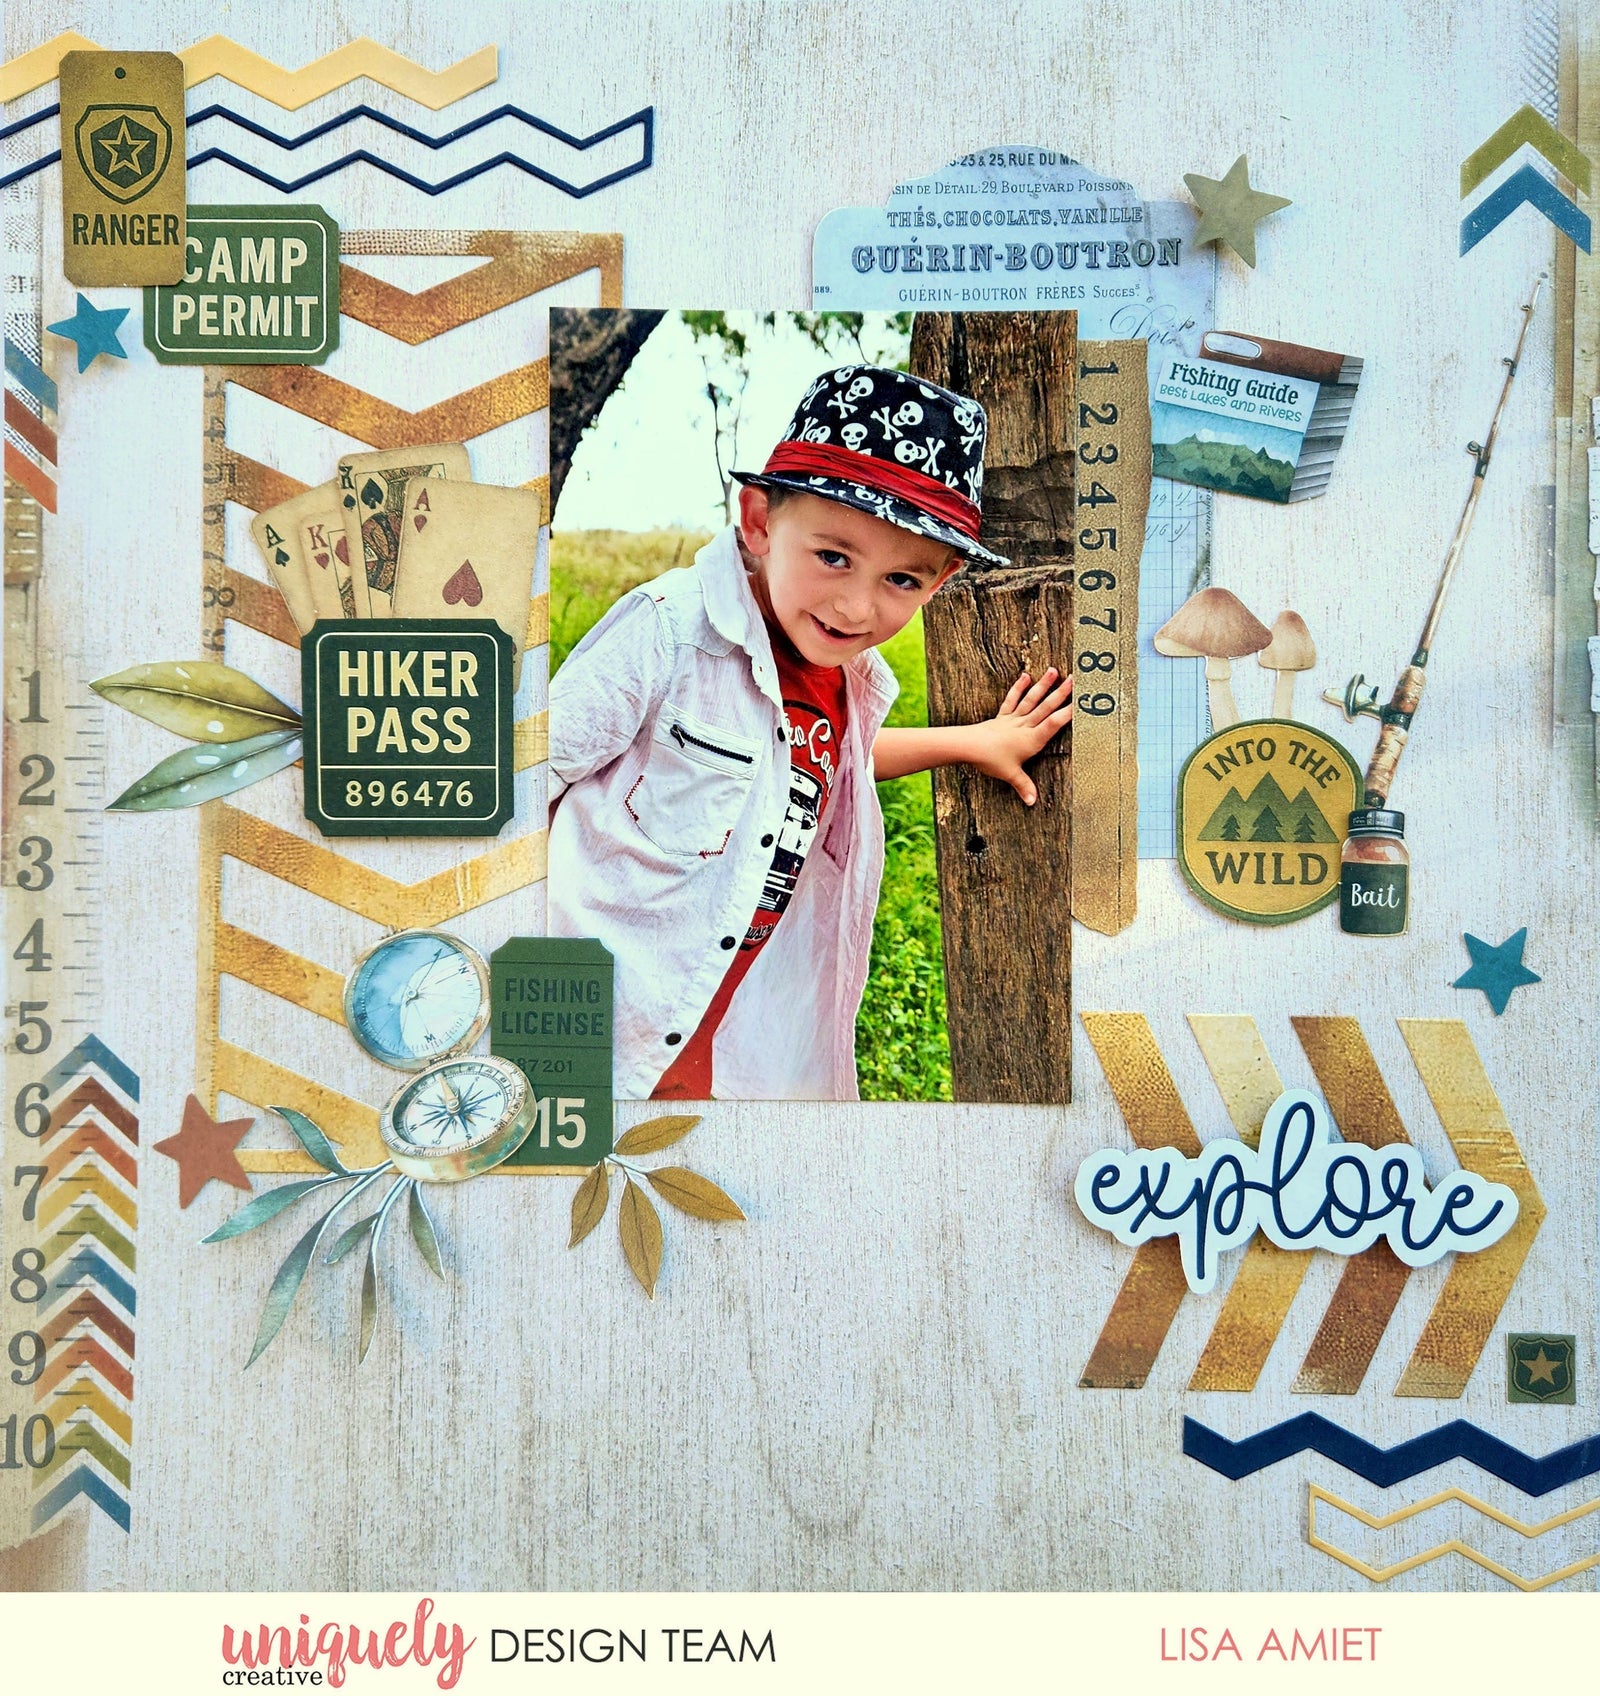

To recreate this fantastic layout created by Design Team member Lisa Amiet you can follow the steps below:
Uniquely Creative Products Used:
· UCP2956 Longitudes Paper
· UCP2959 Nature’s Path Paper
· UCP2961 Wild Terrain Paper
· UCP2962 Coordinates Paper
· UCP2965 Creative Cuts
· UCE2126 Camping Tickets & Titles Ephemera
· UCD2201 Chevron Border Dies
· UCD2202 Slimline Chevron Strip Dies
· Cut-a-part Sheet
· Fussy Cutting Scissors
Other Products Used:
· Die Cutting Machine
· Glue, Double Sided Tape, Foam Mounts
Photo Size: 4” x 6”
Step 1:
Use Longitudes paper as your base page. Remove cut-off strip. Use the Chevron Border die to. Die-cut from Nature’s Path paper. Adhere to the left side of your base paper. Adhere four of the chevron pieces to the bottom right corner of page. Fussy cut tag from Wild Terrain paper and adhere to right side of chevron border piece – See image 1.
Step 2:
Use Slimline Chevron Strip dies to die-cut chevron pieces from the Cut-a-part Sheet. Cut a 7.5cm piece of solid navy chevron and a 5.5cm piece of yellow chevron outline die-cut, and adhere to bottom right corner, under other chevron pieces. Cut a 12.5cm piece of navy outline die-cut and a 7.5cm piece of yellow outline chevron strip and adhere to top left corner of page.
Step 3:
Adhere your photo to the centre of page, overlapping chevron border and tag. Fussy cut number strip from Wild Terrain paper and adhere to tag, tucking under the right side of your photo slightly. Adhere fishing guide Creative Cut. Adhere Creative Cut star to tag, using Foam Mounts. Adhere fishing pole and bait Creative Cut, and ticket, from the Camping Tickets & Titles Ephemera to the right side of your photo, layering them. Fussy cut mushrooms from Wild Terrain paper and adhere above ticket – See image 2.
Step 4:
Adhere tickets from Camping Tickets & Titles Ephemera to the top left corner of page, overlapping previous pieces. Adhere star Creative Cut, using Foam Mounts, under tickets.
Step 5:
Adhere hiker ticket Ephemera, with Foam Mounts, and playing cards Creative Cuts to left side of page in centre of Chevron Border die-cut. Fussy cut leaves from Wild Terrain and Cut-a-part Sheet and adhere to left side of ticket - See image 3.
Step 6:
Adhere ticket Ephemera and compass Creative Cut to bottom left corner of photo. Fussy cut foliage from Cut-a-part Sheet and adhere to bottom, tucking under previous pieces slightly. Adhere star Creative Cut to left side of cluster – See image 4.
Step 7:
Fussy cut title from the Cut-a-part Sheet and star square from Wild Terrain. Adhere title to chevron pieces, using Foam Mounts and square next to last chevron piece. Adhere star Creative Cut above these pieces to finish – See image 5.