FAMILY LAYOUT TUTORIAL - KIM ARNOLD

To recreate this beautiful layout created by Design Team member Kim Arnold you can follow the steps below:
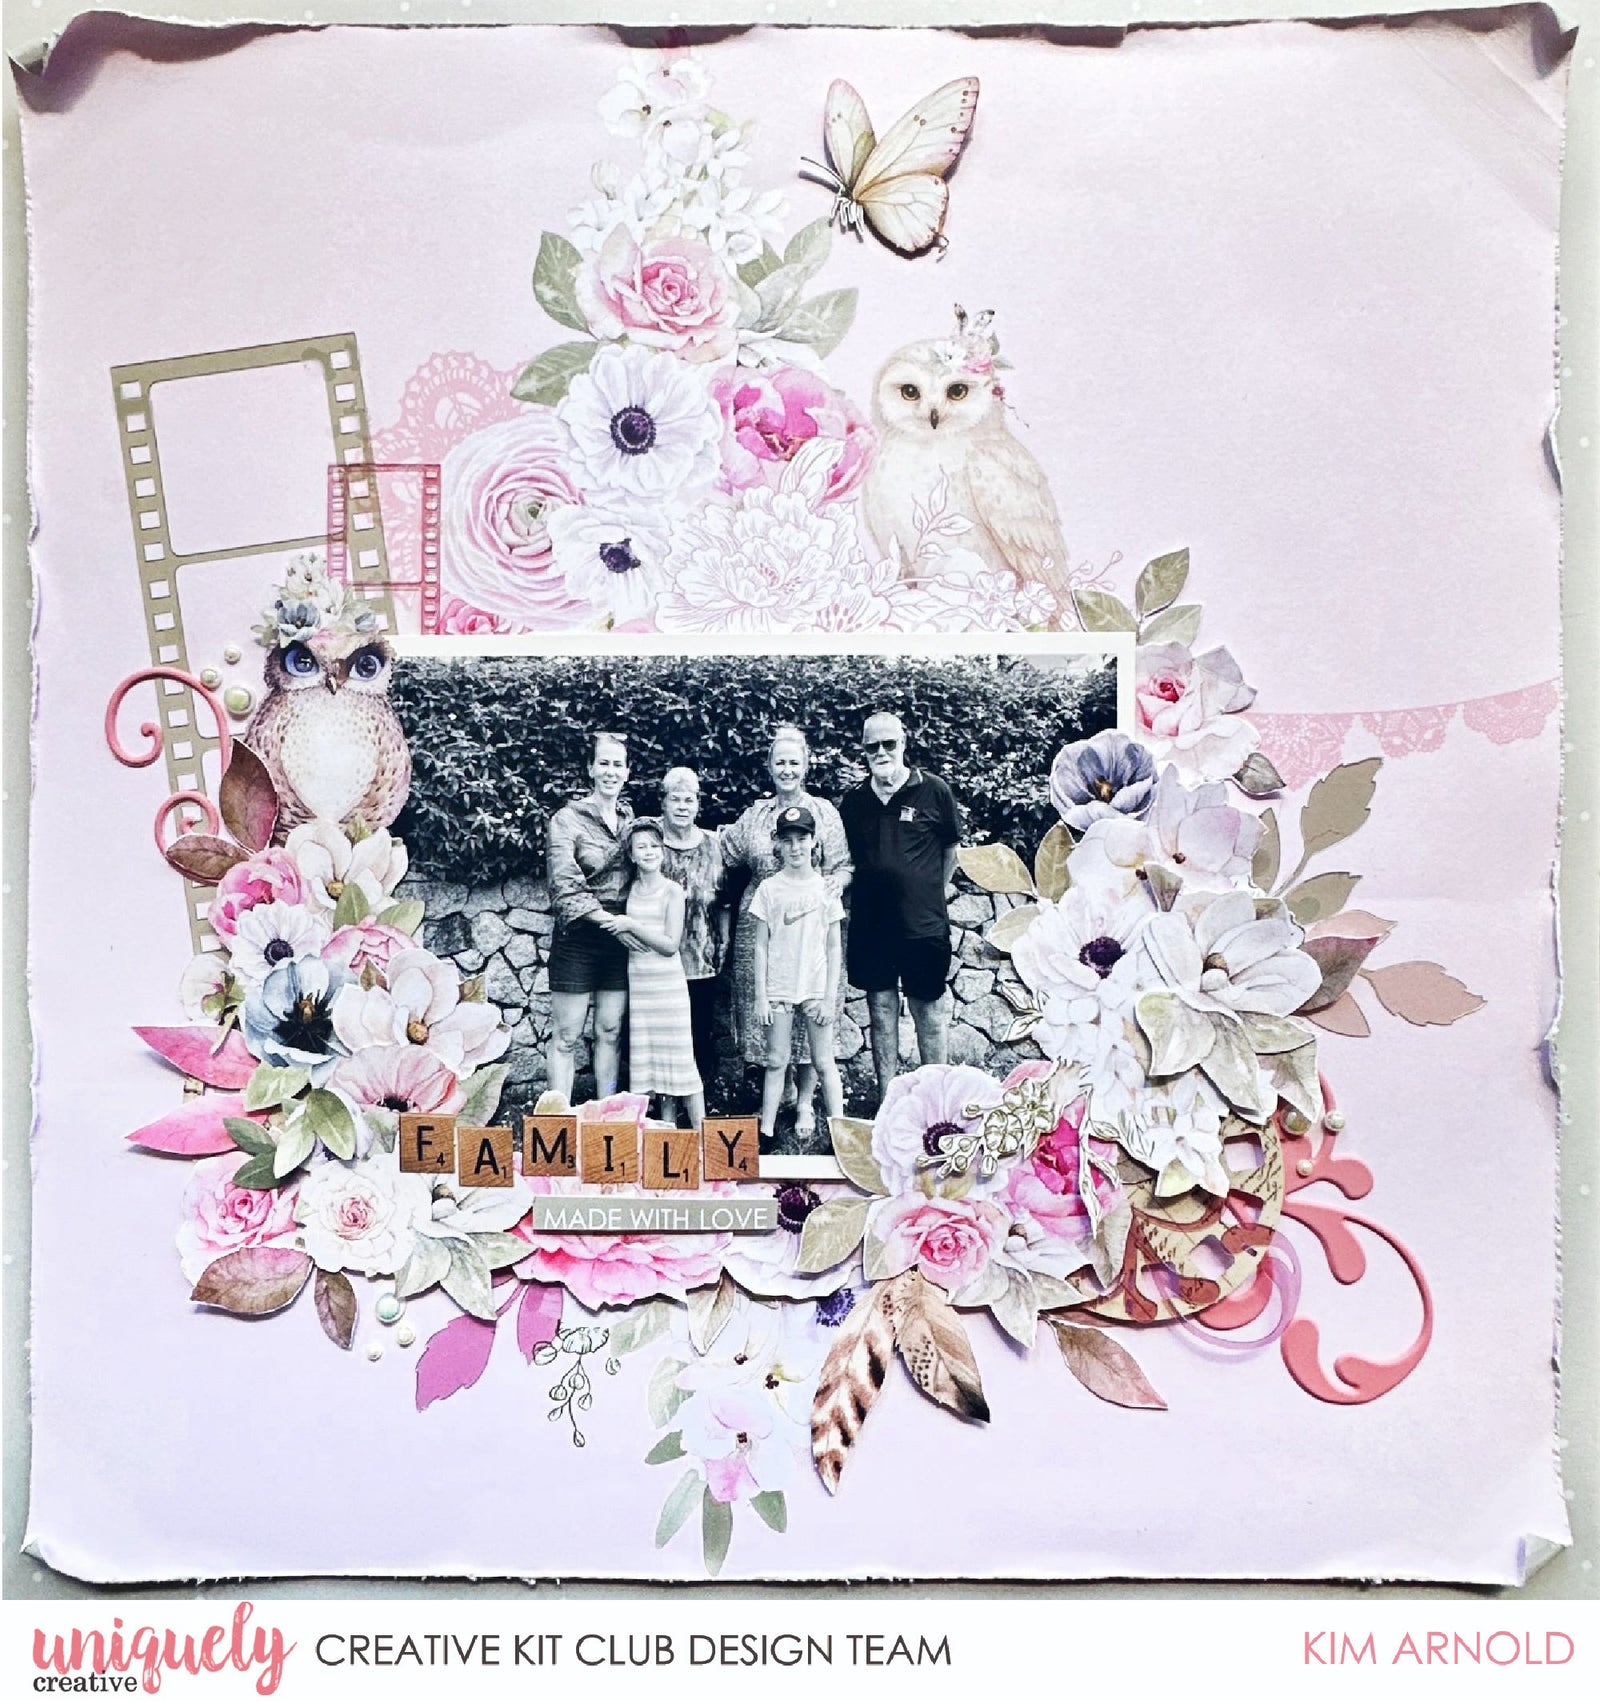
Uniquely Creative Products Used:
· UCP3051 This is Grace Paper x 2
· UCP3053 Floral Fragments Paper
· UCP3061 Whispers of Wisdom Creative Cuts
· UCCS227 Whispers of Wisdom Cut-a-part
· UCE2181 Pink Flourish Puffy Stickers
· UCE1882 Chantilly Pearls
· UCE2178 Acetate Layering Ephemera
· UCE1961 Foam Mounts Strips
· UCE1986 Edge distressing tool
Photo size: 4x6"
Step 1:
Cut down one sheet of This is Grade paper to 11 ½ inches square and distress edges using Edge distressing tool – See image 1.
Step 2:
Attach distressed This is Grace paper to B side of the second piece of This is Grace paper with foam tape.
Step 3:
Attach large green and small pink film strips from Acetate Layering Ephemera to left of image on This is grace paper using small dabs of wet glue – See image 2
Step 4:
Attach photo to right of film strips using foam tape.
Step 5:
Using pieces from the Creative Cuts and florals cut from the Floral Fragments paper, create the first part of your floral cluster around the bottom and sides of your photo – See image 3.
Step 6:
Add in Pink Puffy Flourish Stickers, flourishes and leaves from the Acetate Layering Ephemera and feathers from the Creative Cuts – See image 4
Step 7:
Add butterfly from Creative Cuts to top of page using foam tape, title using block letters from the Creative Cuts and phrase from the Cut-a-part sheet. Finish with Chantilly Pearls.
