Favourite Teacher Card - Lydell Quin

Uniquely Creative Products Used:
- UCP2499 Class in Session Paper Pack
- UCP2492 Hit the Books
- UCP2258 Teacher Appreciation
- UCP2501 Class in Session Creative Cuts
- UCE1957 Class in Session Pocket Pack
- Class in Session Cut-a-part Sheet Pre-school-6
Other Products Used:
- Trimmer, scissors, ruler
- Double-sided tape, foam tape, glue
- Black Distress Ink
- Fine Tip Black Pen
- Uniquely Creative Slimline Card and Envelope
Instructions:
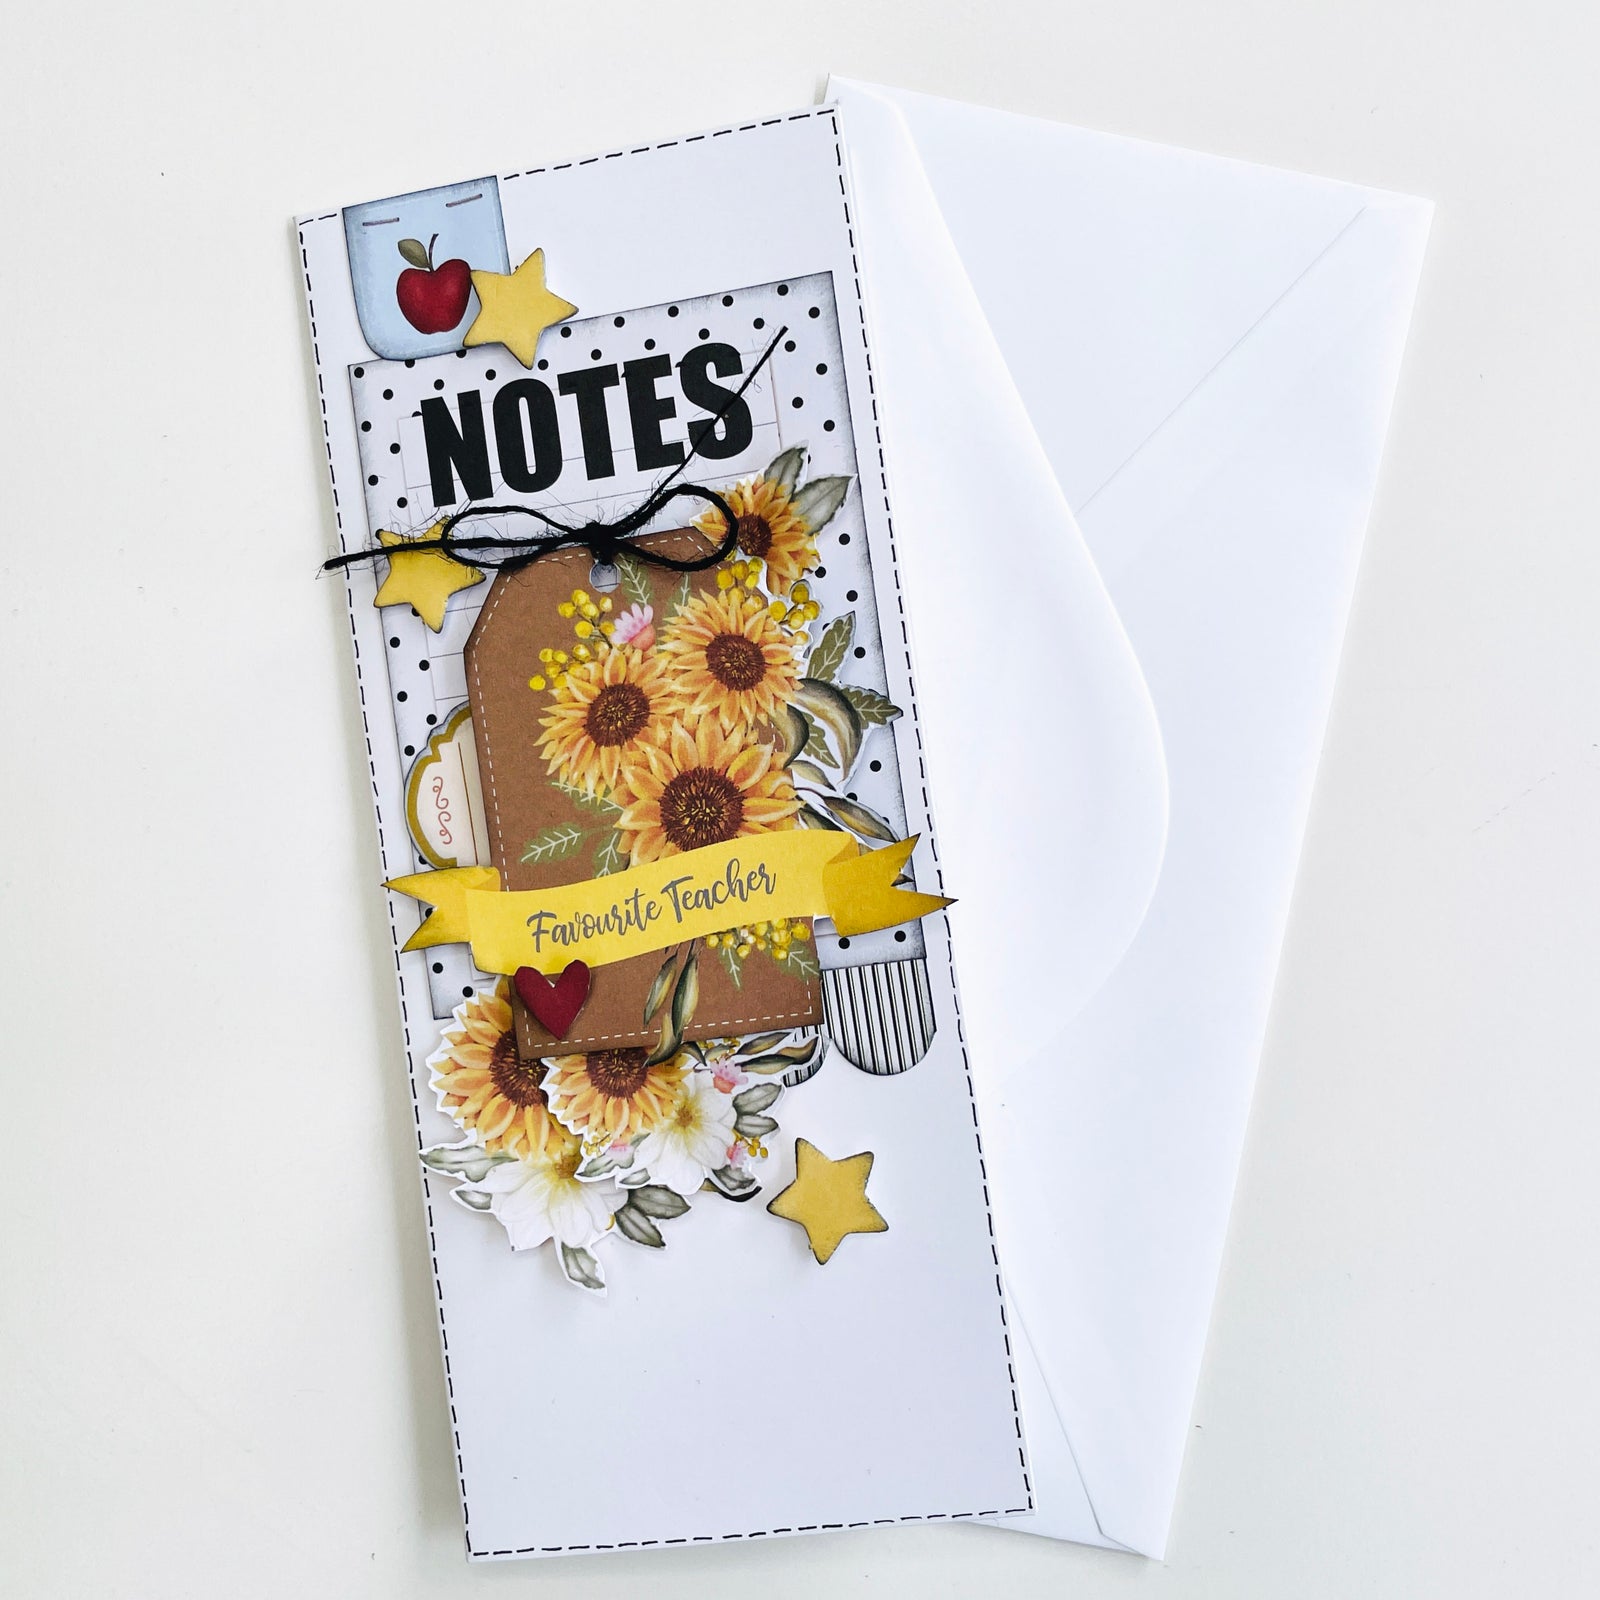
1. Use a Uniquely Creative Slim line Card or make your own card by cutting A4 cardstock down to 17.5cm x 21cm and folding in half.
2. Find the card that says ‘NOTES’ in UCE1957 Class in Session Pocket Pack and cut in half. Ink the edges and adhere it on your card front on the upper portion of your card.

3. Using Patterned Paper UCP2492 Hit the books, fussy cut out several florals. Lay them down on your card and then add a few on top after bending up the edges

4. Fussy cut the Favourite Teacher tag from Paper UCP2258 Teacher Appreciation and ink the edges. Mount it with foam mounting tape of cardboard for dimension (see main image)
5. Locate any relevant images from the cut-a-part sheet and cut out, Ink and add foam tape if desired. (Lydell chose the tab with the apple and the Thankyou for helping me grow tag)
6. Find the little yellow stars in UCP2501 Creative Cuts, Ink and mount each with foam tape and place in position.


7. Tie string to the tags (optional)

8. Now that you have everything positioned how you want it start gluing in place. Add glue to the centres of the elements so you can tuck things under and lift edges up for dimension. (see main image)
9. Add the small tag to the back side of the card (see above photo)
10. Using a fine tipped black pen add faux stitching lines around the edge of your card front.
