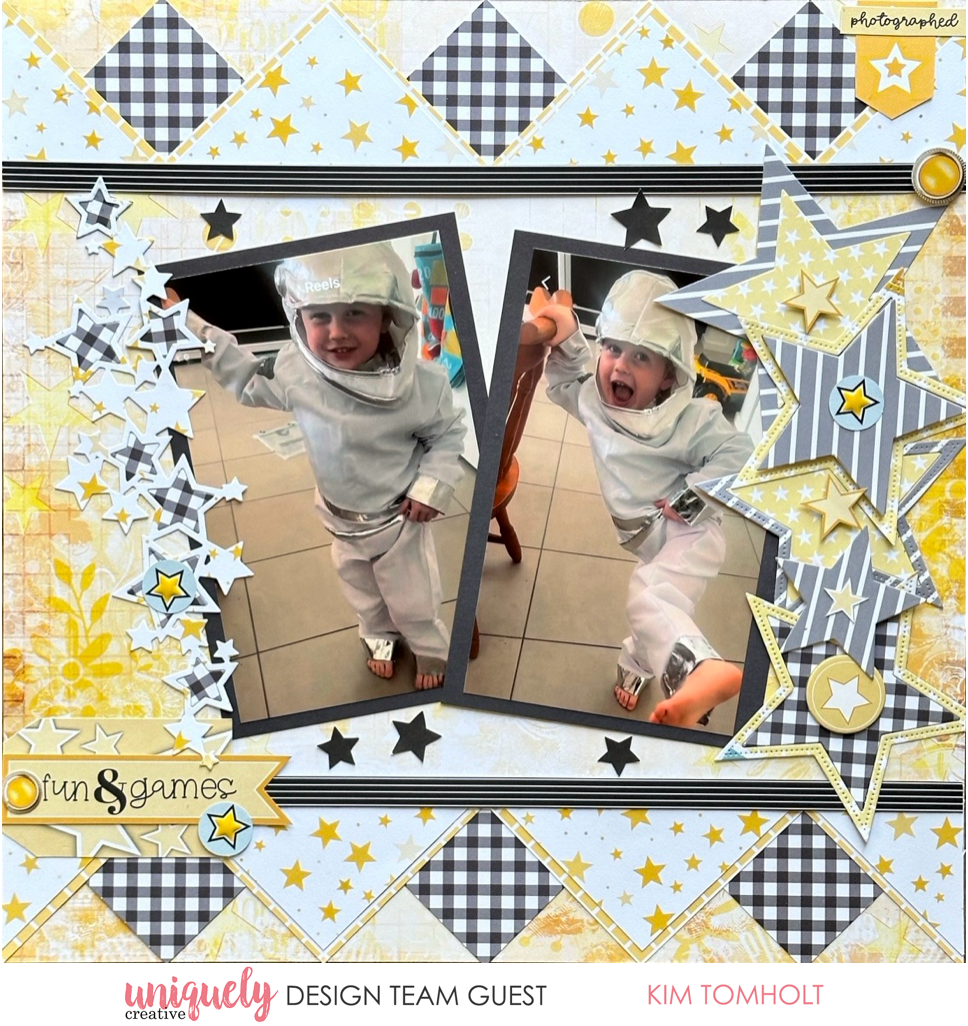
FUN & GAMES LAYOUT TUTORIAL - KIM TOMHOLT

To recreate this fun layout created by Design Team member Kim Tomholt you can follow the steps below:
Uniquely Creative Products Used:
· UCP3013 Starry Eyed Paper
· UCP3014 Star Dust Paper
· UCP3015 Glow Paper
· UCP3018 Guiding Light Paper
· UCP3021 Written in the Stars Creative Cuts
· UCE2161 Enamel Star Shapes
· UCE2162 Written in the Stars Chipboard Stickers
· UCD2216 Slimline Starry Stack Die
· UCD2211 Star Die
Other Products Used:
· Paper trimmer, scissors, glue, ruler, foam mounts
Photo size: 5.5" x 3.5" (photo mat: 6"x4")
Step 1:
Cut (3x) 3” x 3” squares from the GUIDING LIGHT paper, then cut each square into a triangle – See image 1.
Step 2:
Cut (3x) 3” x 3” squares from STAR DUST paper and (3x) 2 ¾ x 2 ¾ “ squares from STARRY EYED paper. Adhere together before cutting each square into a triangle. On the last 2 triangles, cut in half again as shown to create 4 small triangles – See Image 1.
Step 3:
Adhere GUIDING LIGHT triangles to STAR DUST base page (trim off border strip) at the 2”, 6” and 10” mark at both top and bottom of page – See image 2.
Step 4:
Adhere two of the STARRY EYED paper triangles at the 4” and 8” mark at both top and bottom of page – See Image 3.
Step 5:
With the smaller triangles, adhere flush against the left hand and right hand side of page as shown – See image 3.
NB: It is OK to overlap the corners. The base of the triangles do not need to line up perfectly as they will be covered as shown in the next step.
Step 6:
Adhere the strip from the GUIDING LIGHT paper 2” from the top and 2” from the bottom of page. This will cover up the base the of the triangles and hide any imperfections – See image 4.
Step 7:
Adhere photo mats (or alternatively 6” x 4” photos) and embellish with Dies, Creative Cuts and Chipboard Stickers.