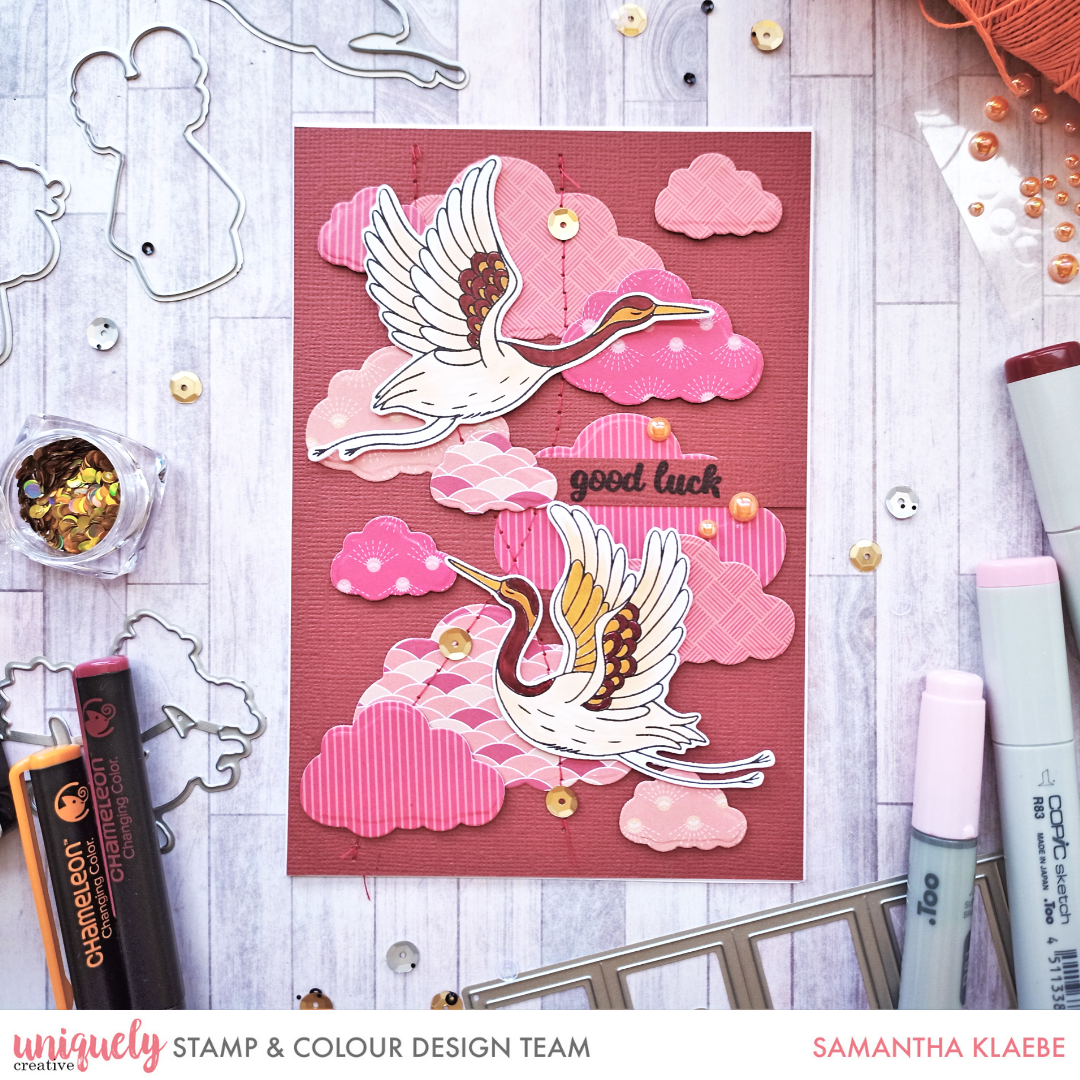
Good Luck - Samantha Klaebe

Card Size 4 ¼” x 6 ¼”
Uniquely Creative Products Used
Lucky You stamp and die, Good Times stamp and die, Cloud die, cardstock, pattern paper,sequins, embellies - pearls
Other Products Used
Ruler, paper trimmer, scissors, pencil, stamping block, tape runner, foam adhesive, black ink, Cuttlebug, sewing machine
Colours Used
Copic Markers:
R81/R83/R85/R89
YR21/YR23/YR24
Instructions:
Step 1 - Cut out a card front using card stock (measurements: 10.5 cm X 15.5 cm)
Step 2 - Using pattern paper die cut the clouds
Step 3 - Adhere these to the card front as shown. Over lapping a few with foam tape.(Optional: Add machine stitched details)
Step 4 - Stamp the sentiment on cardstock, trim and adhere to card front
Step 5 - Stamp and die cut both stork images. Colour with your preferred medium
Step 6 - Adhere images to card front using foam tape
Step 7 - Embellish card with sequins and pearls
Step 8 Adhere card front to an A6 card base