Hanging Terrarium - Jane Clark

Card Size: H 6 7/8” x W 9” Folded white card, Portrait
Uniquely Creative Products Used
UC1837 Succulents Stamp Set, UCD1957 Succulents Dies, UCL1710 Succulents Laser Cuts, UCD1956 Cut-A-Part Essentials #4 Die, UCE1831 A4 Watercolour Card
Other Products Used
Copic Markers C1, C2, C3, E41, E43, E44, W2, W3, W4, YG25, G24, G28, G29, BG72, BG75, BG78, BV23, BV25, V15
Fine Black Permanent Marker, Hero Arts Intense Black Ink, StazOn Jet Black Ink, Stamping Platform, Die-Cutting Machine, Distress Ink Pumice Stone, Mist Bottle, Mixed Media Mat, Vellum, Large Cream Split Pin, Foam Mounting Tape, Glue.
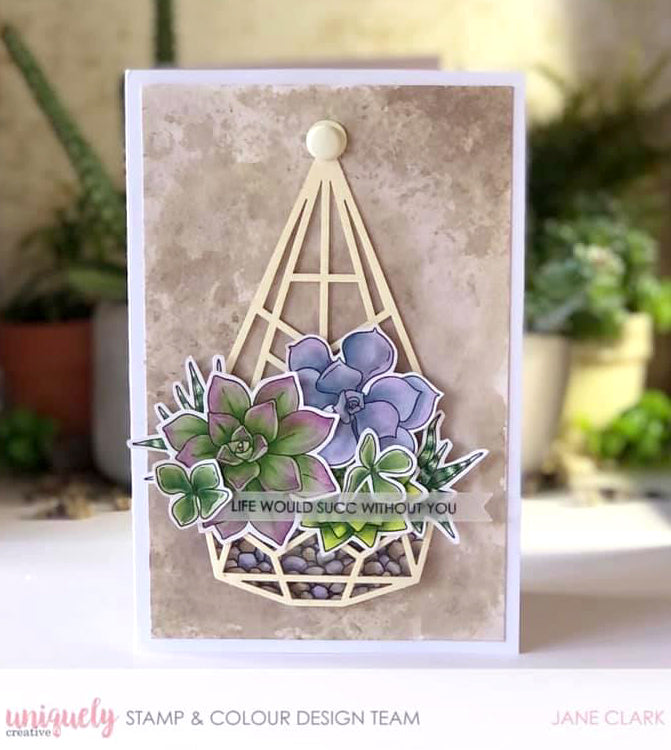
Instructions:
1. Cut the Succulent Laser Cut in half. Trace around the bottom section on white card using a pencil, draw small pebbles in the area using a fine permanent black pen.

2. Colour the pebbles using Copic markers – C1, C2, C3, E41, E43, E44, W2, W3, W4. Trim the pebbles section and glue it to the back of the bottom section of the Succulent Laser Cut.

3. Stamp all the Succulent images on white card using black ink, colour with Copic markers and die-cut them. Stamp a Succulent sentiment on vellum using StazOn black ink, die-cut this using Essential #4 die.

4. Arrange the coloured Succulents and the vellum sentiment over the top area of the pebble piece and secure it all in place using glue and foam mounting tape. Add the top Laser Cut above the succulents using more tape.
5.Dab Distress Ink pumice stone several times on a mix media mat, spray with water then press watercolour card over the watered inks to create a grungy background.

6. Pierce a hole at the top of the grungy background and attach the hanging Laser Cut using a cream brad. Adhere the piece to the front of folded white card with tape.
