Happy Birthday Card Tutorial - Maria Aloisi

Card size: 10.5cm x 15cm.
Uniquely Creative Products Used:
UCP2187 Ready?...Go!, UCP2189 Dream Big Dreams, UCP2192 The Story – Layer Cuts, UCP2194 Currently Awesome, Watercolour Cut-A-Part, UCP2195 Choose Your Own Adventure Creative Cuts, UCE1804 Foam Mount – Circles.
Other Products Used:
Paper Trimmer, Scissors, Double Sided Tape, Glue
Instructions:
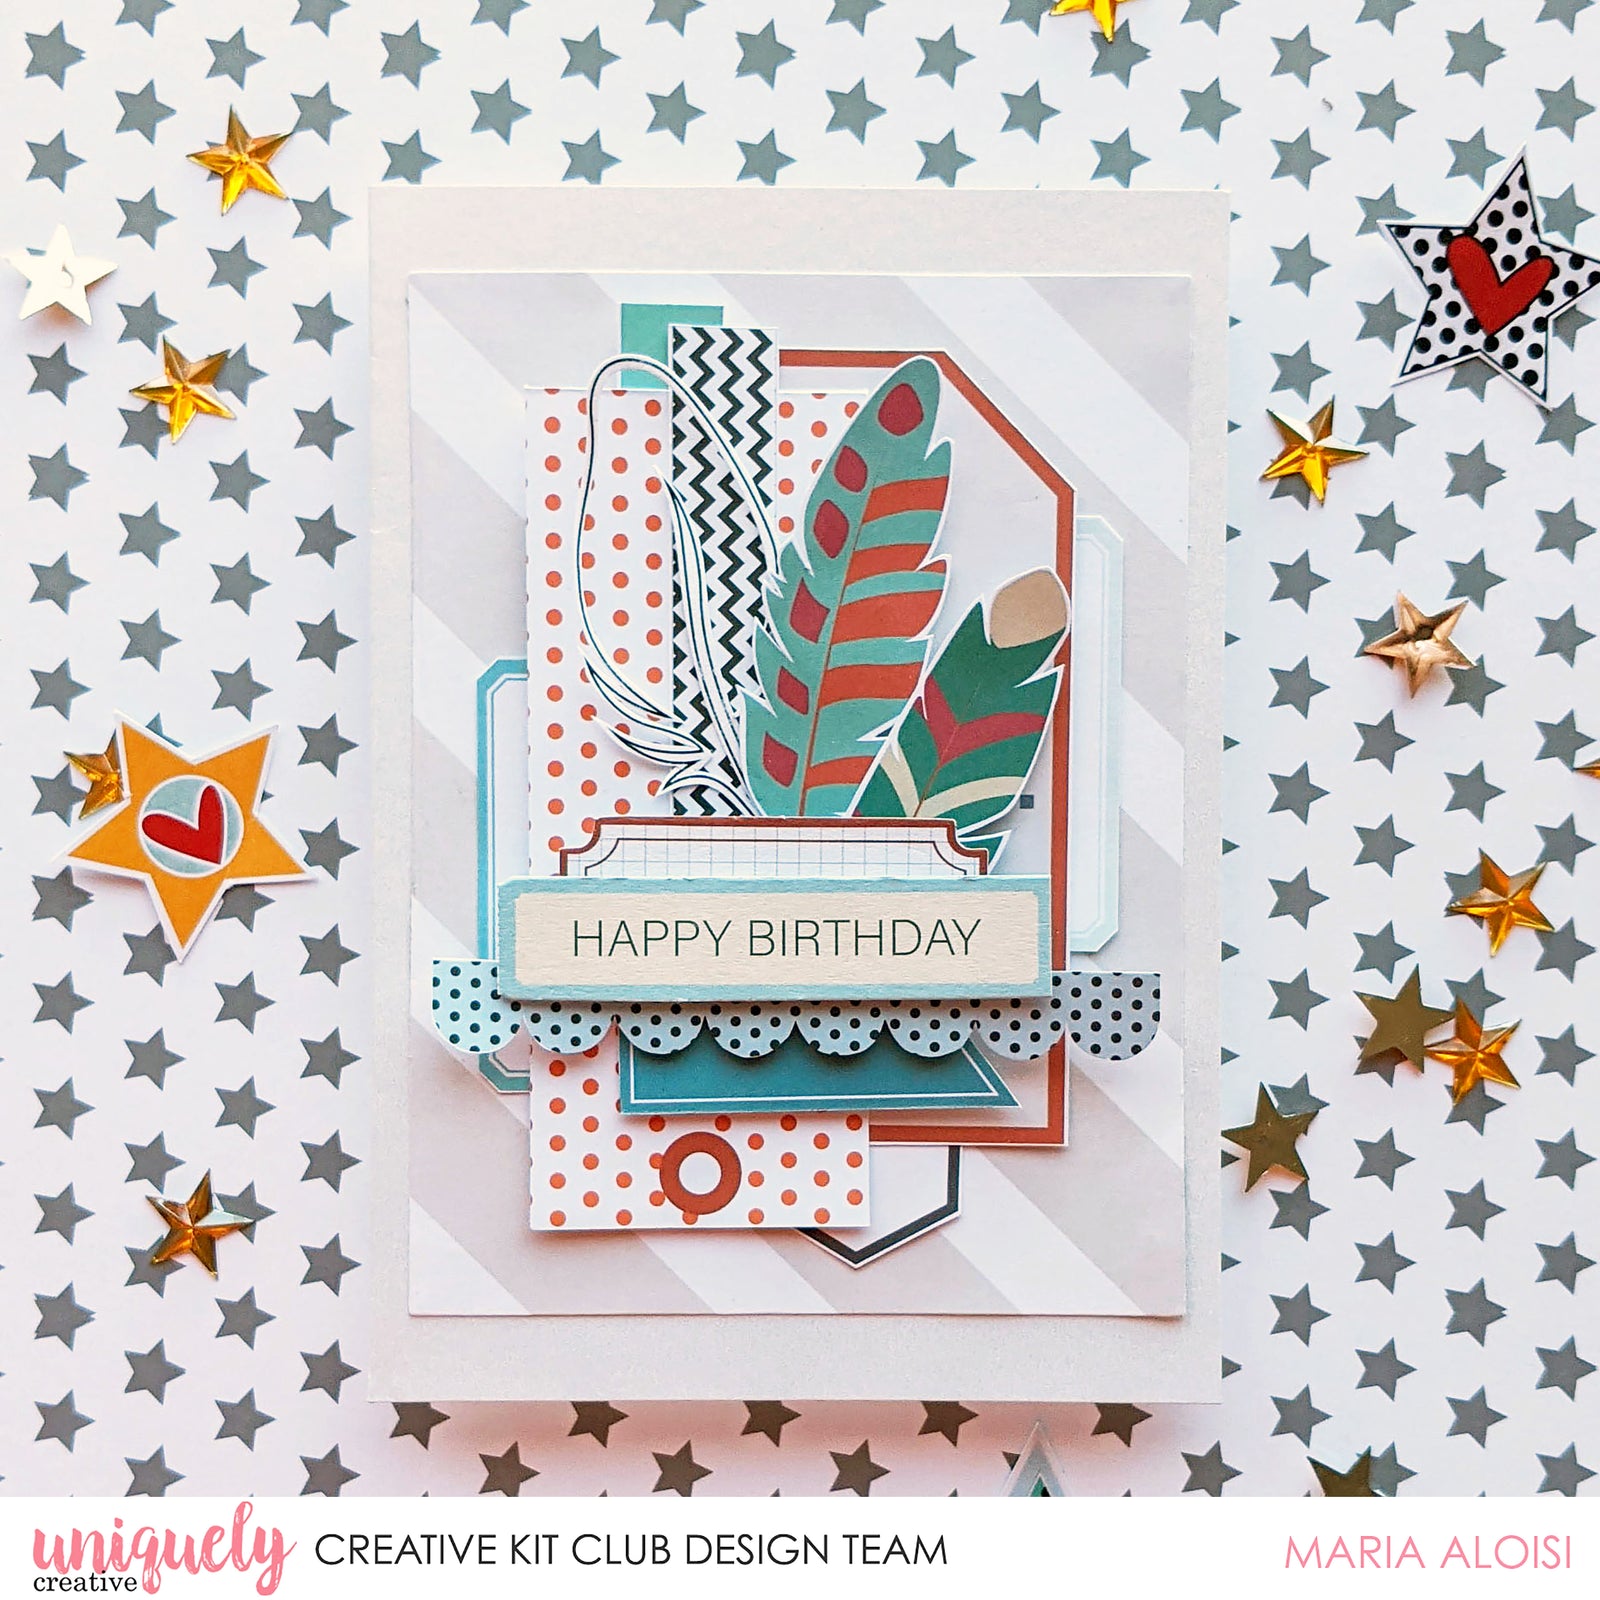
1. Cut a piece of Dream Big Dreams paper to 3¾" x 5" and adhere to card base. Cut 2 tags from the Currently Awesome paper – the ‘Go See Do’ tag and the polka dot tag.

2. Fussy cut several layer cuts from The Story – Layer Cuts paper.

3. Fussy cut 2 feathers from the Ready?...Go! paper. Fussy cut a feather from the watercolour cut-apart and cut away the inside.

4. Adhere the ‘Go See Do’ tag ¾“ from the right-hand side of the card edge and 1¼“ from the bottom of the card. Note: Add the adhesive to the middle of the tag so that pieces can be added underneath and at the bottom later on in the process.
5. Adhere the teal strip flush with the ‘Go See Do’ tag on the right-hand side and ⅛” from the top of the Dream Big Dreams paper. Adhere the polka dot tag ¾” from the left-hand side of the card edge and ⅜” from the bottom of the Dream Big Dreams paper. Place the adhesive in the middle of the tag.
6. Adhere the chevron strip 1½“ from the left hand side of the card edge then adhere the fussy cut feathers with the circle foam mounts.

7. Add the Happy Birthday creative cut and the watercolour feather.

8. Add three layer cut pieces underneath the red tags as pictured.

9. Tuck the teal banner underneath the red Happy Birthday creative cut and the blue polka dot on top of the red Happy Birthday creative cut. Finally add the blue Happy Birthday creative cut, with edges trimmed off, on top of the blue polka dot layer cut.
