
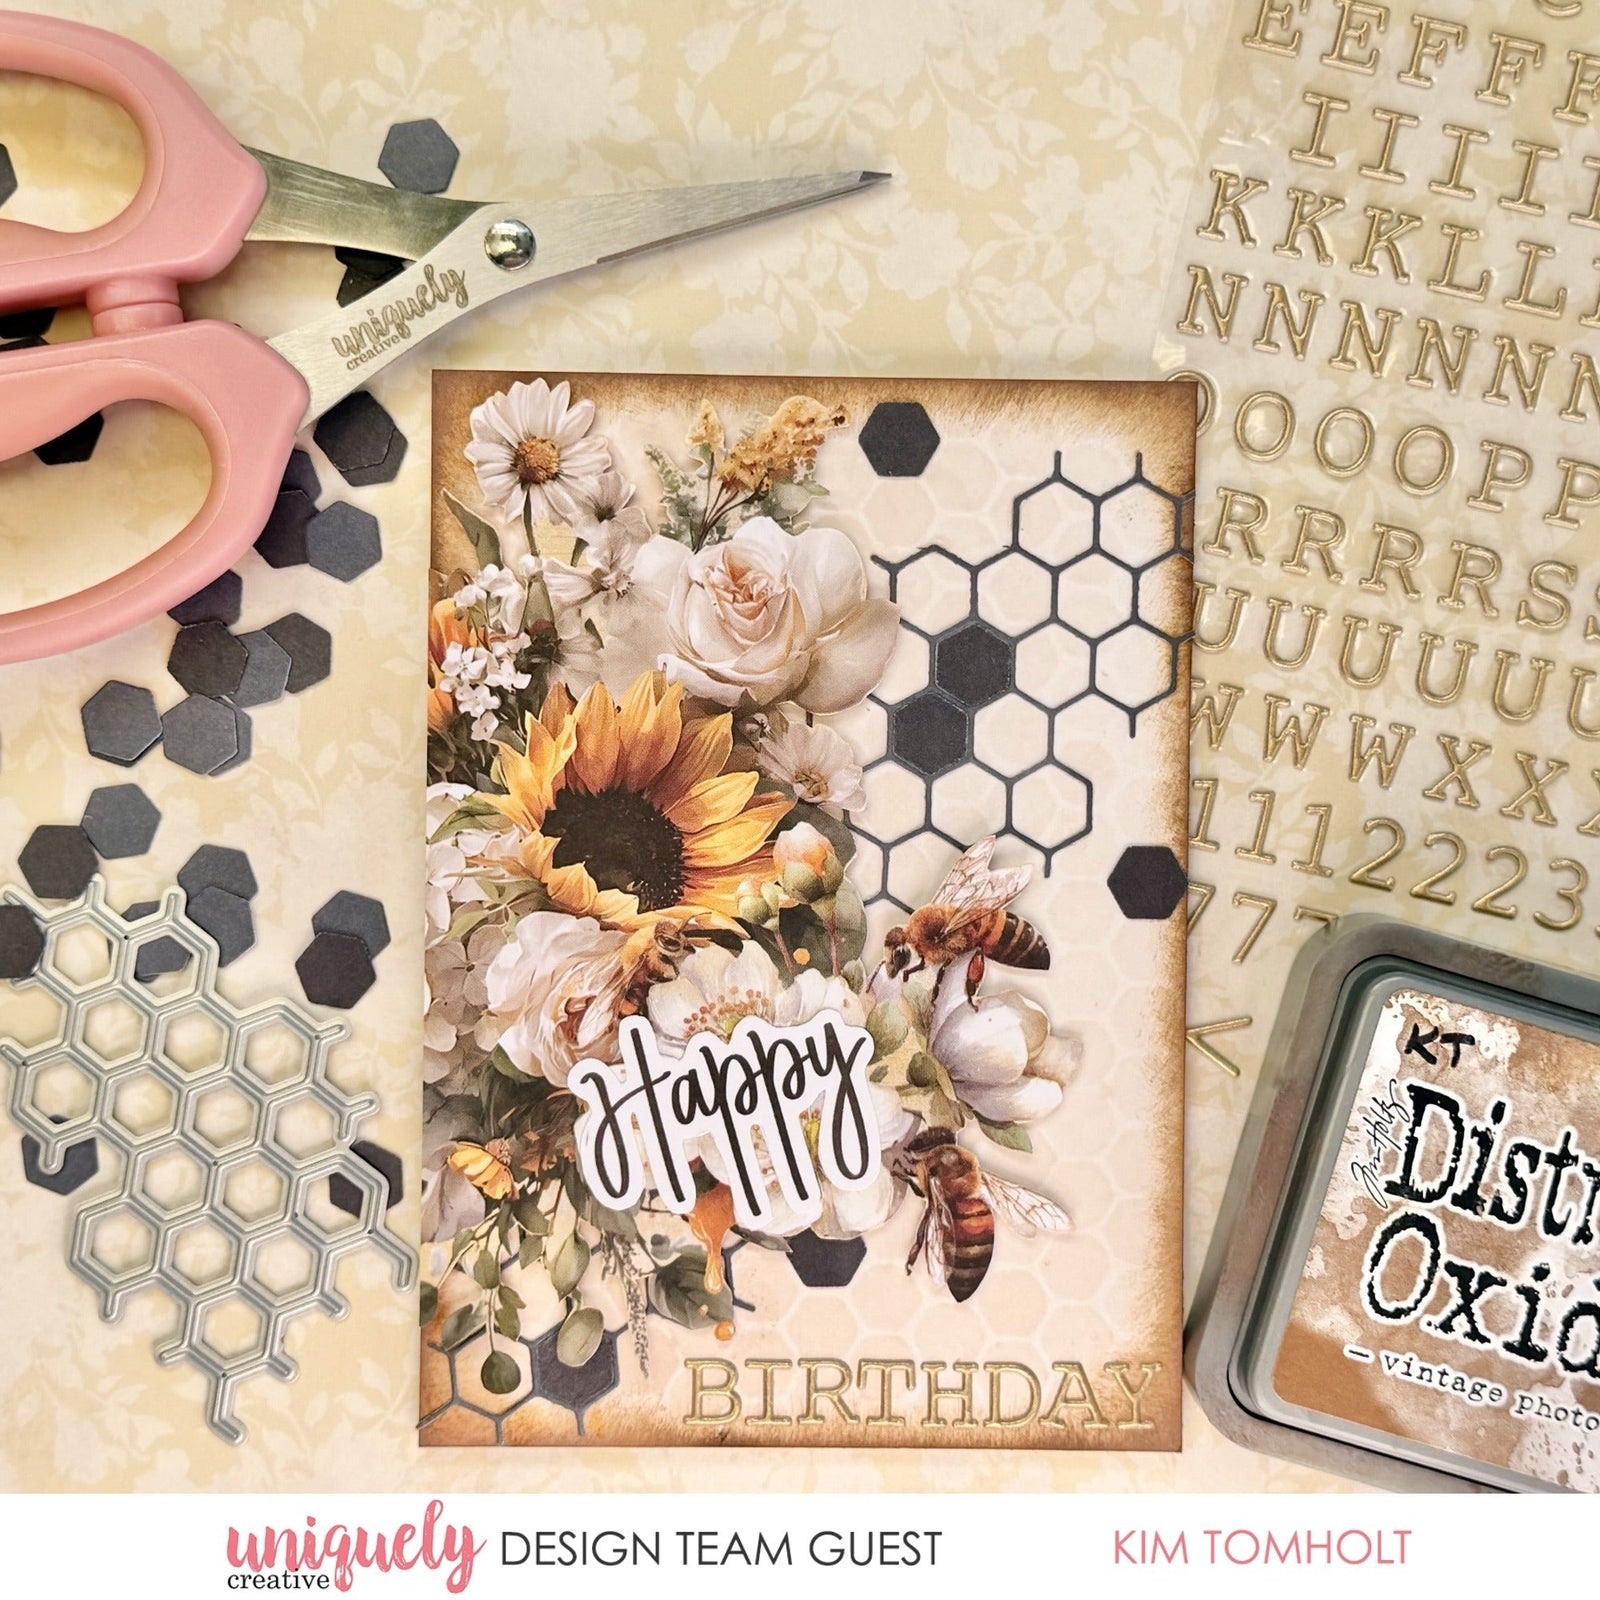

To recreate this beautiful card created by Design Team member Kim Tomholt you can follow the steps below:
Uniquely Creative Products Used:
· UCP3162 Sunday Garden Paper
· UCCA1788 Midnight Cardstock
· UCCS258 Sweet as Honey Cut-a-Part Sheet
· UCE2230 Puffy Alpha Stickers Uppercase Gold
· UCD2238 Honeycomb Texture Die
· UCE1872 Fussy Cutting Scissors
· UCE1978 Foam Mounts Dots & Strips
· UCE2192 Paper Perfect Quick Dry Glue
· UCE2194 Paper Perfect Trimmer
· Vintage Photo Distress Oxide Ink
Other Products Used:
· Sponge
Card size: 13.5cm x 13.5cm
Step 1:
Cut 10.5cm x 14.8cm from Sunday Garden (reverse), ink edges with Vintage Photo Distress Ink and adhere to card base. Fussy cut floral bee cluster from Sunday Garden – See image 1
Step 2:
Die cut 2 x Honeycomb Texture Die from Midnight cardstock (Keep inserts) – See Image 2
Step 3:
Fussy cut “Happy “ sentiment from Cut-a-Part sheet.
Step 4:
Adhere Honeycomb Die pieces with Paper Perfect Quick Dry Glue as shown in Image 3. Glue some of the cut out hexagons back into the die as shown.
Step 5:
Add floral bee cluster flush with the left side of the card using foam mounts. Adhere “Happy” sentiment. Add “Birthday” to bottom right hand corner of card using Gold Puffy Alpha Stickers. Add extra hexagons as desired.