
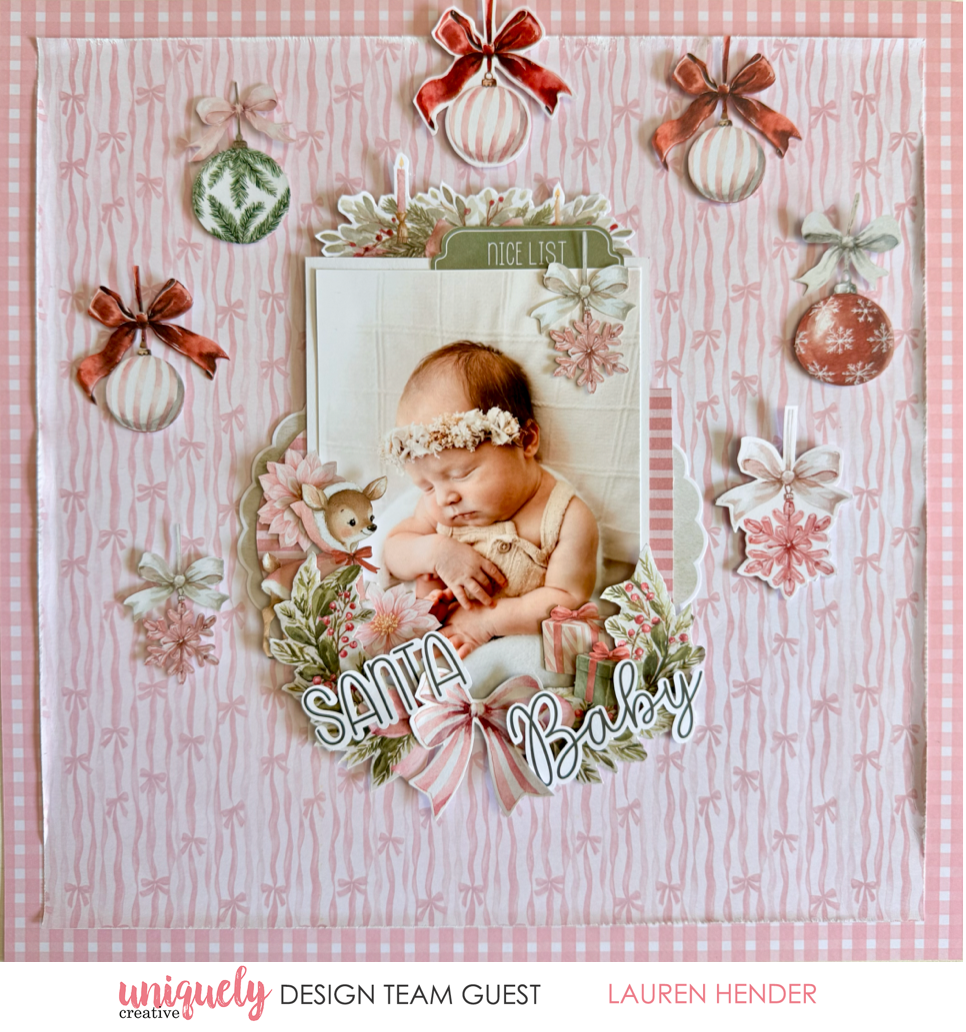

Welcome to our Christmas in July Collection - Little Festive Things!
To recreate this sweet layout created by Design Team member Lauren Hender you can follow the steps below:
Uniquely Creative Products Used:
· UCP3203 Sharing the Joy
· UCP3200 Holly & Pine
· UCP3197 Scrapbooking Creative Cuts
· UCP3195 Card Maker’s Collection Pack
Other Products Used:
· Trimmer
· Scissors
· Adhesives including mounting foam
Photo size: (1) 4” x 6”portrait
Step 1:
The two pages we use for the base is Sharing the Joy and Holly and Pine.
Step 2:
Cut Sharing the Joy down to 28x28 cm, distress the edges and adhere to the centre of Holly and Pine.
Step 3:
Fussy cut the icons from the second Sharing the Joy cardstock.
Step 4:
Fussy cut the pink stripe bow and the Christmas bauble icons from the Card Makers Collection pack.
Step 5:
Mount your portrait photo in white.
Step 6:
Carefully cut in half the scalloped edge icon, and from the icon fussy cut the floral element from it. We use scalloped edge cut off for layering so be careful to keep them intact (refer to below photo)

Step 7:
In the centre of the page we are going to create a layered photo cluster. We start by placing down all the pieces to ensure we are happy with the look and so that it does not layer over parts of the photo that we would like to feature. Play around with this step and try to ensure that it maximises highlighting the photo. Once you are happy with the positioning adhere the elements layer by layer using a mix of flat adhesive tape and foam tape to create dimension. I have layered mine in the following order: two scalloped halves, foam mounted red and pink striped arched icon, with the arch on the left hand side of the photo, the fireplace icon with foam tape at the top of the photo (refer to photo)

Step 8:
Adhere the ‘nice list’ tab icon at the top right hand side of the photo followed by the scrapbooking creative cut pink Christmas Bauble Icon.
Step 9:
Adhere the dear (foam), the two light pink flower icons, as well as the light pink present from the Scrapbooking Creative Cuts.
Step 10:
Using foam adhesive adhere the floral fussy cut icons either side of the bottom of the photo and then fill the centre gap by adhering the pink and white striped bow in the centre.
Step 11:
Cut the Santa Baby title creative cut in half and adhere the title at an angle using foam and add the little green present creative cut near the light pink one on an angle.
Step 12:
Adhere using foam tape all the creative cut and fussy cut Christmas baubles around the photo in the top two thirds of the page (refer to main photo).
