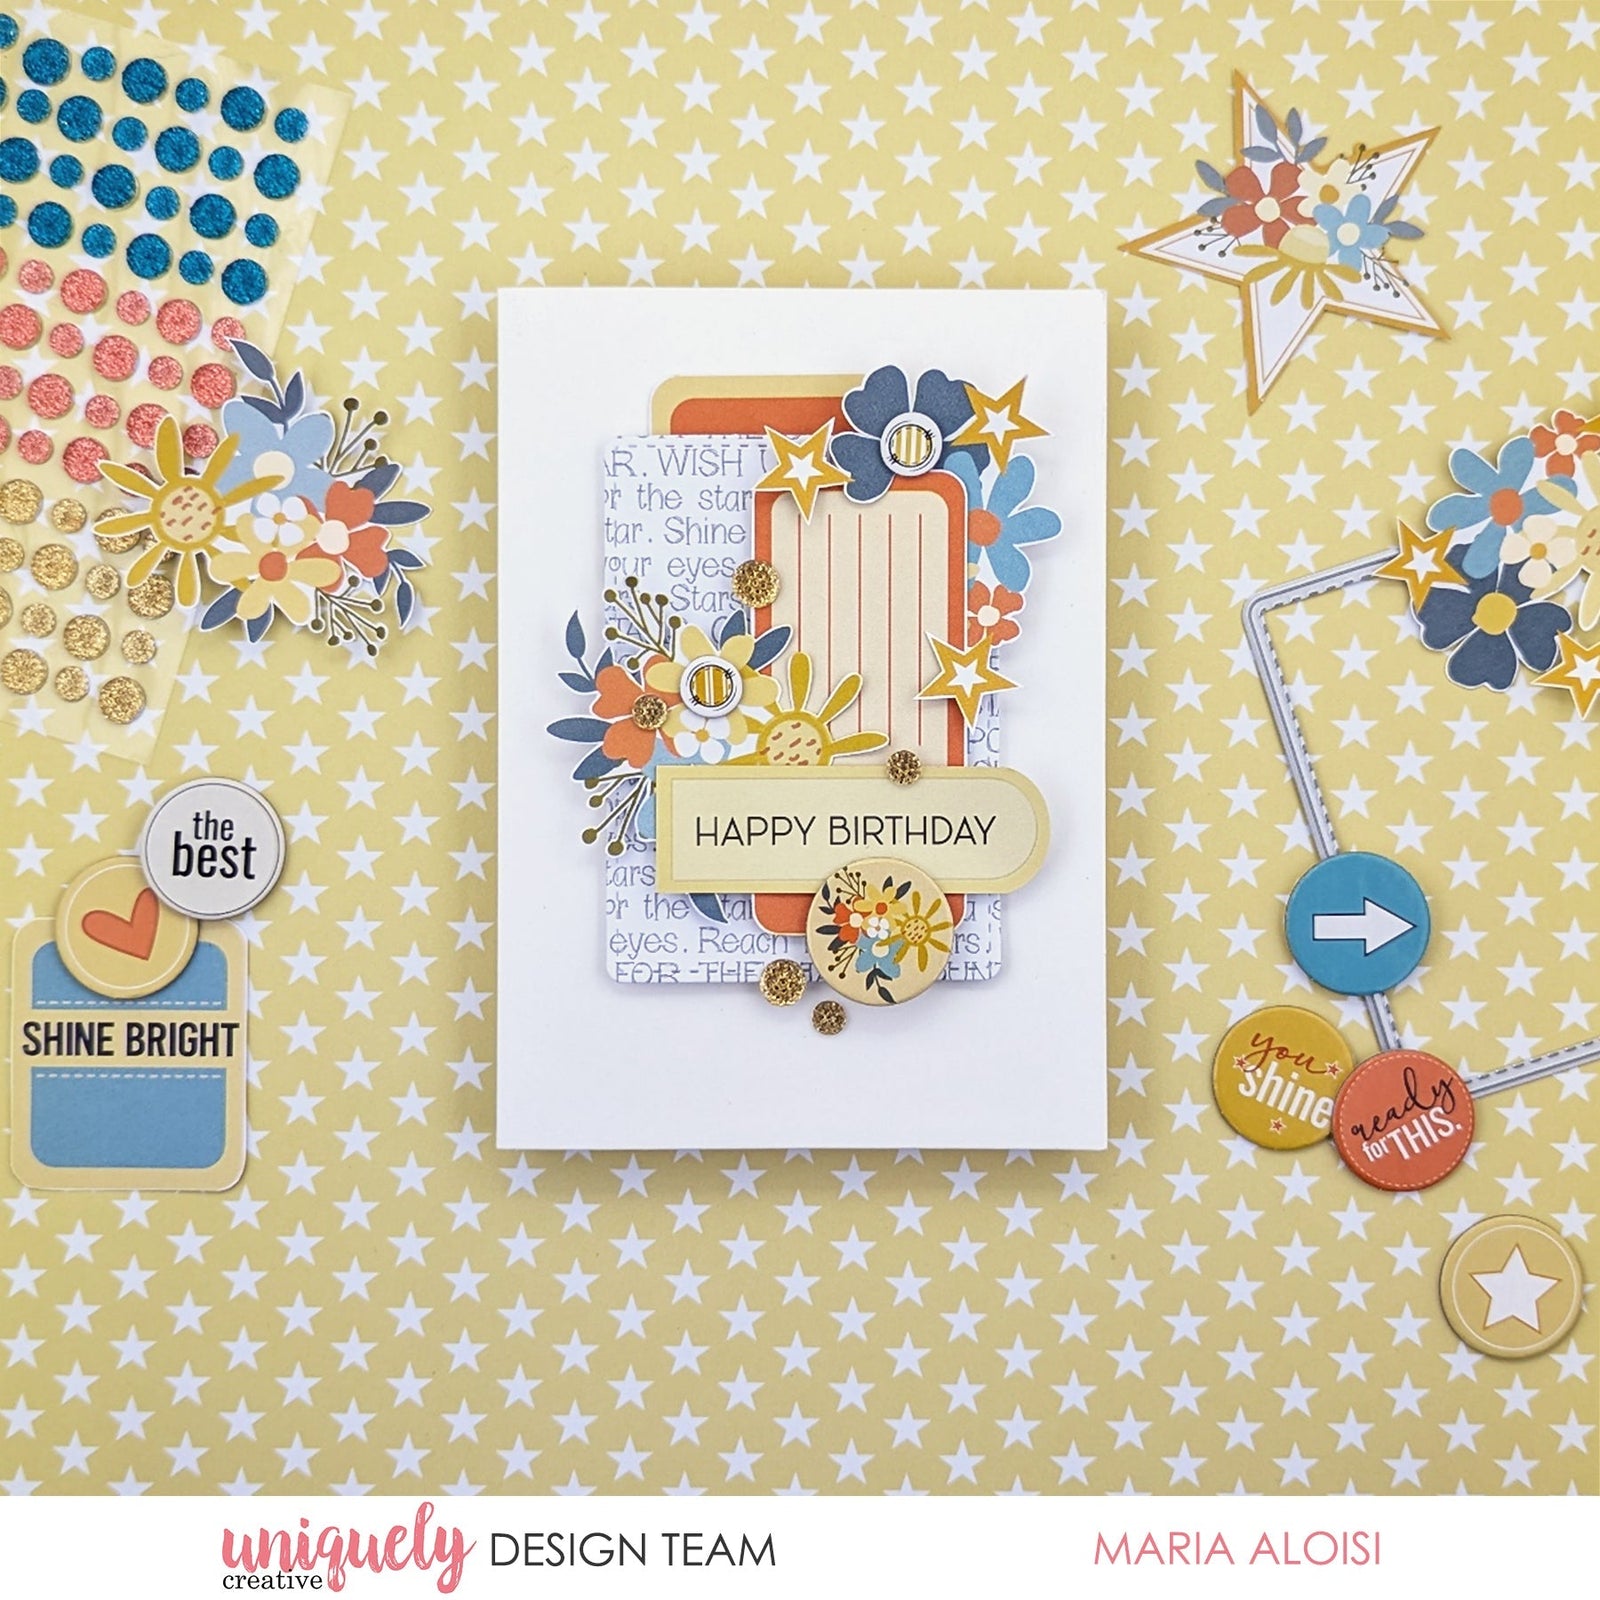
HAPPY BIRTHDAY CARD TUTORIAL - MARIA ALOISI

To recreate this amazing card created by Design Team member Maria Aloisi you can follow the steps below:
Uniquely Creative Products Used:
· UCP3012 Star Shine paper
· UCP3017 Superstar paper
· UCP3021 Written In The Stars Creative Cuts
· UCE2117 Sparkly Stickers - Celebrations
· UCE2162 Written In The Stars Chipboard Stickers
· UCE2163 Written In The Stars Alpha Stickers
· UCD2135 Stitched Rounded Corner Die
· UCE1811 Rectangle Cards and Envelopes
· UCE1803 Foam Mounts Squares & Strips
· UCE1859 6mm Double Sided Tape
· UCE1872 Fussy Cutting Scissors
· UCE1935 Craft Tweezers
Other Products Used:
· Die Cutting Machine
Card size: 10.5cm x 15cm
Step 1:
From the Star Shine (reverse) paper, use the Stitched Rounded Corner Die and cut a panel. Adhere using Foam Mounts so that it is ¾” from the left edge and 1” from the top of the card – See image 1.
Step 2:
Cut two images from the Superstar paper. Using Double Sided Tape, adhere one image under the panel. Using Foam Mounts, adhere the other image on top of the panel – See image 2.
Step 3:
Cut two floral images from the Star Shine paper. Using Foam Mounts, adhere one image on top of the ‘Jot It Down’ image and the other underneath – See image 3.
Step 4:
Using Double Sided Tape, add the ‘Happy Birthday’ creative cut to the card. Use two dots, from the Chipboard Alpha Stickers, as flower centres. To finish, add Sparkly Stickers – See image 4.