
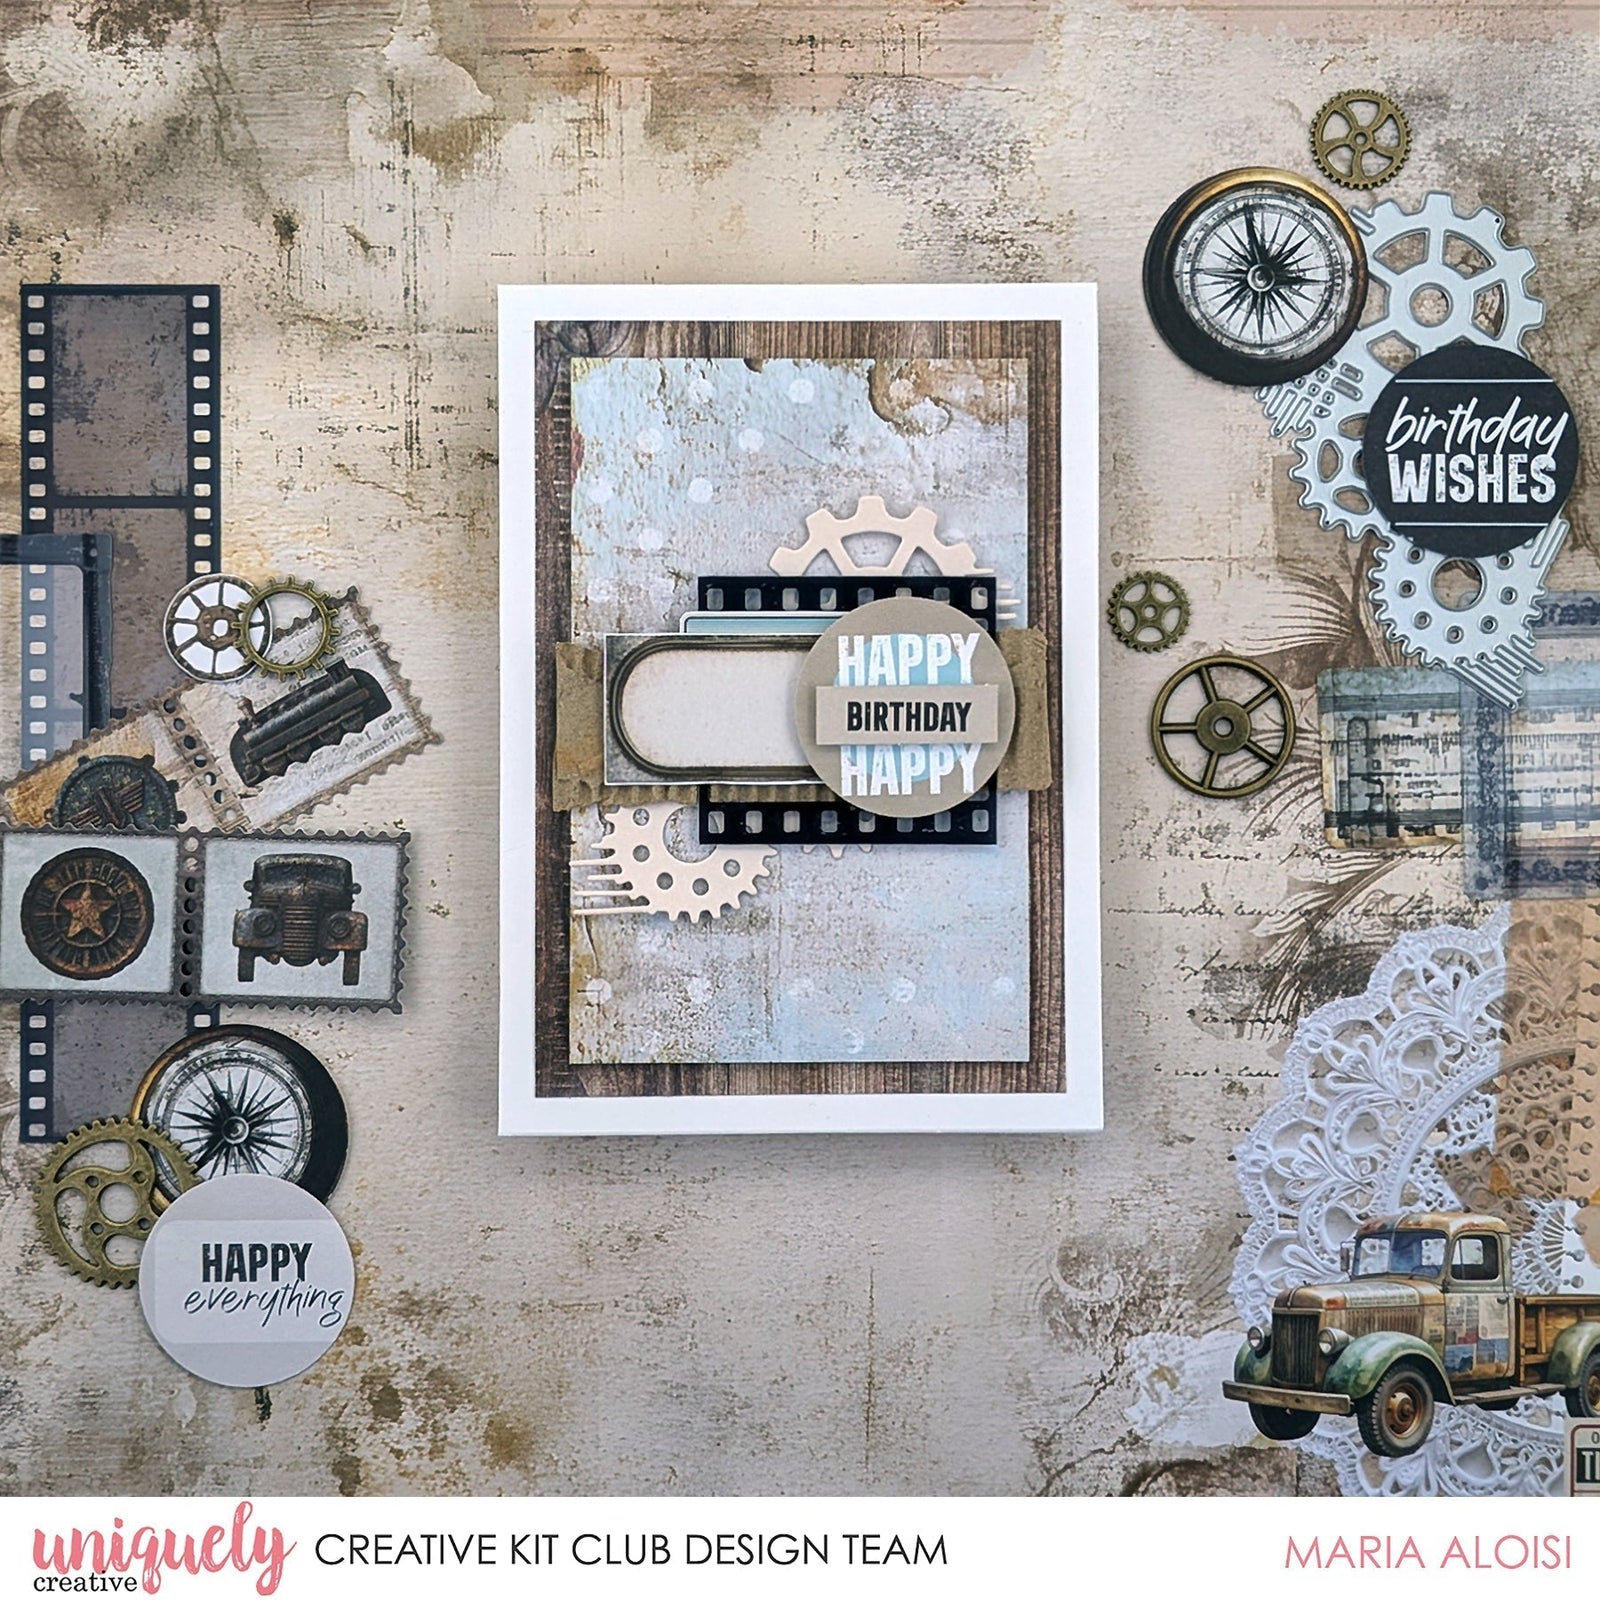

To recreate this fantastic card created by Design Team member Maria Aloisi you can follow the steps below:
Uniquely Creative Products Used:
· UCP3153 Next Exit Paper
· UCP3155 Ride On Paper
· UCP3157 Speed Limit Paper
· UCP3160 Creative Cuts
· UCE2223 Acetate Rustic Ephemera
· UCE1809 12 x 12 Corrugated Card
· Cut-a-part Sheet
· UCD2242 Cogs Texture Die
· UCCA1791 Mocha Cardstock
· UCD1985 Cut-a-part Essentials #6 Die
· UCE1803 Foam Mounts & Squares
· UCE1811 Rectangle Cards & Envelopes
· UCE1859 6mm Double Sided Tape
· UCE1872 Fussy Cutting Scissors
· UCE1981 Die Release Tool
· UCE2192 Paper Perfect Quick Dry Glue
· UCE2194 Paper Perfect Trimmer
Other Products Used:
· Die cutting machine
Card size: 10.5cm x 14.8cm
Step 1:
Cut a 3⅝” x 5⅜” piece from the Ride On (reverse) paper. Using Double Sided Tape adhere to the centre of the card base. Cut a 3⅛” x 4¾” piece from the Next Exit (reverse) paper. Using Foam Mounts add on top of the Ride On piece.
Step 2:
Using the Cogs Texture Die and the Mocha (reverse) cardstock, die cut a piece. Using glue, add to the card.
Step 3:
Cut a 3 ¼” x 1¼” strip of corrugated card. Tear the edges. Using Paper Perfect Quick Dry Glue add to the card. 
Step 4:
Using the Cut-a-part Essentials #6 die cut the circle sentiments from the Cut-a-part sheet. Set aside the Happy circle sentiment along with a ‘Birthday’ creative cut. Fussy cut a couple of images from the Speed Limit paper. Set aside a single film strip acetate
Step 5:
Using Paper Perfect Quick Dry Glue add the film strip acetate on top of the corrugated card strip. Tuck the fussy cut number plate image under the larger fussy cut image. Using Double Sided Tape add on top of the film strip acetate.
Step 6:
Using Foam Mounts, add the Happy circle sentiment on top of the corrugated card strip. Using Foam Mounts add the ‘Birthday’ creative cut to the centre of the Happy circle sentiment.