Happy Birthday Little Treasure Tutorial - Ashleigh Freeston

Uniquely Creative Products Used:
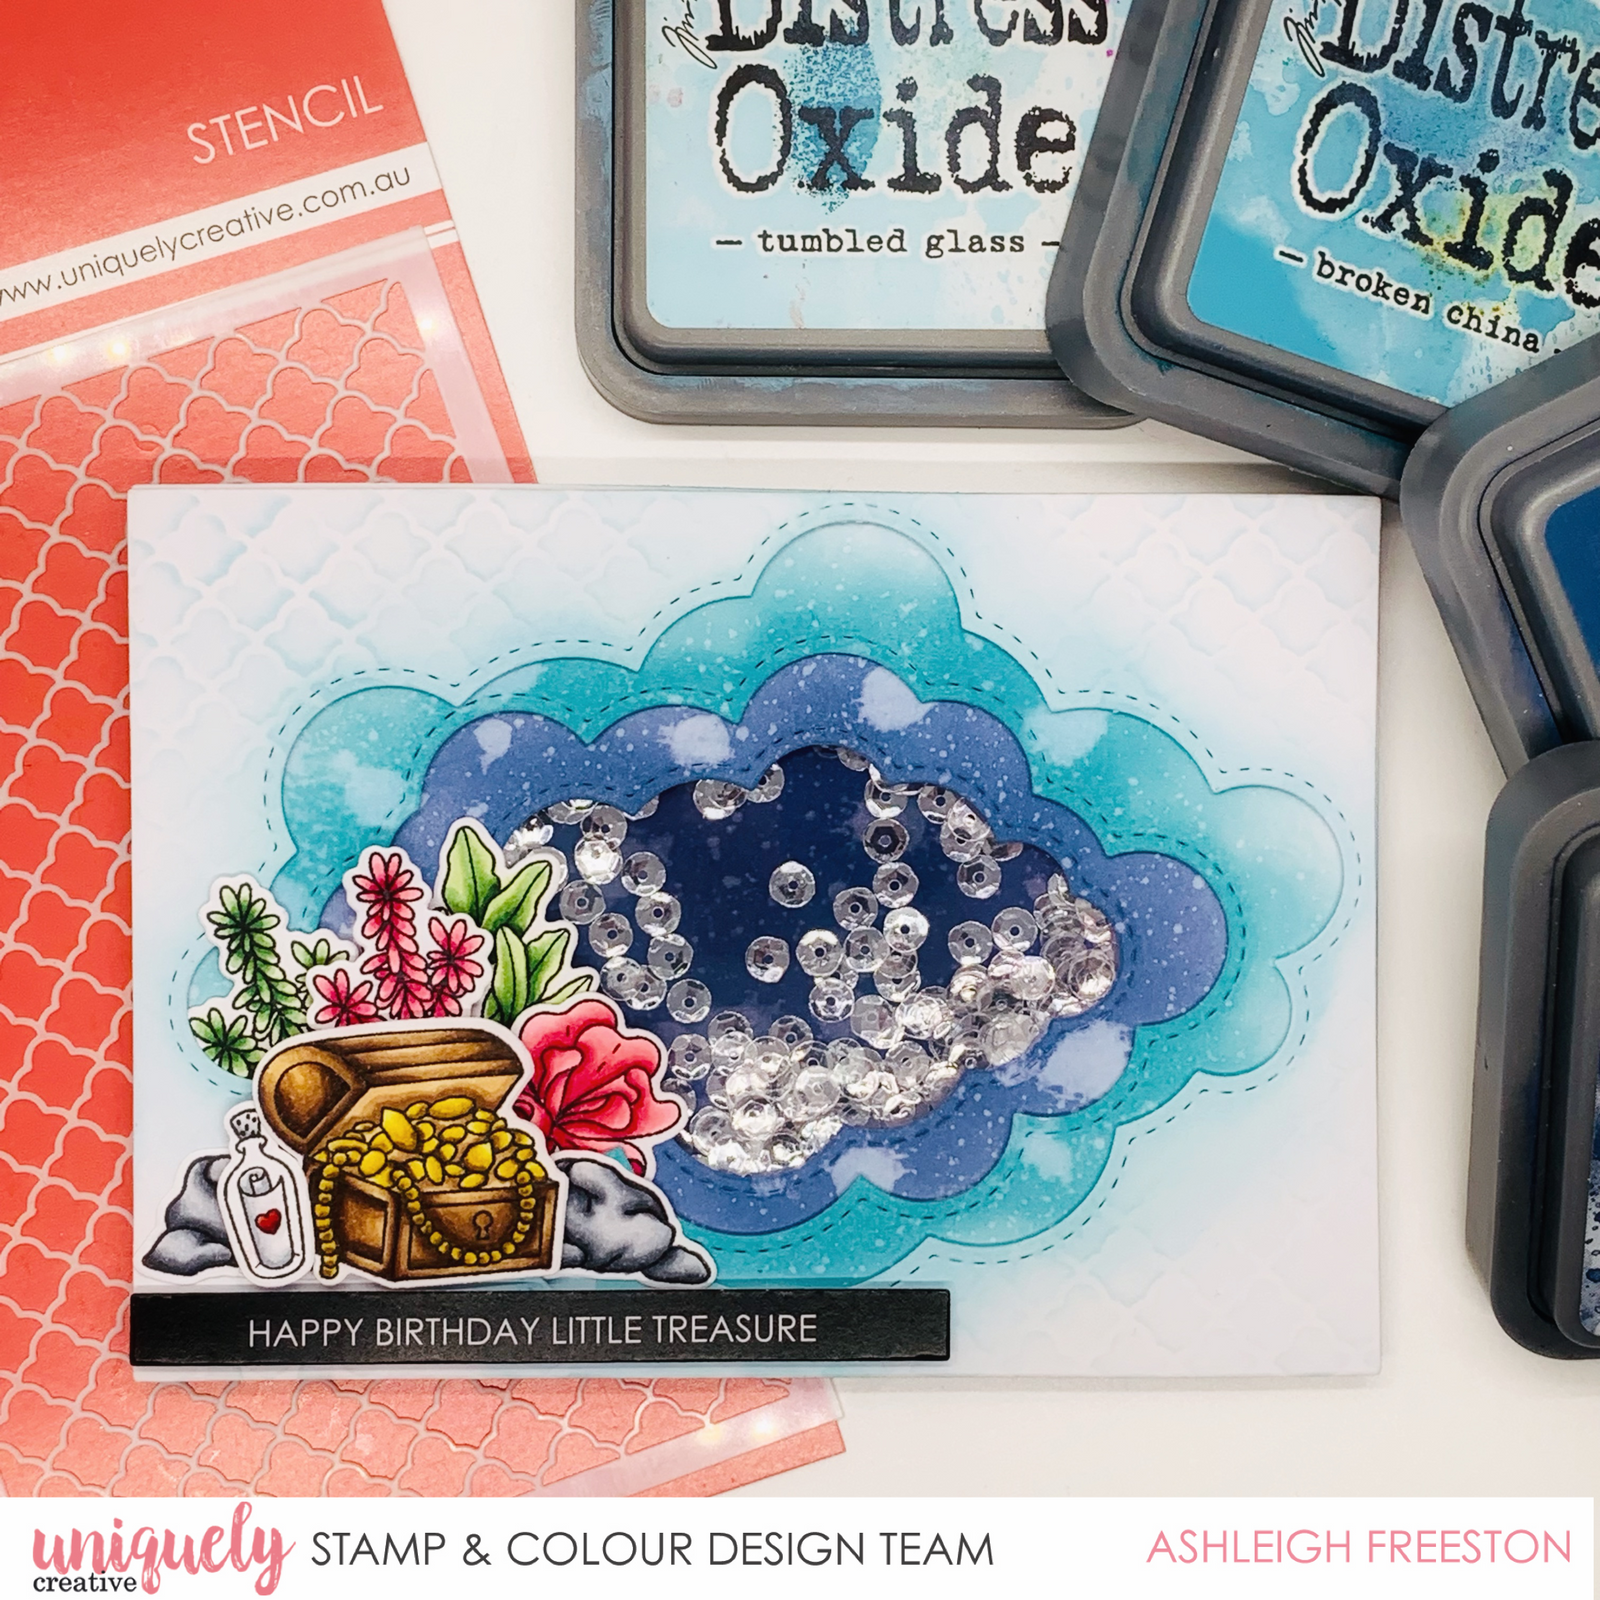
UC1845 Under the Sea Stamp Set, UCD1996 Under the Sea Die, UC1846 Sea Treasures Stamp Set, UCD1997 Sea Treasures Die, UCD1999 Scene Builder #1 Die, Cut-a-Part Essentials #5 Die, Trellis Stencil, Ice Sequins, Rectangle Cards & Envelopes, Uniquely Creative Blending Brush, Foam Mounts
Other Products Used:
Smooth White Cardstock, Distress Oxide: Tumbled Glass, Broken China, Faded Jeans & Chipped Sapphire, Water Spray Bottle, Acetate, Adhesives,
Copic Colours:
Treasure Chest – E21, E23, E25, E27, E29 (wood); Y11, Y15, Y25, E27 (gold)
Rocks – C1, C2, C4, C5, C7
Bottle – C00, C1, C2; R24, R27, R29, R59
Pink Foliage – RV21, RV23, RV25, RV29
Green Foliage – G20, G21, G24, G28
Instructions:
1. Die cut the Scene Builder #1 Die from 3 pieces of white cardstock (one cloud shape of each size) with the background piece. Cut 1 extra white rectangle for your back piece.
2. On your piece with the largest cut-out, use blending brush with Tumbled Glass Distress Oxide, working from the centre outwards. Ink through Trellis Stencil for some added interest.

3. On next size down, ink blend with Broken China Distress Oxide, working your way out. Splatter with water and remove excess ink.

4. Repeat step above with Faded Jeans Distress Oxide.

5. On final white rectangle (solid piece), repeat step with Chipped Sapphire Distress Oxide.
6 .Layer up your pieces and adhere using thin foam mounts.
7. Create a shaker portion by adhering acetate to the back of Faded Jeans panel. Fill shaker with Ice Sequins, before attaching the Chipped Sapphire backing piece. Adhere onto rectangle card base.
8. Colour images with colouring medium of your choice (I used Copic markers) and die cut using matching fussy cutting dies.


9. Die cut sentiment with Cut-a-Part Essentials #5 die. Layer up the images, ensuring the foliage is tucked inside some of the background layers to create dimension. Use a combination of foam mounts and double sided tape.