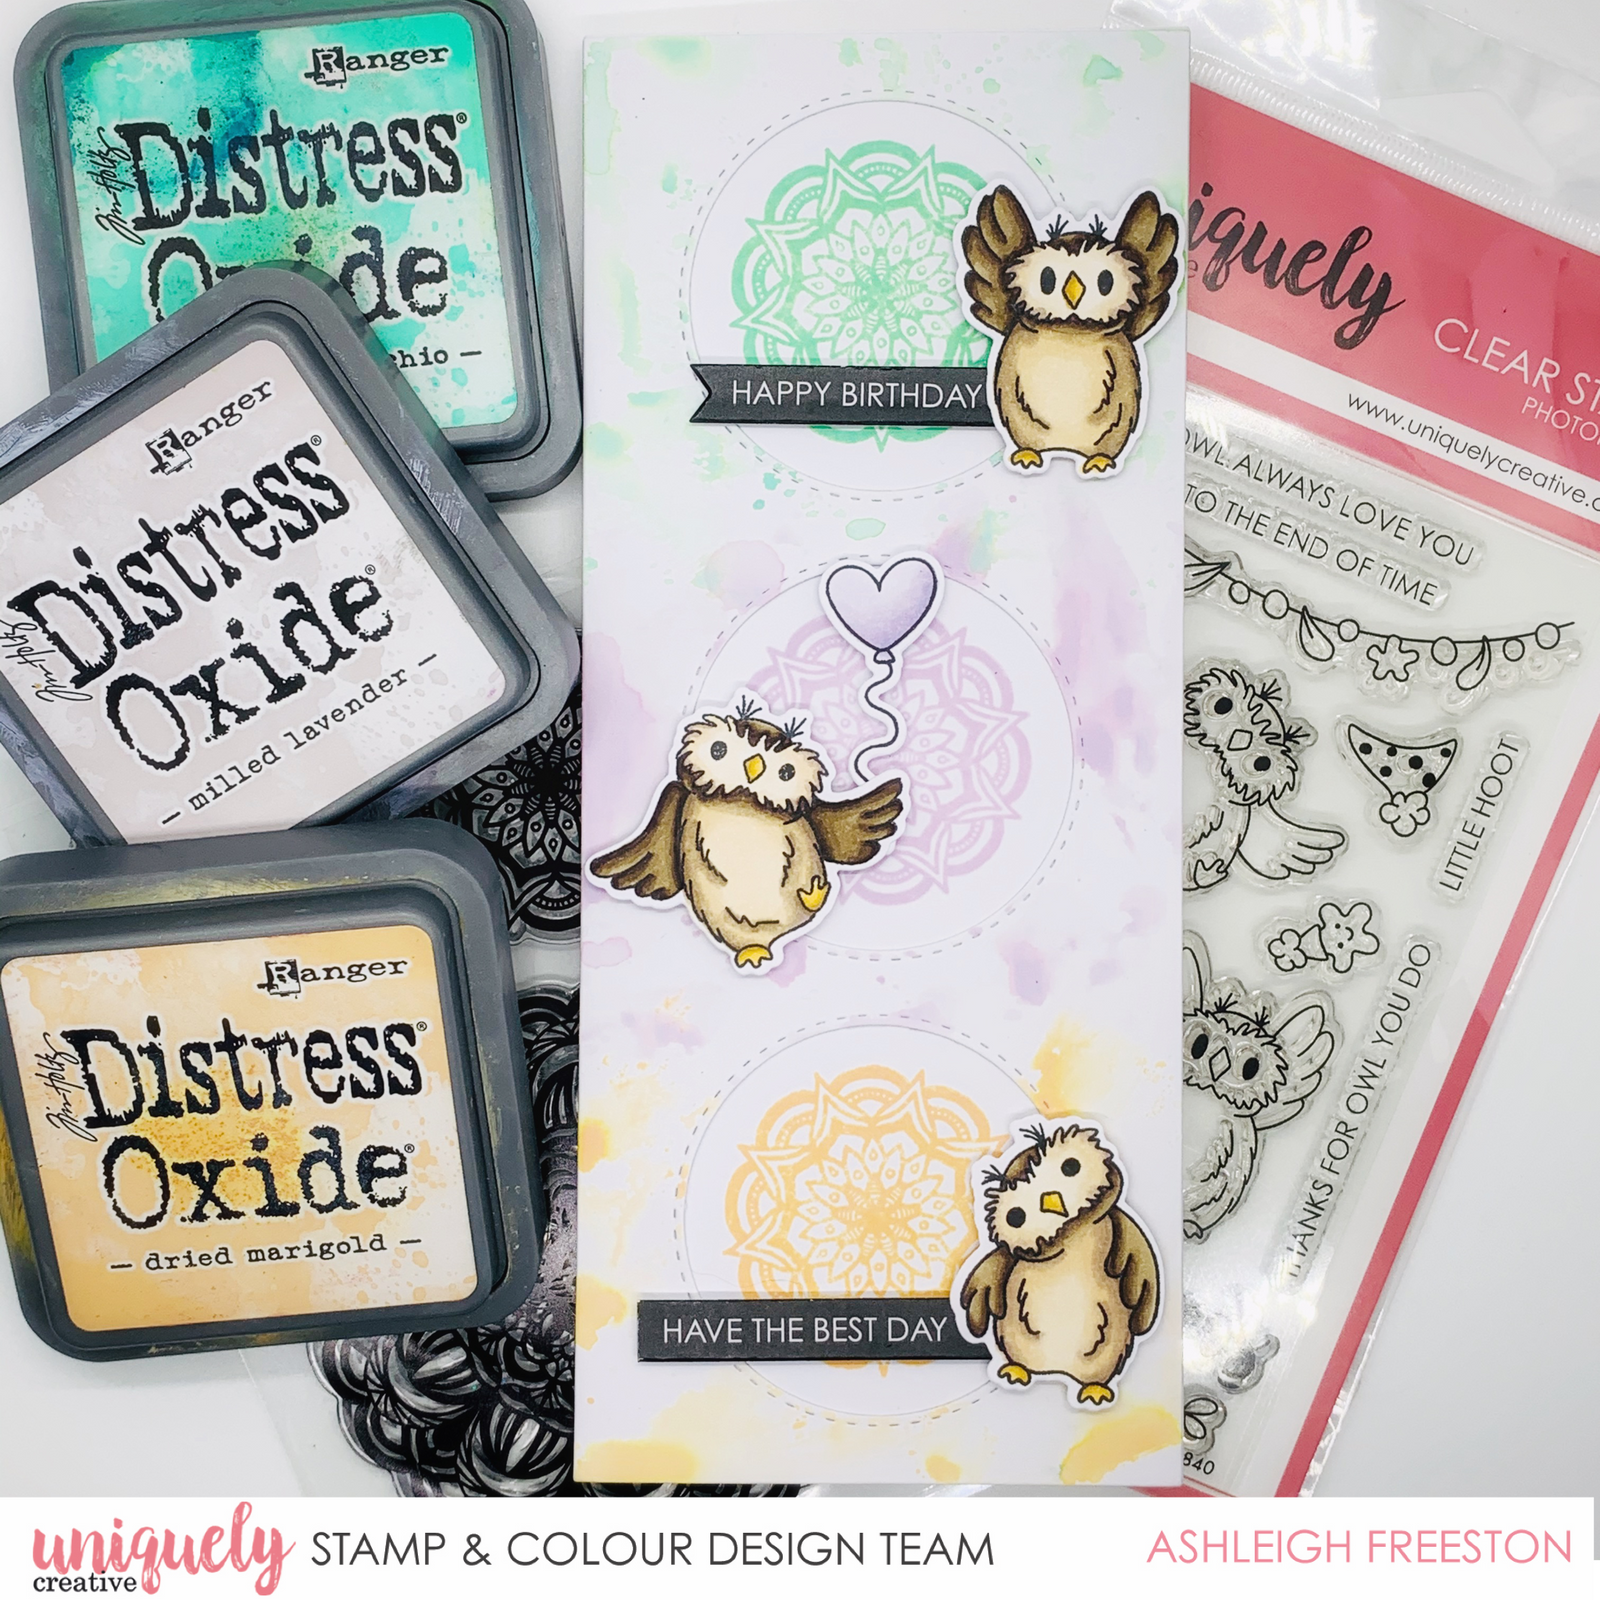
Happy Birthday Slimline - Ashleigh Freeston

Card Size:
8.8cm x 21cm – UC Slimline Card
Uniquely Creative Products Used:
UC1841 Owl Family Stamp, UCD1982 Owl Family Die, UC1840 Little Hoot Stamp, UCD1981 Little Hoot Die, Owl Family Cut-a-Part Sheet, UCD1967 Slim 3 Circle Window Die, UCD1972 Slim Stitched Nesting Rectangle Die, UC1720 Doily/Mandala Stamp, Cut-a-Part Essentials #4 Die, Slimline Card & Envelopes
Other Products Used:
Smooth White Cardstock, Distress Oxide: Cracked Pistachio, Milled Lavender, Dried Marigold, Stamp Platform, Acetate Sheet, Water Spray Bottle, Adhesives
Copic Colours:
Owl - E79, E47, E44, E43 (outer); E71, E30, E50 (face); E44, E71, E43, E30, E50 (inner); E71, YR23, YR21 (beak/feet)
Balloon – BV01, BV00, BV000, BV0000
Instructions:
1. Die cut largest Slim Stitched Nesting Rectangle Die from white cardstock. Die cut Slim 3 Circle Window Die from white cardstock.
2. Line up both pieces on top of each other and align in stamp press. Position small doily stamp in middle of the top circle and stamp with Cracked Pistachio Distress Oxide. Repeat stamp until you have a good impression.
3. Repeat stamping with centre and bottom circles, with Milled Lavender and Dried Marigold Distress Oxide respectively.

4. Take 3 Circle Window piece of cardstock and smoosh Dried Marigold Distress Oxide onto acetate sheet. Spritz with water and turn over and press onto background piece, focussing the colour on the bottom third.
5. Repeat with Milled Lavender and Cracked Pistachio Distress Oxide.

6. Adhere 3 Circle Window background piece onto Stitched Nesting Rectangle, and then onto a Slimline card base.
7. Stamp Owls and Balloon and colour with the colouring medium of your choice (I used Copic Markers). Die cut with matching fussy cutting dies.

8. Die cut the Cut-a-Part sheet with the Cut-a-Part Essentials #4 Die and adhere chosen sentiments to card with foam mounts. Complete the card by adhering the Owl images with foam mounts.
