Happy Birthday Wishes - Natalie Elphinstone
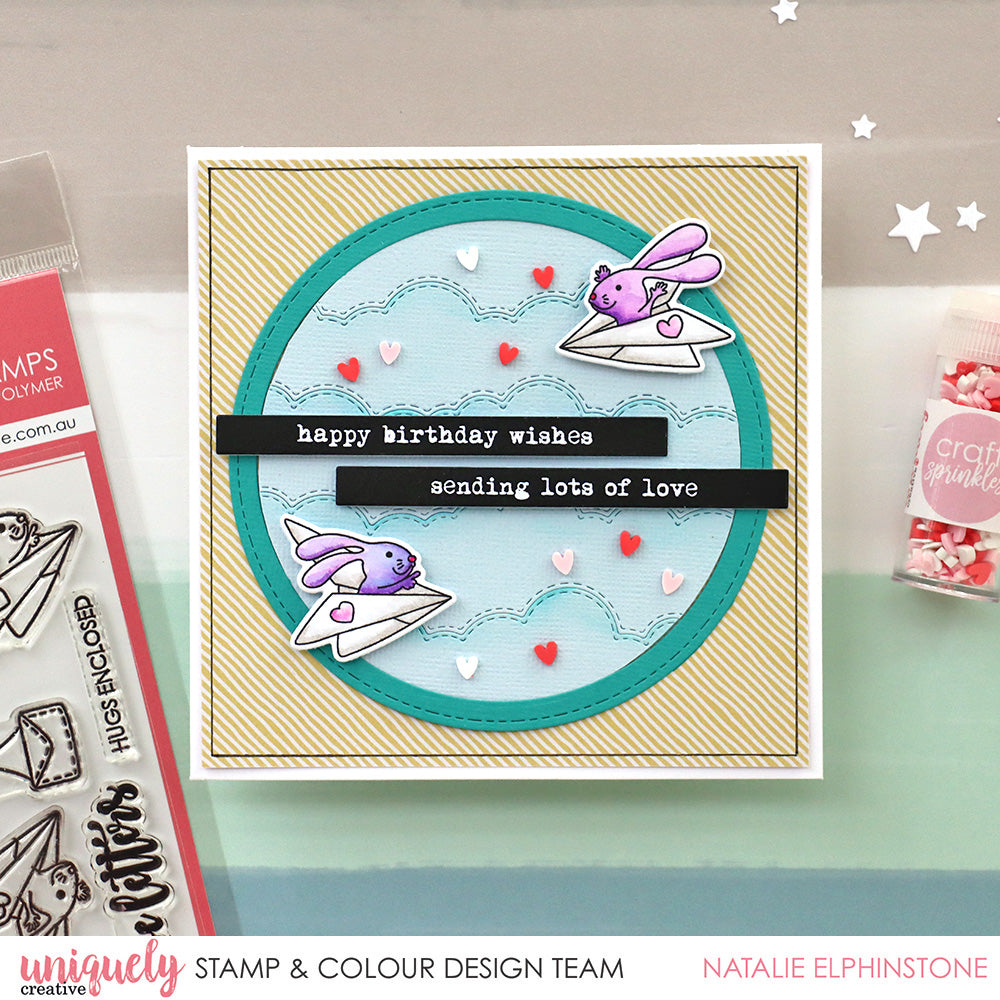

Card Size: Uniquely Creative 13.5 x 13.5cm square card
Uniquely Creative Products Used
Love Letters Stamp Set, Love Letters Dies, Stitched Nesting Circles Dies, Stitched Cloud Borders Dies, Love Letters Cut-a-Part Sheet, Valentines Hearts Craft Sprinkles, Watercolour Paper, UNIQOLOUR Markers, Uniquely Creative Blending Brush, Foam Mounts - Squares and Strips, Love Letters Patterned Paper, Watercolour Cardstock
Other Products Used
Blue Cardstock, Teal Cardstock, Blue Ink, Black Marker, Black Staz On Ink
Colours Used
UNIQOLOUR Markers
Instructions
1. Take the biggest 2 dies from the Stitched Nesting Circles dies, and fit them inside one another. Cut them both out from teal cardstock to create the outside border of the centrepiece. Don't throw away the middle piece, because this will be used too! Cover this piece in some kind of adhesive such as double-sided tape.

2. Take a large rectangle of light blue cardstock (high enough to be taller than the middle circle) and cut a series of Stitched Cloud Borders along it. It makes it easier if you don’t cut them into strips, so position the die slightly in from the edge.
3. Gently lift each strip and add some shading to the edges with a blending brush and some blue ink.

4. Adhere the borders over the top of the adhesive circle and trim around the edges. The border will fit over the top perfectly, and now you’ve created the centrepiece.
5. Cut a piece of yellow patterned paper from the Love Letters Kit slightly smaller than the Square Card base and adhere. Adhere the centrepiece in the middle of the card. Draw a thin black line around the edge of the yellow patterned paper for a little extra detail.

6. Stamp and colour the two paper-plane bunnies with black Staz On ink and watercolour with UNIQOLOUR Markers. Die cut the images.
7. Adhere the bunny images and two sentiment strips with foam tape. Scatter some Valentines Hearts Craft Sprinkles for some added detail to complete the card.

