Happy Days Tutorial - Stephanie Donnini

Uniquely Creative Products Used:
UC1854 Enjoy The Fun Stamp Set, UCD2026 Enjoy The Fun Die, UCMM1751 Scene Builder Clouds & Grass Stencil, UCMM1752 Scene Builder Nature Elements Stencil, UCMM1753 Scene Builder Trees Stencil, UCD1958 Cut-A-Part Essentials #5 Die, UCD1985 Cut-A-Part Essentials #6 Die, UCD2004 Scalloped Nesting Circle Die, Foam Squares And Strips.
Other Products Used:
Smooth White Cardstock, Stamping Platform, Die-Cutting Machine, Score Board, Glue, Glossy Accents, White Gel Pen, Blending Inks, Blending Brush, Black Amalgam Ink.
Copic markers: N0, N1, N3, N5, E27, E15, E11, BG49, BG45, BG11, Y15, Y21, YR68, RV25, RV23, RV21
Instructions:
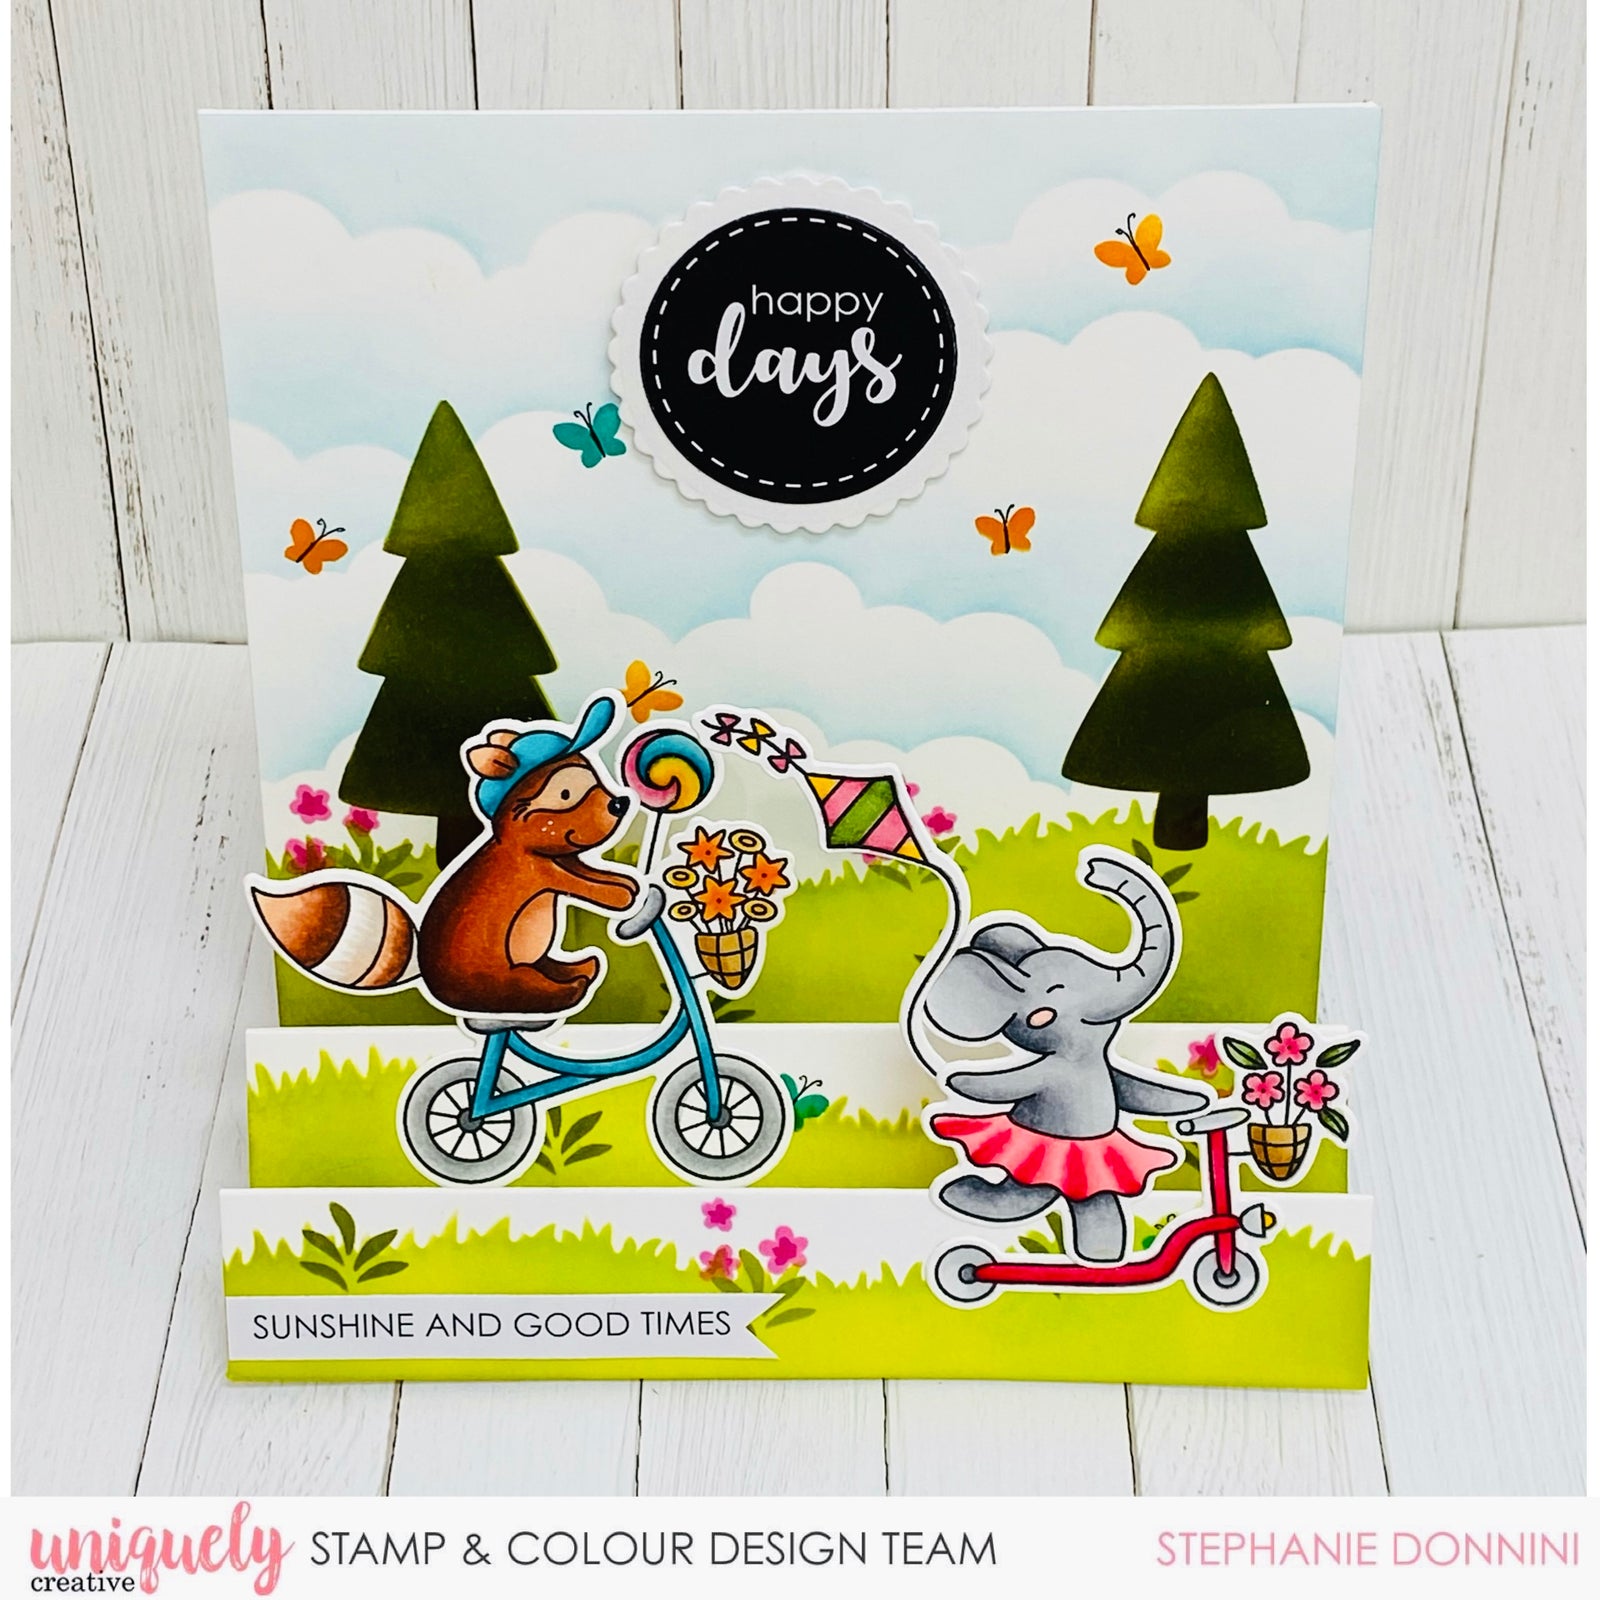
1. Take a piece of 24cm x13cm smooth white card stock. Using a score board score the card at 2.5cm, 5cm, 8cm and 11cm. Fold it accordion style as pictured below and reinforce the folds with a bone folder.

2. To create the background, use the scene builder clouds & grass stencil. Start off with the grass and add it to the fronts of each of the steps. Use a combination of light and dark green ink to add some dimension. Clean off your stencil and add the clouds on the largest panel.

3. Keep creating the scene using the nature elements and the trees stencil. Stephanie added colourful butterflies, flowers, some foliage, plus two trees to frame the background. She also added some black pen detail to the butterfly’s body and antennas.

4. Stamp ‘Enjoy The Fun’ images on white blending card using copic friendly black ink. Colour your images with copic markers, cut out using the co-ordinating dies. Attach the animals to their scooter and bike with some glue.

5. Adhere the stencilled panel to a square card base 13x13cm. Glue the animals to front steps creating a fun dimensional card.

6. Using the coordinating dies, choose a sentiment from the cut-apart sheets. Adhere to the card.


