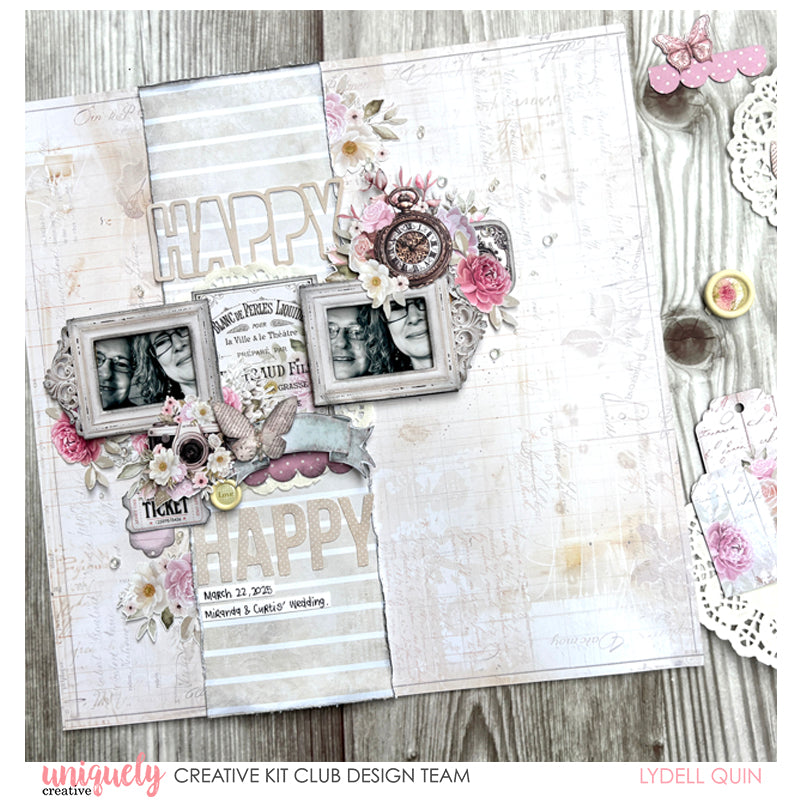
HAPPY LAYOUT TUTORIAL - LYDELL QUIN

To recreate this sweet layout created by Design Team member Lydell Quin you can follow the steps below:
Uniquely Creative Products Used:
· UCP2927 12x12 Collection Pack
· UCP2929 Dear Diary Creative Cuts
· UCE2100 Dear Diary Wooden Buttons
· UCCS194 Cut-a-part Sheet
· UCE1807 Paper Doilies
· UCE2033 Pearl Tape Chantilly
· Foam Mounts
Other Products Used:
· Black Soot Distress Ink
Photo Size: 2 x 3 landscape
Step 1:
Fussy cut elements from paper UCP2925 Remember and set aside pieces you’d like to include in your layout - See main image for ideas.
Step 2:
Use Paper UCP2924 Hoping (Side B) as the background sheet and UCP2926 The Story (Side B) cut to 4” x 12”. Ink Edges and distress if desired. Adhere in place just to the left of centre. - See image 1
Step 3:
Gather the two frames and the title words ‘Happy’ from UCP2929 Creative Cuts. Lay them on your page for correct placement - See image 1
Step 4:
Trim Pieces of box board (or use foam tape) to add dimension to the frame pieces - See image 2
Step 5:
Place a doily in the centre and then an inked fussy cut element, angle the frames slightly. Layer some floral pieces under the left right sides of the frames. You can adhere these down when you are happy with their position– See image 3
Step 6:
TIP - Cut elements that will be layered, in halves to extend the use of your items – See image 4
Step 7:
Create gatherings of layered embellishments using any fussy cut pieces and Creative Cuts. Layer items together and add foam tape here and there for dimension. Add in UCE2100 Wooden Buttons, creating texture and dimension– See image 5
Step 8:
Trim photos to fit behind your frames and glue them in place. Adhere the frames in place and add in any elements around your photos. (You can layer on top or tuck things in behind. - See image 6
Step 9:
Add on journaling and any of the tiny pearls (ie -the body of the butterfly) Cut pearls apart from UCE2033 Pearl Tape Chantilly to finish the page. - See main image for possible placement