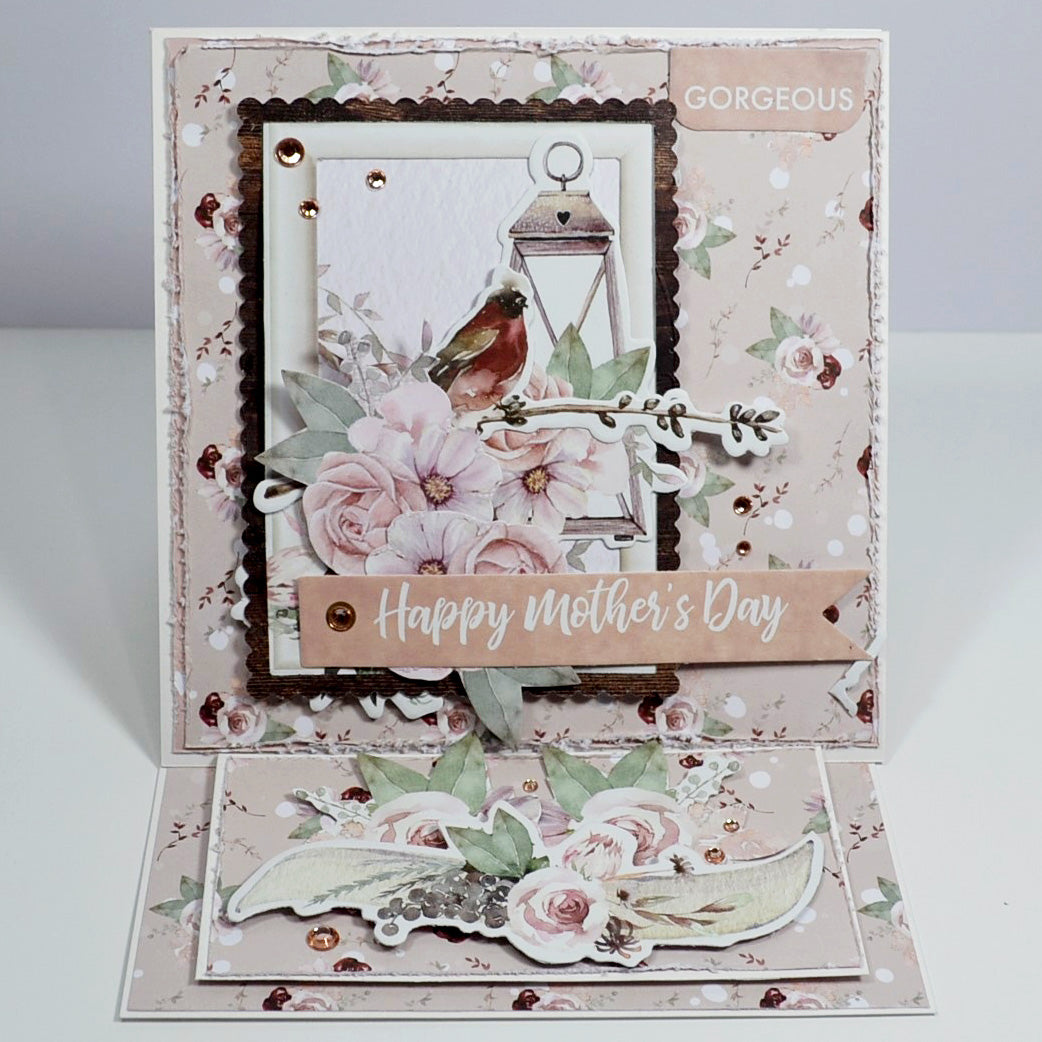
Happy Mother's Day - Candy Chelepy

Uniquely Creative Products Used
UCP2051 - Jasper Bloom Paper, UCP2056 Let it Snow Paper, UCP2055 Wreath Paper, UCP2059 Winter Rose Creative Cuts, UCD1907 Frames Die, UCE175 Champagne Rhinestones, White cardstock
Other Products Used
Trimmer, Scissors, Double-sided Tape, Foam Tape, Glue, Die-cutting Machine, Edge Distresser
Instructions
1. To create the easel card, cut a piece of the white cardstock at 6x12 inches. Fold this piece in half, then fold the bottom to the top of the card. With the other 6x12 piece cut at 6 inches so you will have a 6x6 inch square. With the other square piece, cut at 2 ½ x 5 inches for the bottom part of the card.

2. Using the 'Let it Snow' paper cut a piece that measures 5 7/8x 12 inches. Cut a 5 7/8 inch square from that piece. From the leftover scrap, cut a 5 ¾ inch square. Distress around the edges of both papers.

3. Cut a 4 inch piece from the top of the 'Wreath' paper and place the larger rectangle frames die and cut out.

4. From the 'Jasper Bloom' paper, fussy cut two of the smaller flowers with leaves. From the Winter Rose Creative Cuts, find the rectangle frame, Happy Mothers Day banner, large lantern, gorgeous tag and bird on the branch.

5. To assemble the card, tape the 5 7/8 inch pattern paper to the 6x6 inch white card then add the 5 ¾ inch piece on top. Using the inside piece of the scallop die, glue to the back of the rectangle creative cut. Use the brown side of the scallop frame and glue to the top of the inner frame piece. Foam mount and adhere to the card.

6. Add the 6x6 inch piece to the card base. Cut another 5 7/8inch square from the 'Let it Snow' paper and tape to the inside bottom of the card. From the same pattern paper, cut a piece at 2 3/8 x 4 7/8 inches. Distress around the edge and tape to the top of the white 2 ½ x 5inch white cardstock. Place foam tape to the bottom of the card and add a couple more flower clusters from the Creative Cuts on top of this. Add the rhinestones to complete the card.
