Hope Your Day Is Amazing Tutorial - Ali Farmer

Uniquely Creative Products Used:
- Aussie Heroes Die Set
- Heromobiles Stamp Set
- Heromobiles Die Set
- Royal Cardstock
-
Under The Sea Mini Cut Apart Sheets
- Essentials Die #6
-
White cardbase
Other Products Used:
-
Polkadots Embossing Folder
- Sandpaper or nailfile
-
Pear Blossom Press Ez-lights
- Vellum
- Copic Markers – C7, C5, C3, C1, C00, R89, R46, Y13, Y15, B29, B24, B12
- Foam Mounts 2mm
- Double Sided Tape
Instructions:
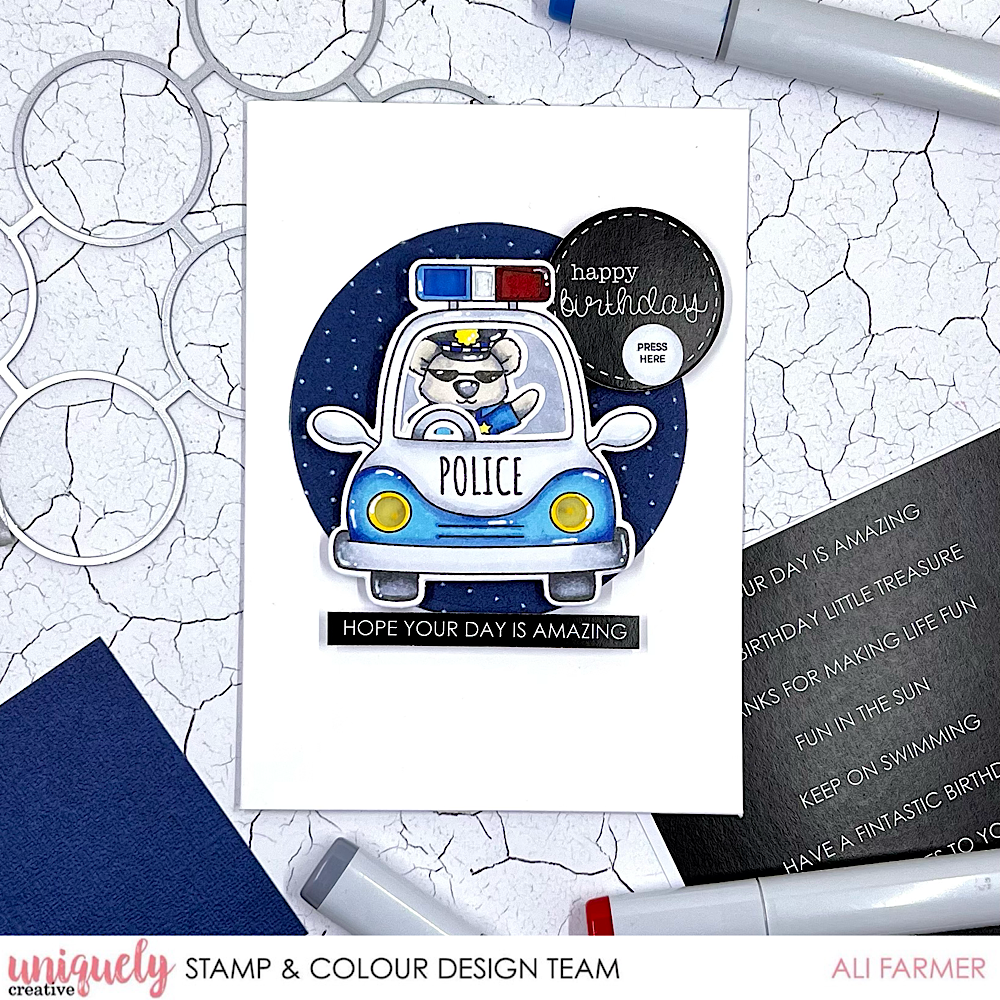
1. Use Polkadots Embossing Folder to emboss Royal Cardstock. Rub with sandpaper or nailfile. Die cut circle from this piece. Stamp images in Copic friendly ink on white cardstock. Die cut images.

2. Cut sections from lights on top of and front headlights of police car image with scalpel and circle punch. Cut small piece of vellum, colour with red/blue and yellow copic markers to fit/adhere behind lights at the top and headlights of car.

3. Colour and die cut all images. Place Policeman in car and make small background piece coloured with C3 copic to adhere behind policeman.

4. Cut Happy Birthday from cut apart sheet and adhere slightly behind car as shown.

5. Adhere Pear Blossom Press Ez-light battery section to back of Happy Birthday circle. Twist light wire to condense – secure with sections of double sided tape (leave backing on) and adhere behind lights at top and headlights using foam mounts pieces as shown.

6. You can place foil behind the light to add extra brightness.

7. Adhere car section with 2 layers of foam mount to the front of the Royal embossed circle. Add sentiment, cut into strip, from Cut apart sheet.

8. Adhere small circle with ‘press here’ stamped or written to front of Happy Birthday circle. Press to light up the Police lights!!