Joyful Christmas Wishes Tutorial - Siann Watts
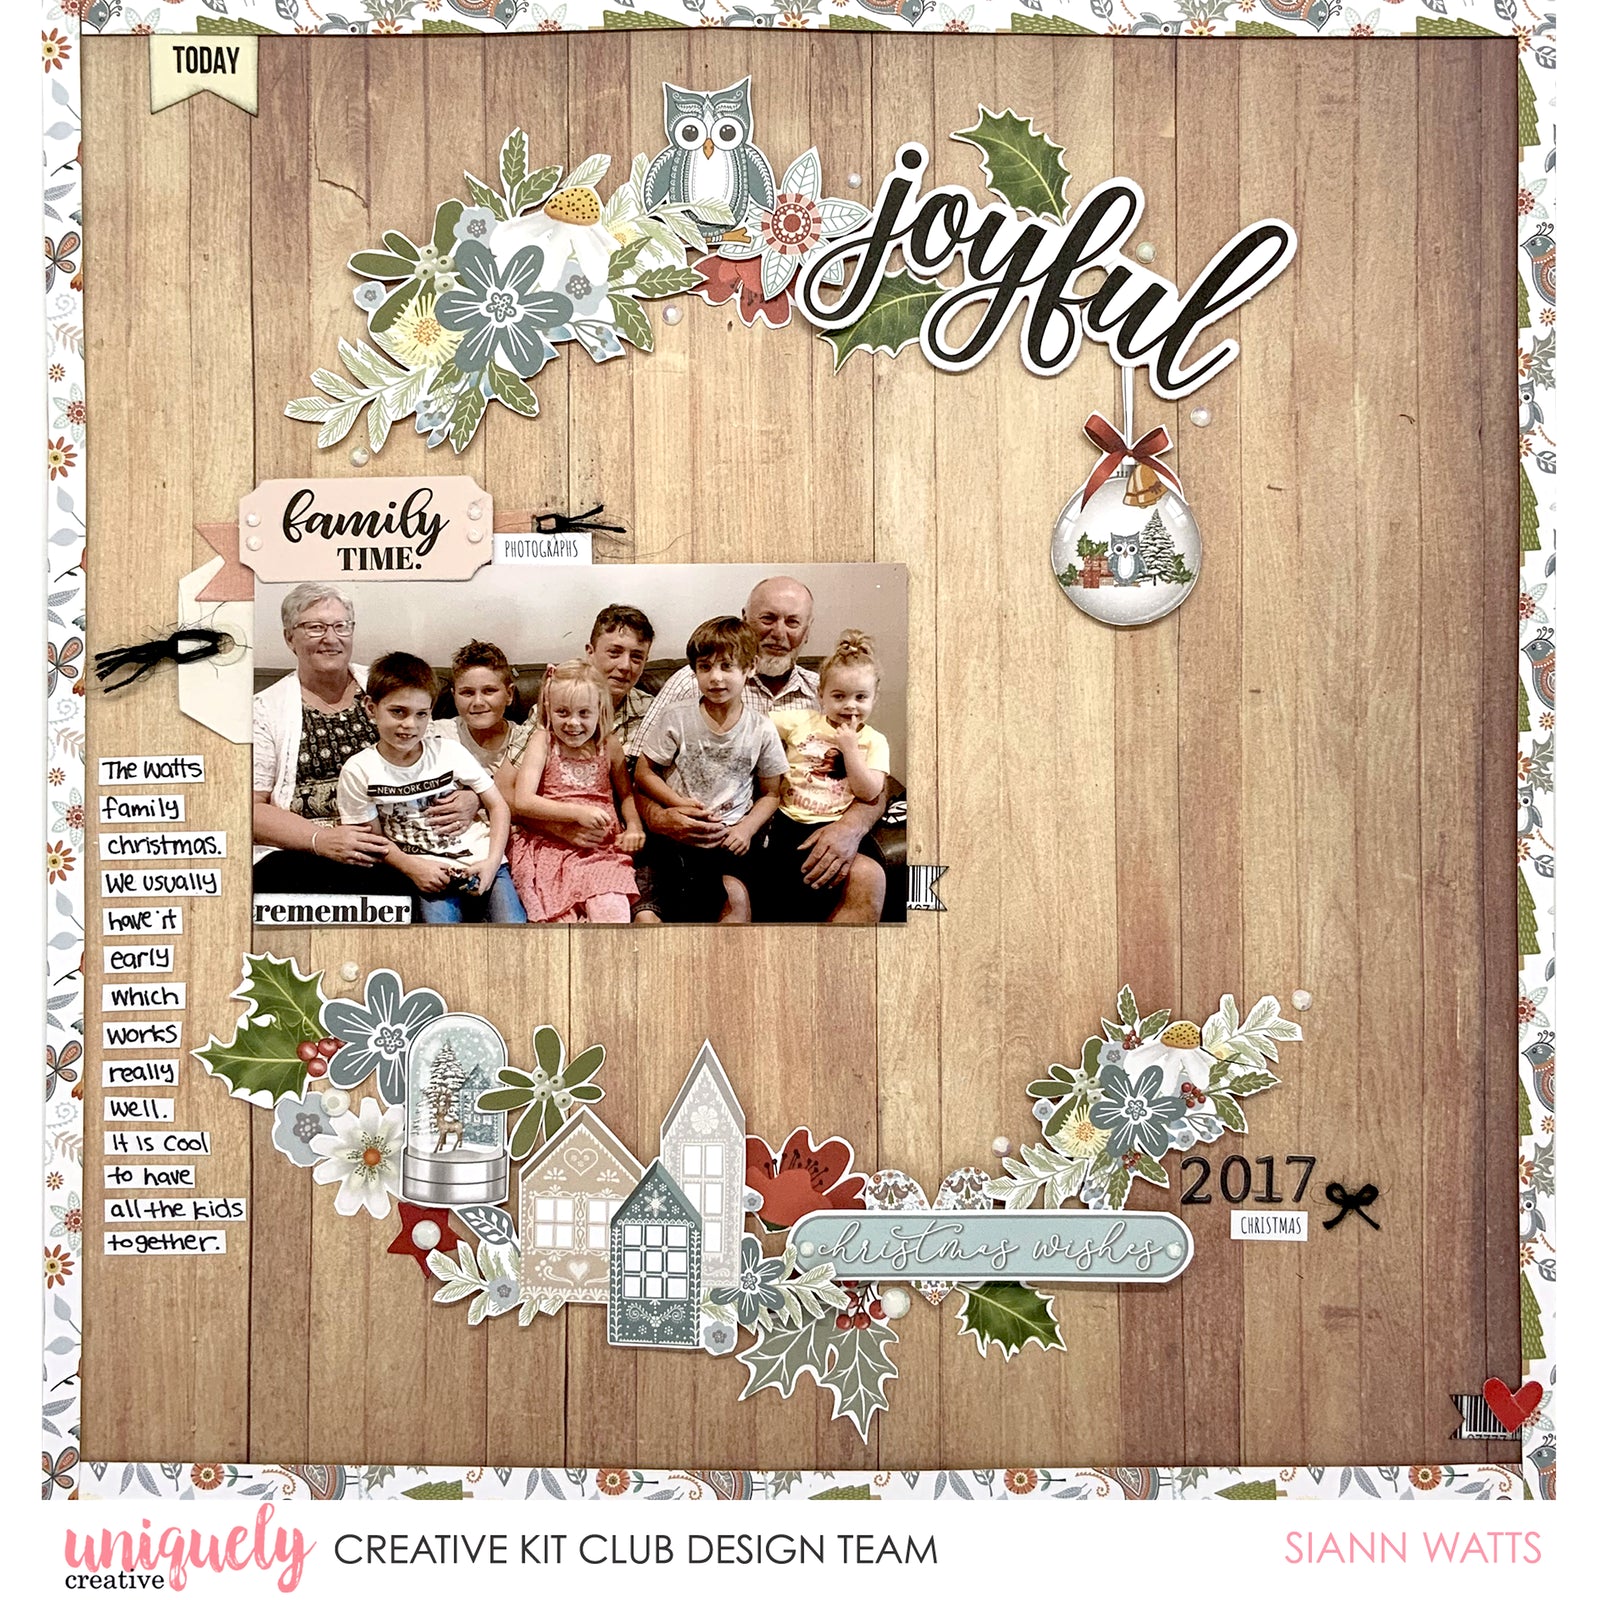

Photo Size: 130mm x 72mm
Uniquely Products Used:
- UCP2464 A December to Remember Collection
- UCP2459 Gift Wrapped
- UCP2457 Making Memories
- UCP2466 A December Creative Cuts
- Cut-a-part sheet
- Watercolour Cut-A-Part
- UCL1748 Christmas Countdown Laser Cut
- UCE1936 Puffy Alpha Black
- UCE1862 Black Twine
- UCE1724 Crystal Rhinestone
Other Products Used:
- Distress Ink
- Die machine
- Black Felt Tip pen
Instructions:
1. Use ‘Gift Wrapped’ paper as your layouts base. Using a template Trace ¾ of a large circle in the centre of the paper. Die cut the tags and other elements from the cut-a-part sheet, fussy cut elements from Gift Wrapped.
2. Tie black string to the tag and layer other elements around your photo. Cutting the barcode and ‘remember’ from the manufacture strip.

3. Collect elements from Creative cuts, Cut-a-part sheet and ‘gift wrapped’ paper and arrange on the upper portion of your circlular pencil line. Mount majority of elements with mounting tape, leaving some elements flat to show dimension. Slightly bend the text ‘joyful’ near the ‘u’ and the ‘o’ to get it a little circular.

4. Collect elements from Creative cuts, Cut-a-part sheet and ‘gift wrapped’ paper and arrange on the lower portion of your circular pencil line. Mount majority of elements with mounting tape, leaving some elements flat to show dimension.

5. Add scattered rhinestones.
6. Trim 1.5cm strips from ‘Making memories’ paper and mount with thin strips of carboard or mounting tape and glue around perimeter.

7. Cut thin strips from white manufacture strip and journal onto it with black felt pen, cut to varying lengths and glue down.
8. Add the year from the puffy alphas.