Living an Astsy Life - Maya Isaksson

Uniquely Creative Products Used
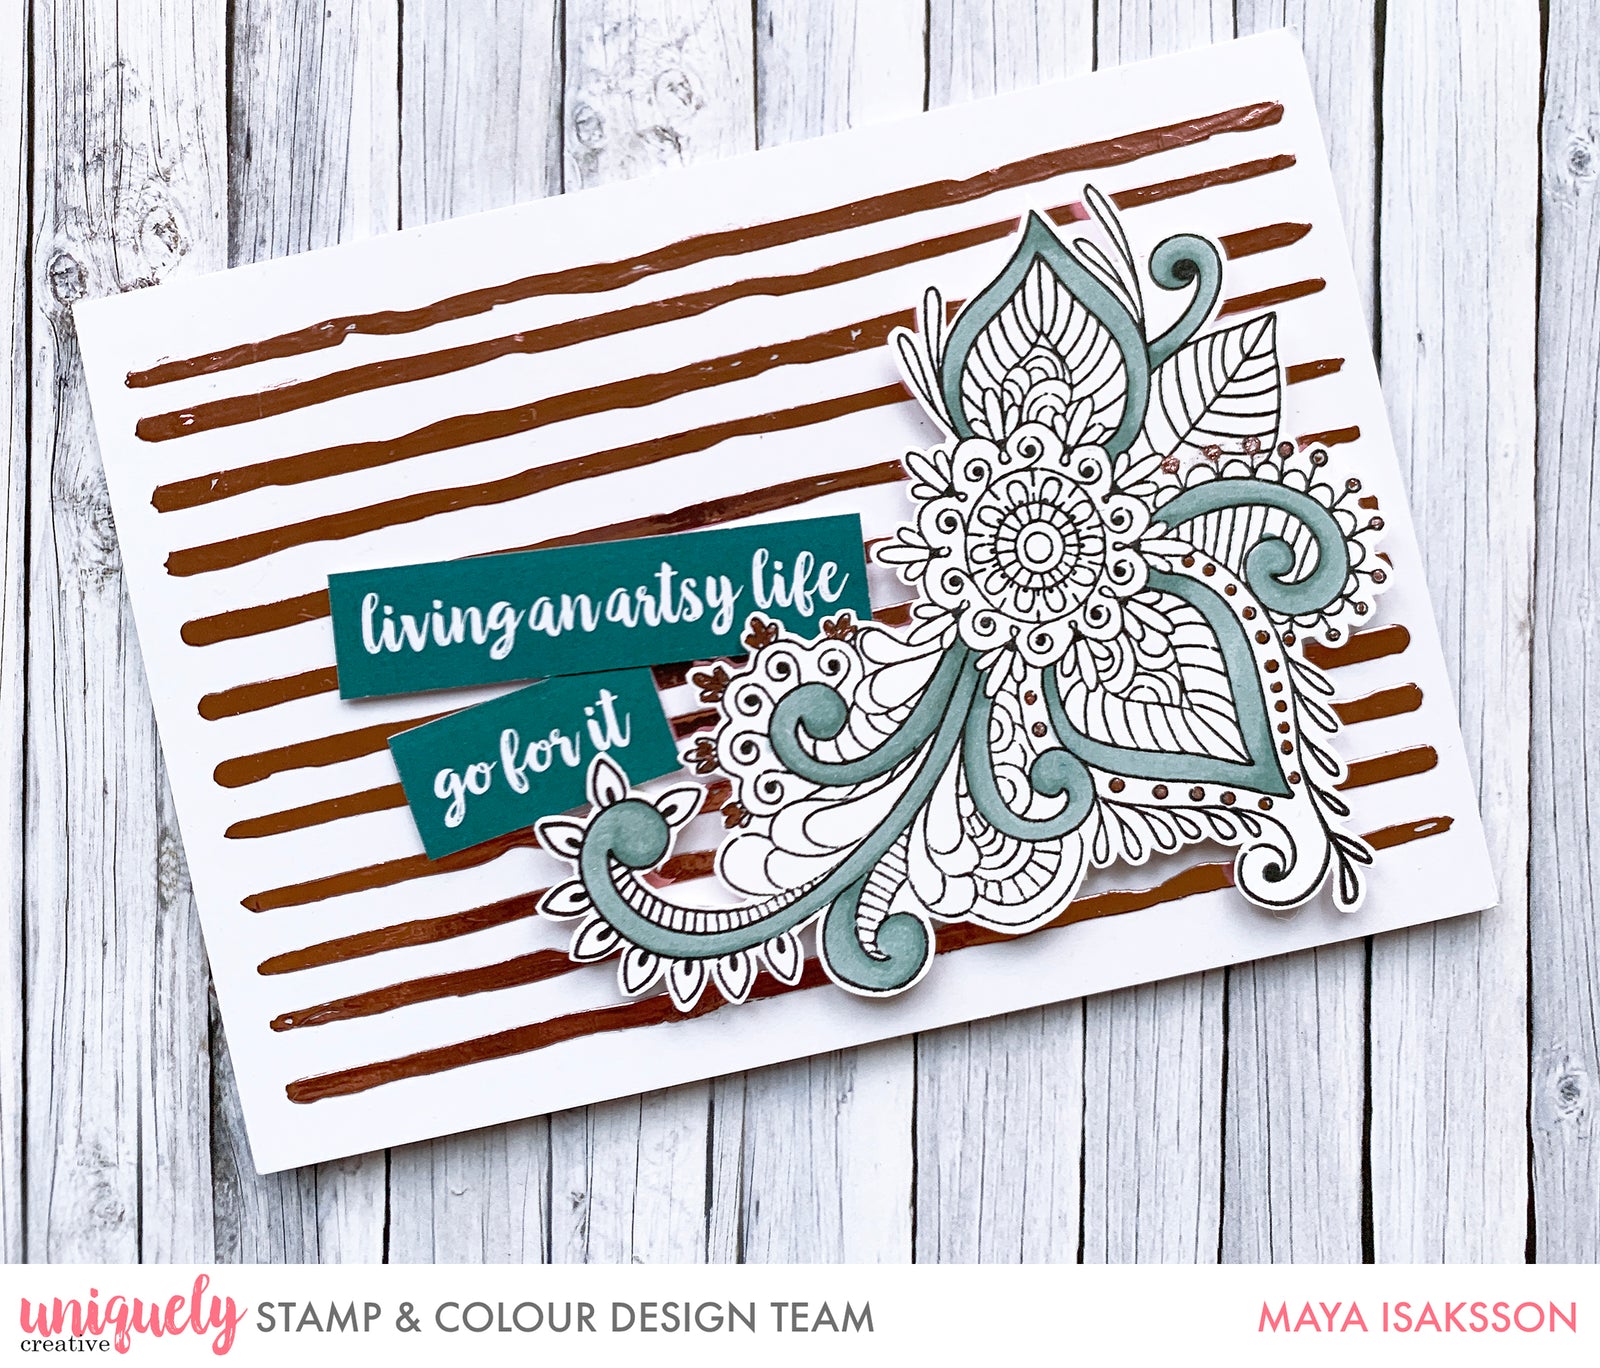
Arty Doodles stamp set, Arty Doodles stencil.
Other Products Used
Deco Foil Transfer Gel. WOW Fab Foil in Blush, laminator or Minc machine for foiling, Spectrum Noir Illustrators in VB1 and VB3, Spectrum Noir Clear Sparkle Pen, Memento Tuxido Black ink pad, glue pen.

Apply the transfer gel through the stencil and set aside to dry. The gel will go from white to clear when drying but to be sure you can set it to dry over night. Clean your stencil immediately after applying the gel to prevent a messy stencil, the gel dries pretty fast

While the gel is drying, stamp and colour your image. I used my alcohol markers so I stamped on Neenah cardstock with waterbased ink. I only used two markers to get shading and I left most of the image white for a fun effect.

I then fussy cut my image using regular scissors. I find that if I hold the scissors still and move the paper instead, I get the best results.

I decided the picture needed something extra so I added clear sparkle pen to the coloured parts

To tie in the stamped image with the background, I added some foil to the image too. You can do this by using a glue pen. This one dries sticky so I added dots where I wanted them, let the glue dry. I rubbed the foil on top of the glue using my finger and then peeled off the foil to reveal the shiny dots.

Last step is to adhere the image using 3d foam and then cut some texts from the cut-apart sheet that comes with the kit and add them as a sentiment. To finish the card I adhered the whole panel to a card base.

