LOVE YOU CARD TUTORIAL - STEPHANIE DONNINI

Uniquely Creative Products Used:
- UCP2738 Vintage Chronicles Collection Pack
- UCP2736 Vintage Chronicles Creative Cuts
- UCD2144 Slim Lacy Edge die
- UCD2143 Ornate Lace die
Other Products Used:
- Glue
- Foam tape
- White rectangle A6 card blank
- Trimmer
- Scissors
- Distress Ink- Speckled Egg
- Blending tool
- Edge Distressing tool
- White paper
Instructions:
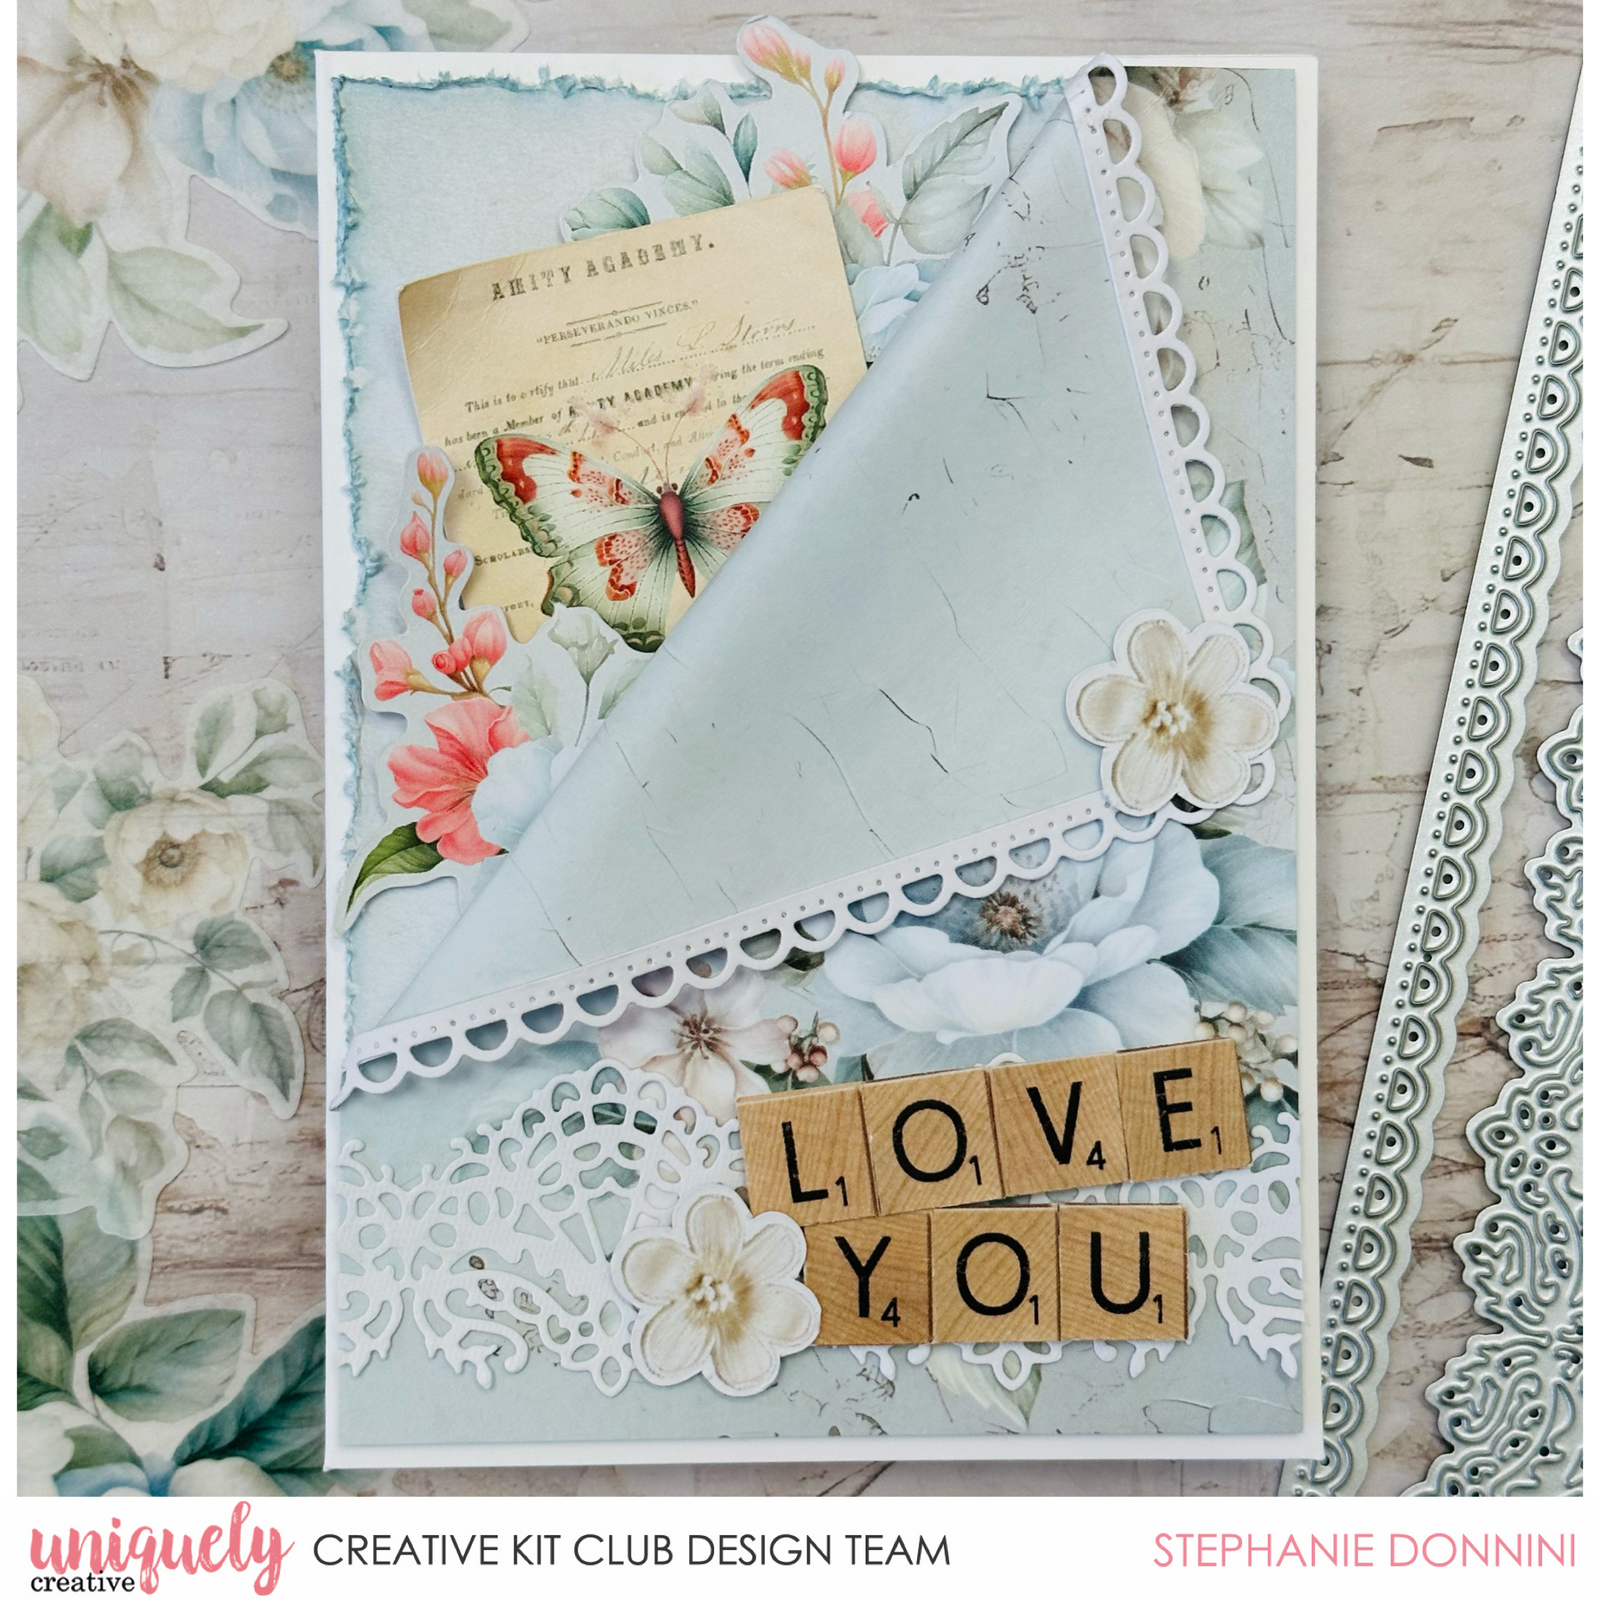
- Take two pieces of patterned paper from the Vintage Chronicles collection pack and cut out two rectangles to fit inside an A6 white card base. – See image 1.

2. Distress the top and left side of the base patterned paper with an edge distressing tool. Blend some ink over the distressed edges to add depth. Speckled egg Distress ink was used here. See image 2.
3. Die cut a strip of Ornate lace and a couple of Slim lacy edges from white lightweight cardstock. – See image 3.
4. Take your second piece of patterned paper and bring the top left-hand corner down to the right side. Adhere with foam tape. Attach Slim lace die cuts to the folded over edges. – See image 4.
5. Adhere the folded panel to the card base with foam tape. Glue a strip of ornate lace to the bottom of the card. – See image 5.
6. Insert various creative cuts in between the layers. Prop pieces up with foam mounts and curl the edges for added dimension. – See image 6.
7. Use the scrabble letters from the creative cuts to make the words Love You. Stick them together with foam tape. – See image 7.
8. Adhere the sentiment to the front of the card, along with a few more floral embellishments. – See image 8.