30 day change of mind returns available
30 day change of mind returns available
Add description, images, menus and links to your mega menu
A column with no settings can be used as a spacer
Link to your collections, sales and even external links
Add up to five columns
Add description, images, menus and links to your mega menu
A column with no settings can be used as a spacer
Link to your collections, sales and even external links
Add up to five columns
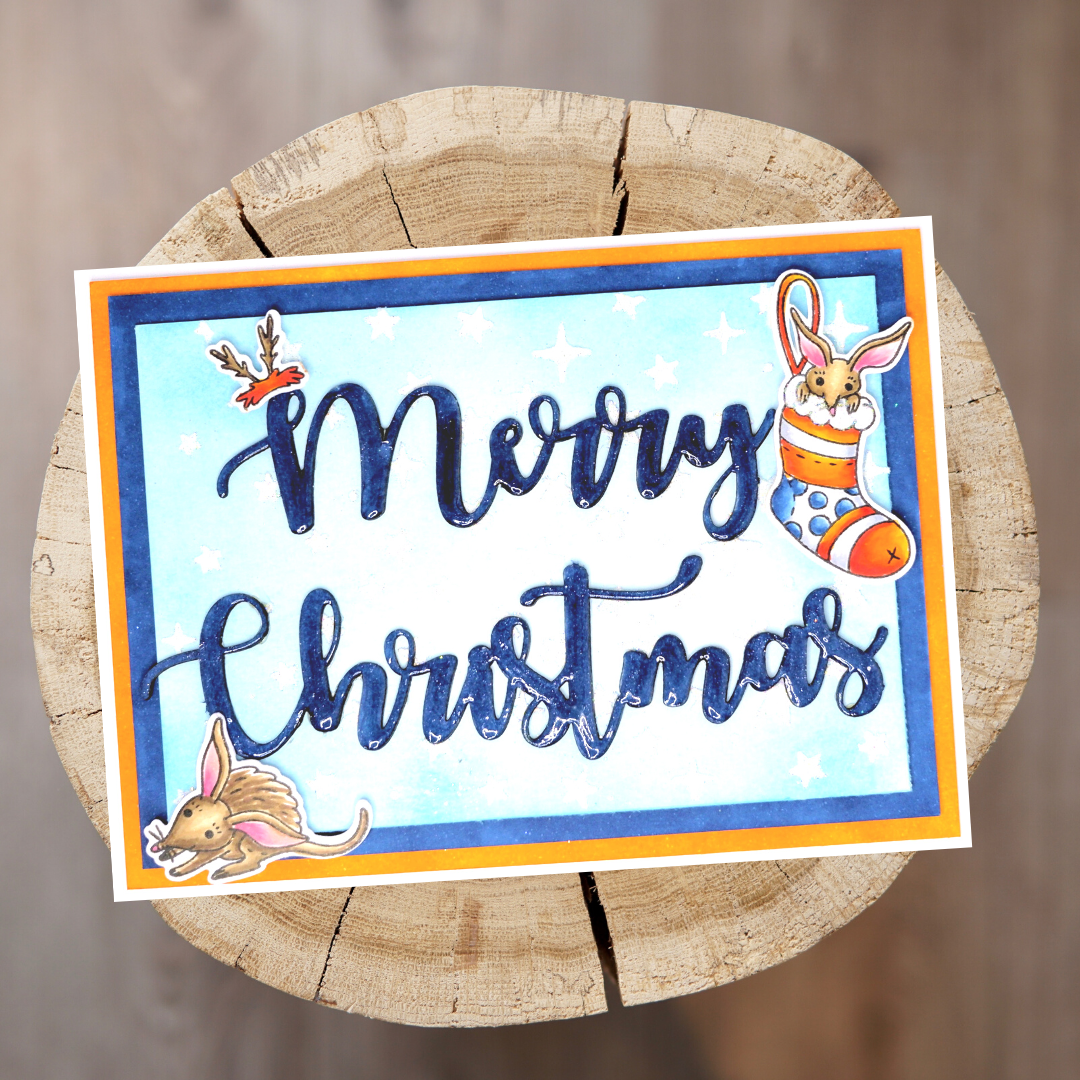
Merry Christmas - Jenny Dix
December 05, 2019

Card Size : 5 3/4'' x 4 1/4''
Uniquely Creative Products Used
Aussie Christmas Stamp Set, laser cut, stencil
Other Products Used
Trimmer, Copic friendly paper, texture paste, glitter, 3D tape, tape runner, light blue ink, Glossy Accents
Colours Used
Copic Markers:
Bilby – E41, E42, E43, E44, E49
Ears – R81, R83
Stocking, background papers – R08, YR07, Y17, B32, B34, B37, C01, C00
Instructions
1. Cut a white card base 5 3/4 x 8 ½ inches. White panel 5 ½ x 4", white panel 5 ¼ x 3 ¾" and white panel 5 x 3 ½". The white panel 5 ½ x 4" using Copic YR16 around the edge. Panel 5 ¼ x 3 ¾" using Copic B37 around the edge

2. Colour your bilbies and cut them out. Ink with light blue ink the smallest white panel. Then the stars, using the stencil and texture paste. While wet, sprinkle with glitter. Then using Copic B37 colour the laser cut and then colour it over with the glitter pen. I then covered the laser cut word with Glossy Accents to make it shine.

3. Layer all the panels and the bilbies with 3D tape. Glue down Merry Christmas and you have completed an Aussie Christmas card.
Leave a comment
Newsletter
Join our mailing list and never miss an update …
