30 day change of mind returns available
30 day change of mind returns available
Add description, images, menus and links to your mega menu
A column with no settings can be used as a spacer
Link to your collections, sales and even external links
Add up to five columns
Add description, images, menus and links to your mega menu
A column with no settings can be used as a spacer
Link to your collections, sales and even external links
Add up to five columns
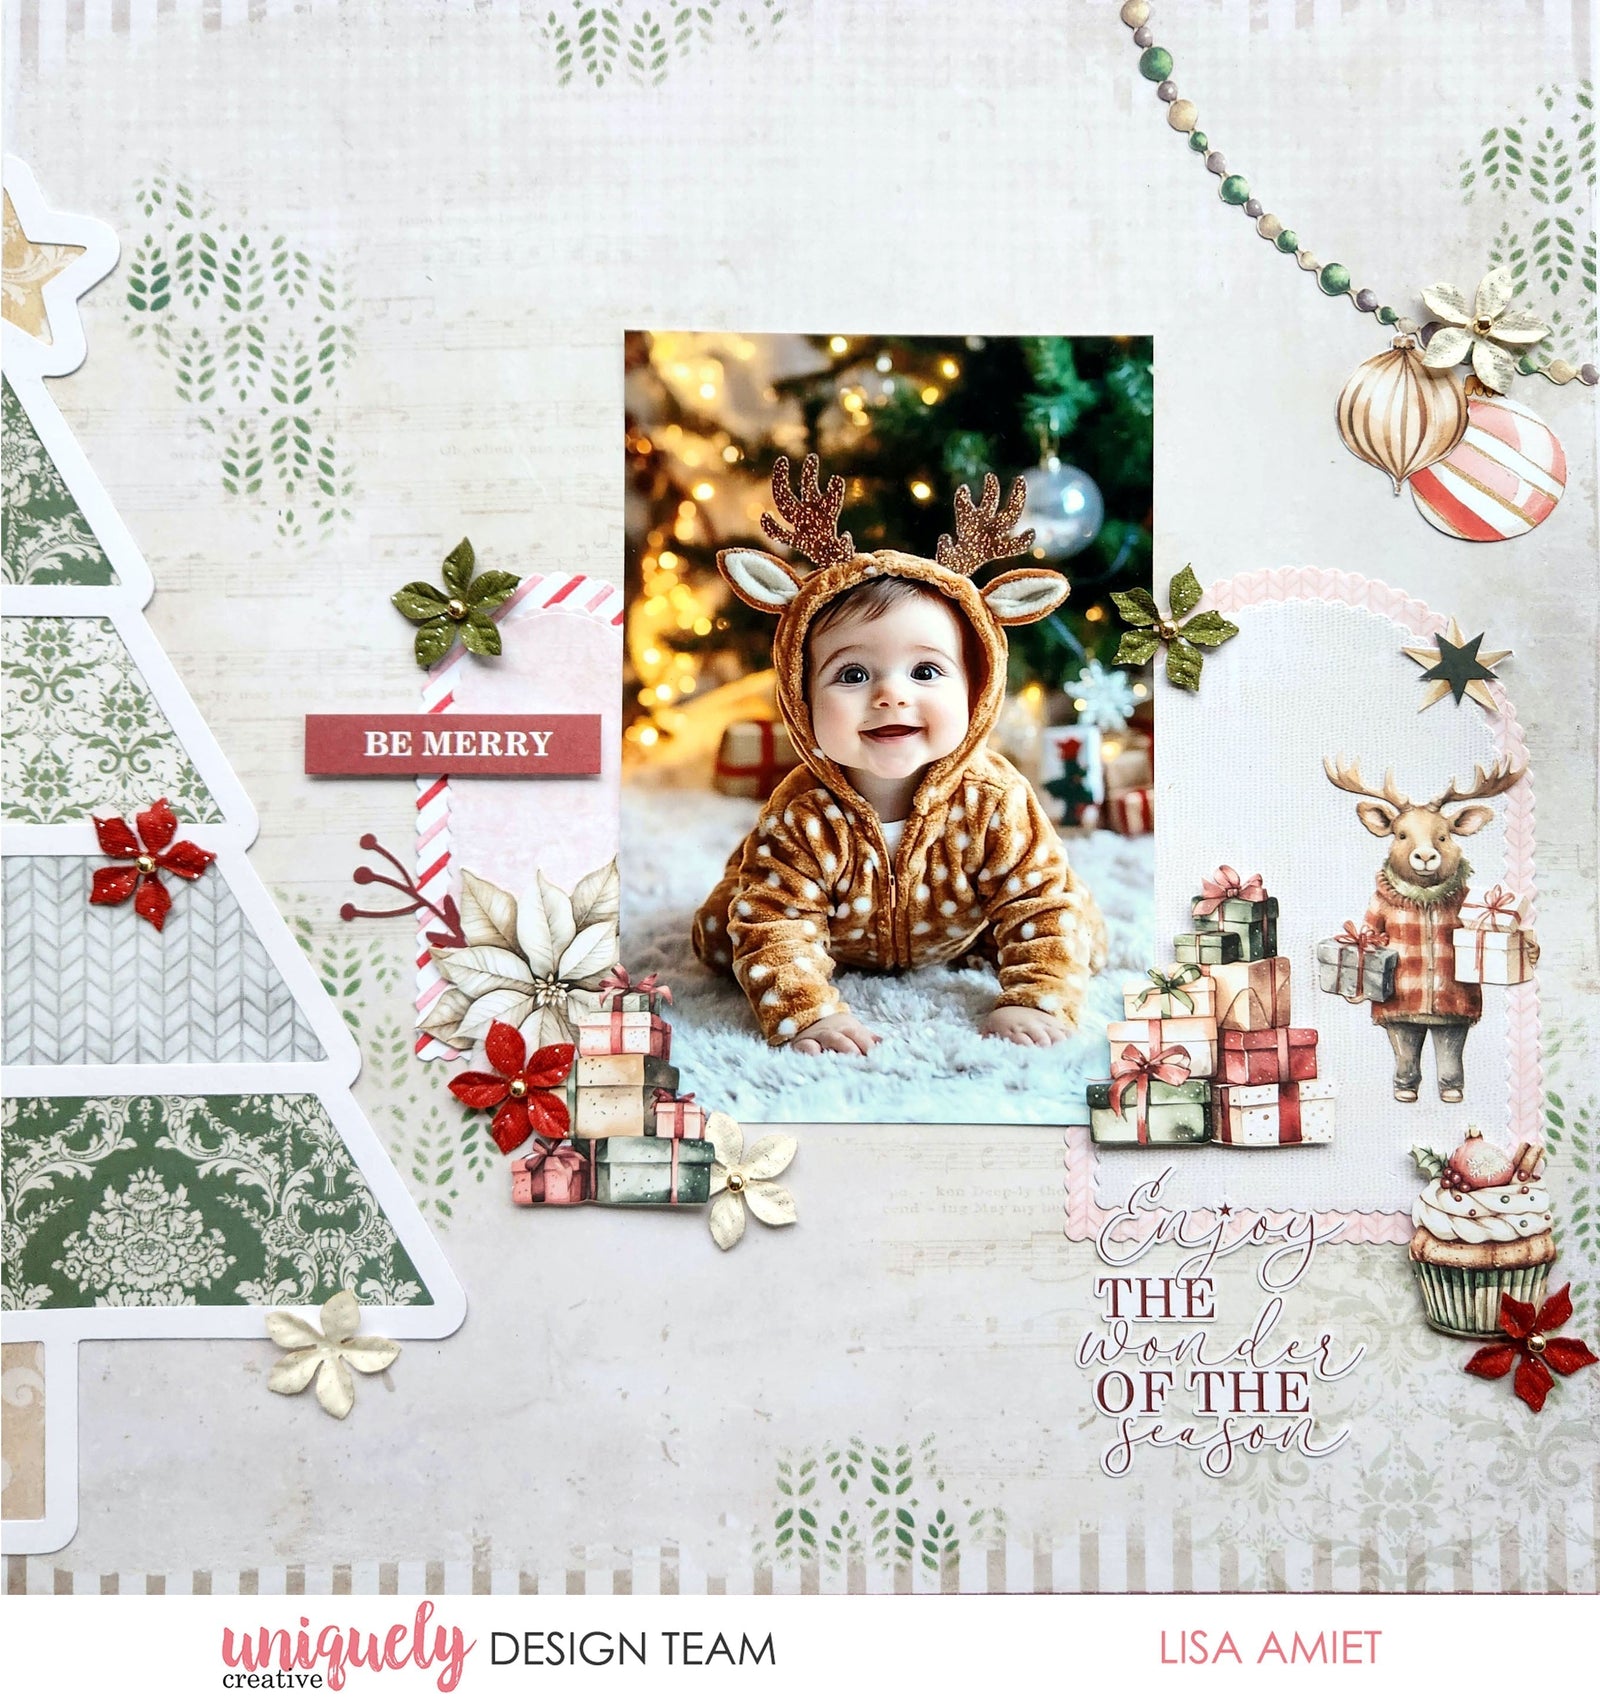
BE MERRY LAYOUT TUTORIAL - LISA AMIET
September 19, 2025

To recreate this gorgeous layout created by Design Team member Lisa Amiet you can follow the steps below:
Uniquely Creative Products Used:
· UCP2985 From Our House Paper
· UCP2986 Where The Heart Is Paper
· UCP2987 Little Traditions Paper
· UCP2991 Night Before Paper
· UCP2988 Hearth & Heart Paper
· UCP2989 Holly in the Hall Paper
· UCP2990 Vintage Baubles Paper
· UCP2992 Ready for Santa Paper
· UCP2996 Home for Christmas Creative Cuts
· UCMM1791 Festive Tidings Stencil
· UCE2121 Home for Christmas Flowers
· UCE2131 Christmas Tree Overlay
· UCD2205 Scalloped Arches Die
· Blending Brush
· Foam Mounts
· Distress Ink – Rustic Wilderness
Other Products Used:
· Die cutting machine, scissors, glue
Photo Size: 4” x 6”
Step 1:
Use Vintage Baubles (reverse) as your base paper. Use the Festive Tidings Stencil, Rustic Wilderness Distress Ink and a blending brush to stencil random areas of your page – See image 1
Step 2:
Cut the Christmas Tree Overlay in half. Use the right side of the tree, it will be on the left edge of your page. Line the back of the tree with Little Traditions paper for the trunk (reverse) and star, Hearth & Heart (reverse) for the top and bottom tiers, From Our House for the second tier, and Holly in the Hall paper for the third tier. Adhere your backed tree to the left side of your page - See image 2
Step 3:
Use the Scalloped Arches dies to die-cut the large arch from Where the Heart Is (reverse) and the next smallest arch from the From Our House paper. Adhere these two arches, with the smaller one on top. Die-cut the smallest arch from Where the Heart Is and the second smallest arch from Ready for Santa paper (reverse). Adhere smaller one on top pf the larger one.
Step 4:
Adhere your layered arches to your page, with the larger one on the right side, and the smaller one to the left. Fussy cut two baubles from Vintage Baubles paper and adhere them to the top right corner of your page, layering them with the beaded garland Creative Cut - See image 3
Step 5:
Adhere one of the cream Home for Christmas Flowers to the garland. Adhere your photo to the centre of your page, overlapping arch die-cuts. Using Foam Mounts, adhere large present stack Creative Cut to the bottom right corner of your photo. Adhere reindeer Creative Cut next to the previous piece. Fussy cut gold star from Ready for Santa paper, and layer with star Creative Cut, adhering above reindeer. Using Foam Mounts, adhere cupcake Creative Cut under reindeer. Adhere red Home for Christmas Flower, overlapping cupcake – See image 4
Step 6:
Adhere white poinsettia Creative Cut to left side of photo. Tuck in and adhere berry Creative Cut. Using Foam Mounts, adhere small present stack, overlapping previous pieces. Adhere red and white Home for Christmas Flowers around present stack.
Step 7:
Cut sentiment from Night Before paper and use Foam Mounts to adhere to small arch. Adhere green Home for Christmas Flowers to small and large arches. Adhere Creative Cut title under large present stack. To finish adhere red and cream Home for Christmas Flowers to your Christmas Tree Overlay – See image 5
Leave a comment
Newsletter
Join our mailing list and never miss an update …
