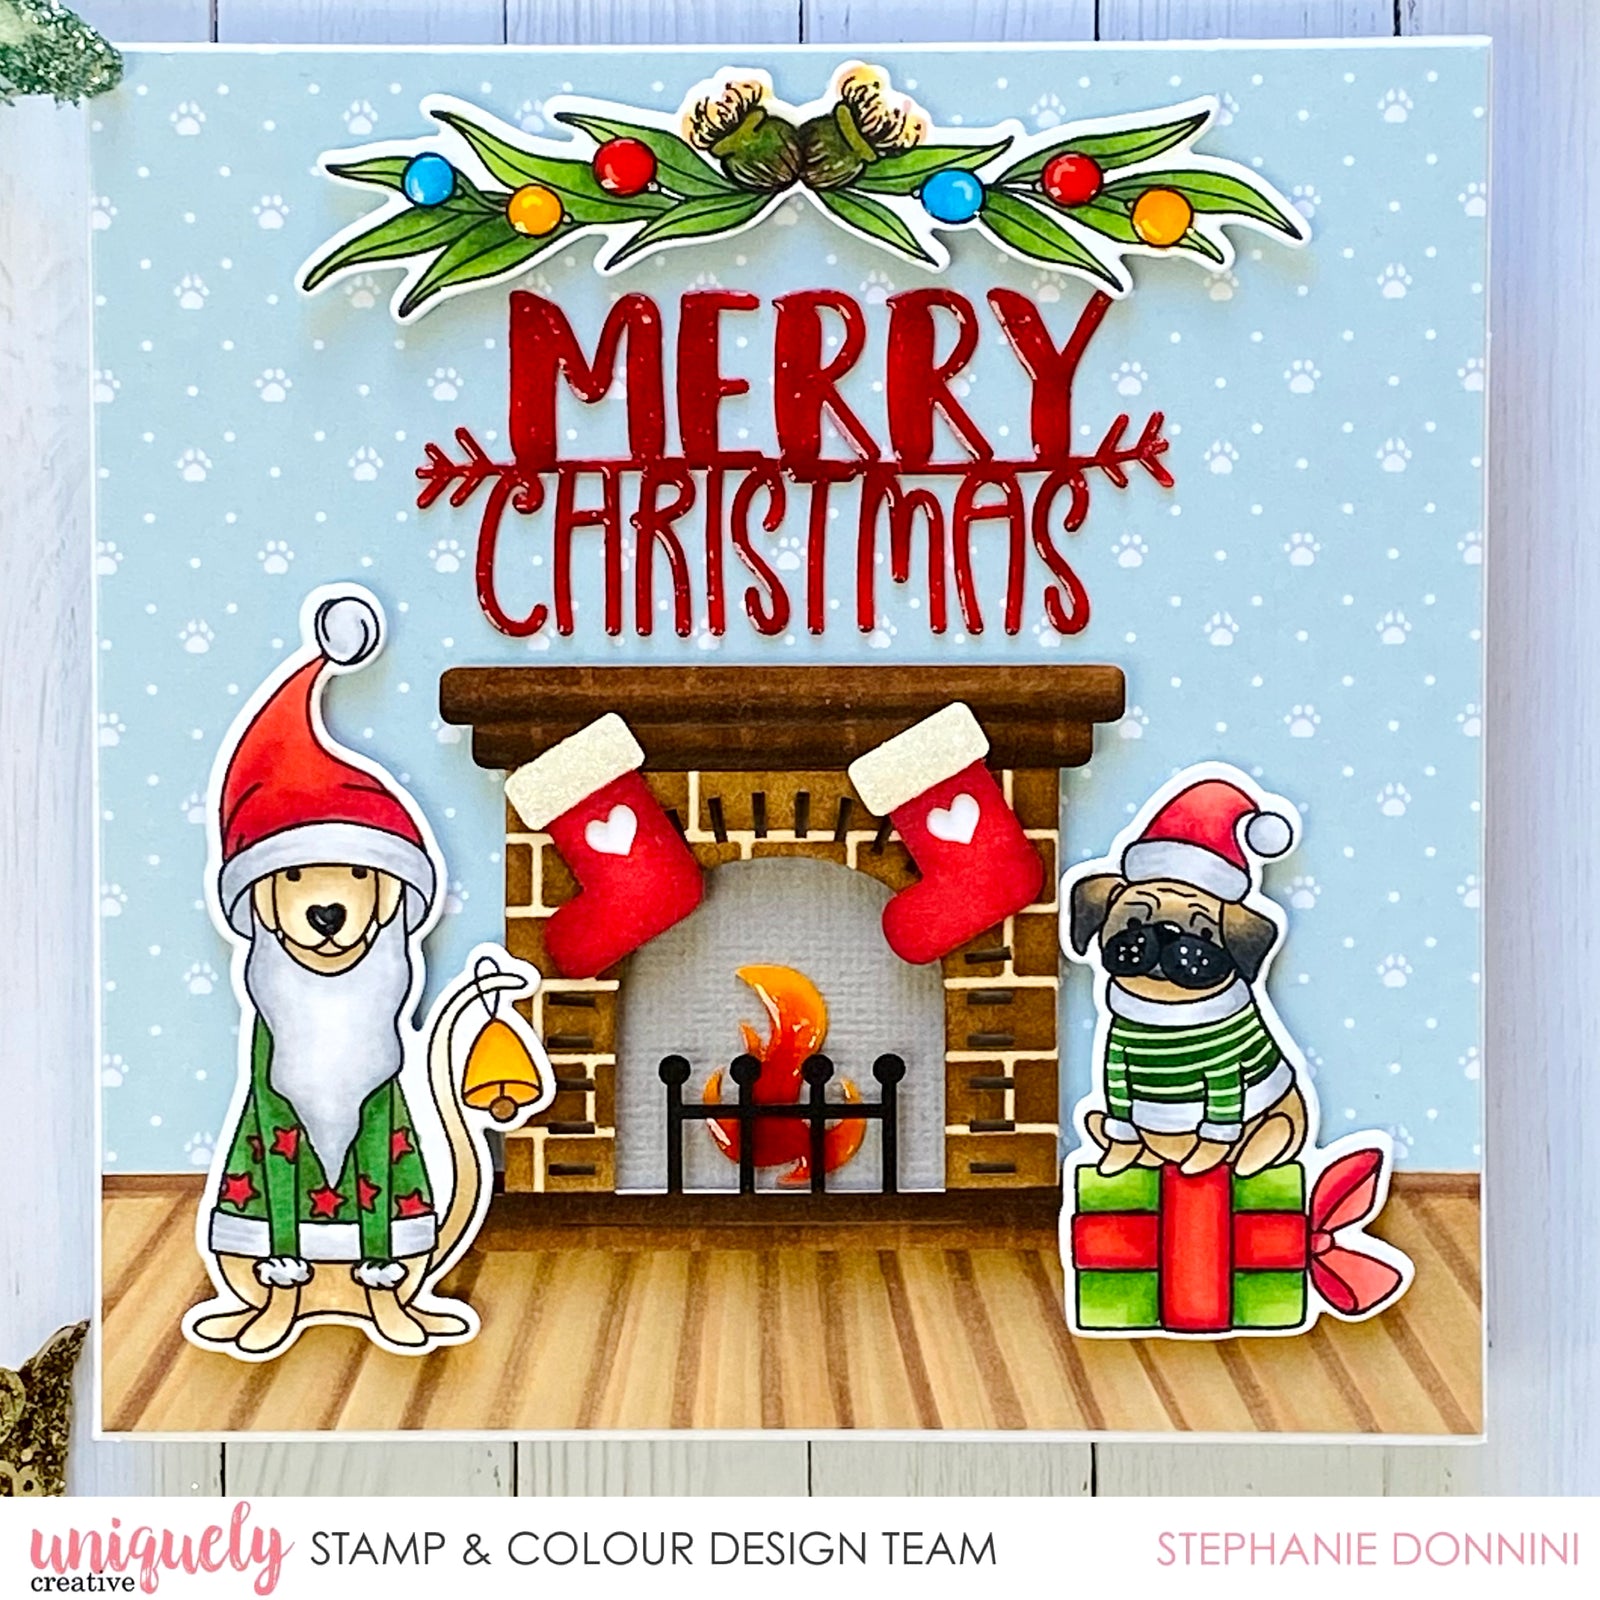
Merry Christmas - Stephanie Donnini

Uniquely Creative Products Used:
UC1850 Santa Paws Stamp Set, UCD2013 Santa Paws Die, UC Santa Paws Patterned Paper, UCL1723 Santa Paws Laser Cut, UCE1803 Foam Squares And Strips.
Other Products Used:
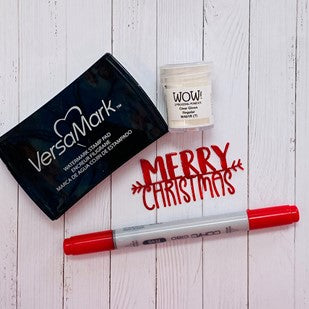
Smooth White Cardstock, Stamping Platform, Die-Cutting Machine, Glue, Clear Embossing Powder, Versa Mark Ink, Gina K Amalgam Black Ink, Heat Tool, Glossy Accents, Glitter Glue, Distress Ink- Vintage Photo.
Copic Markers: YG67, YG17, YG25, R46, R35, R32, N8, N2, N1, N0, E50, E31, E55, YR5, Y19, E59, E57, E35.
Instructions:
1. Stamp ‘Santa Paws’ images on white blending card using copic friendly black ink. Colour images with copic markers, then cut out using the co-ordinating dies.

2. Assemble the laser cut fireplace. Blend distress ink over a basic brick stencil, then use copic markers for the trimmings and fire. Add glossy accents on the flame, and glitter glue on the white trim of the christmas stockings.

3. Select a Santa Paws pattern paper from the kit and trim it down to 11cm x 13.5cm. This will be the wallpaper on your background. Then cut a 2.5cm x 13.5cm strip of blending card to create the flooring. Layer a darker and lighter lines, giving a floorboard effect.

4. For the sentiment use the laser cut ‘Merry Christmas’ and colour it in red with a marker. To add dimension and shine coat the laser cut with versa mark ink, then clear embossing powder. Heat with a heat tool till melted and shiny.
5. To assemble the card, cover the back of the fireplace, dogs, and gum leaf garland with foam tape for a dimensional look. Place a piece of grey cardstock behind the fireplace opening.
