Native Wishes Tutorial - Kelly McCausland

Uniquely Creative Products Used:
-
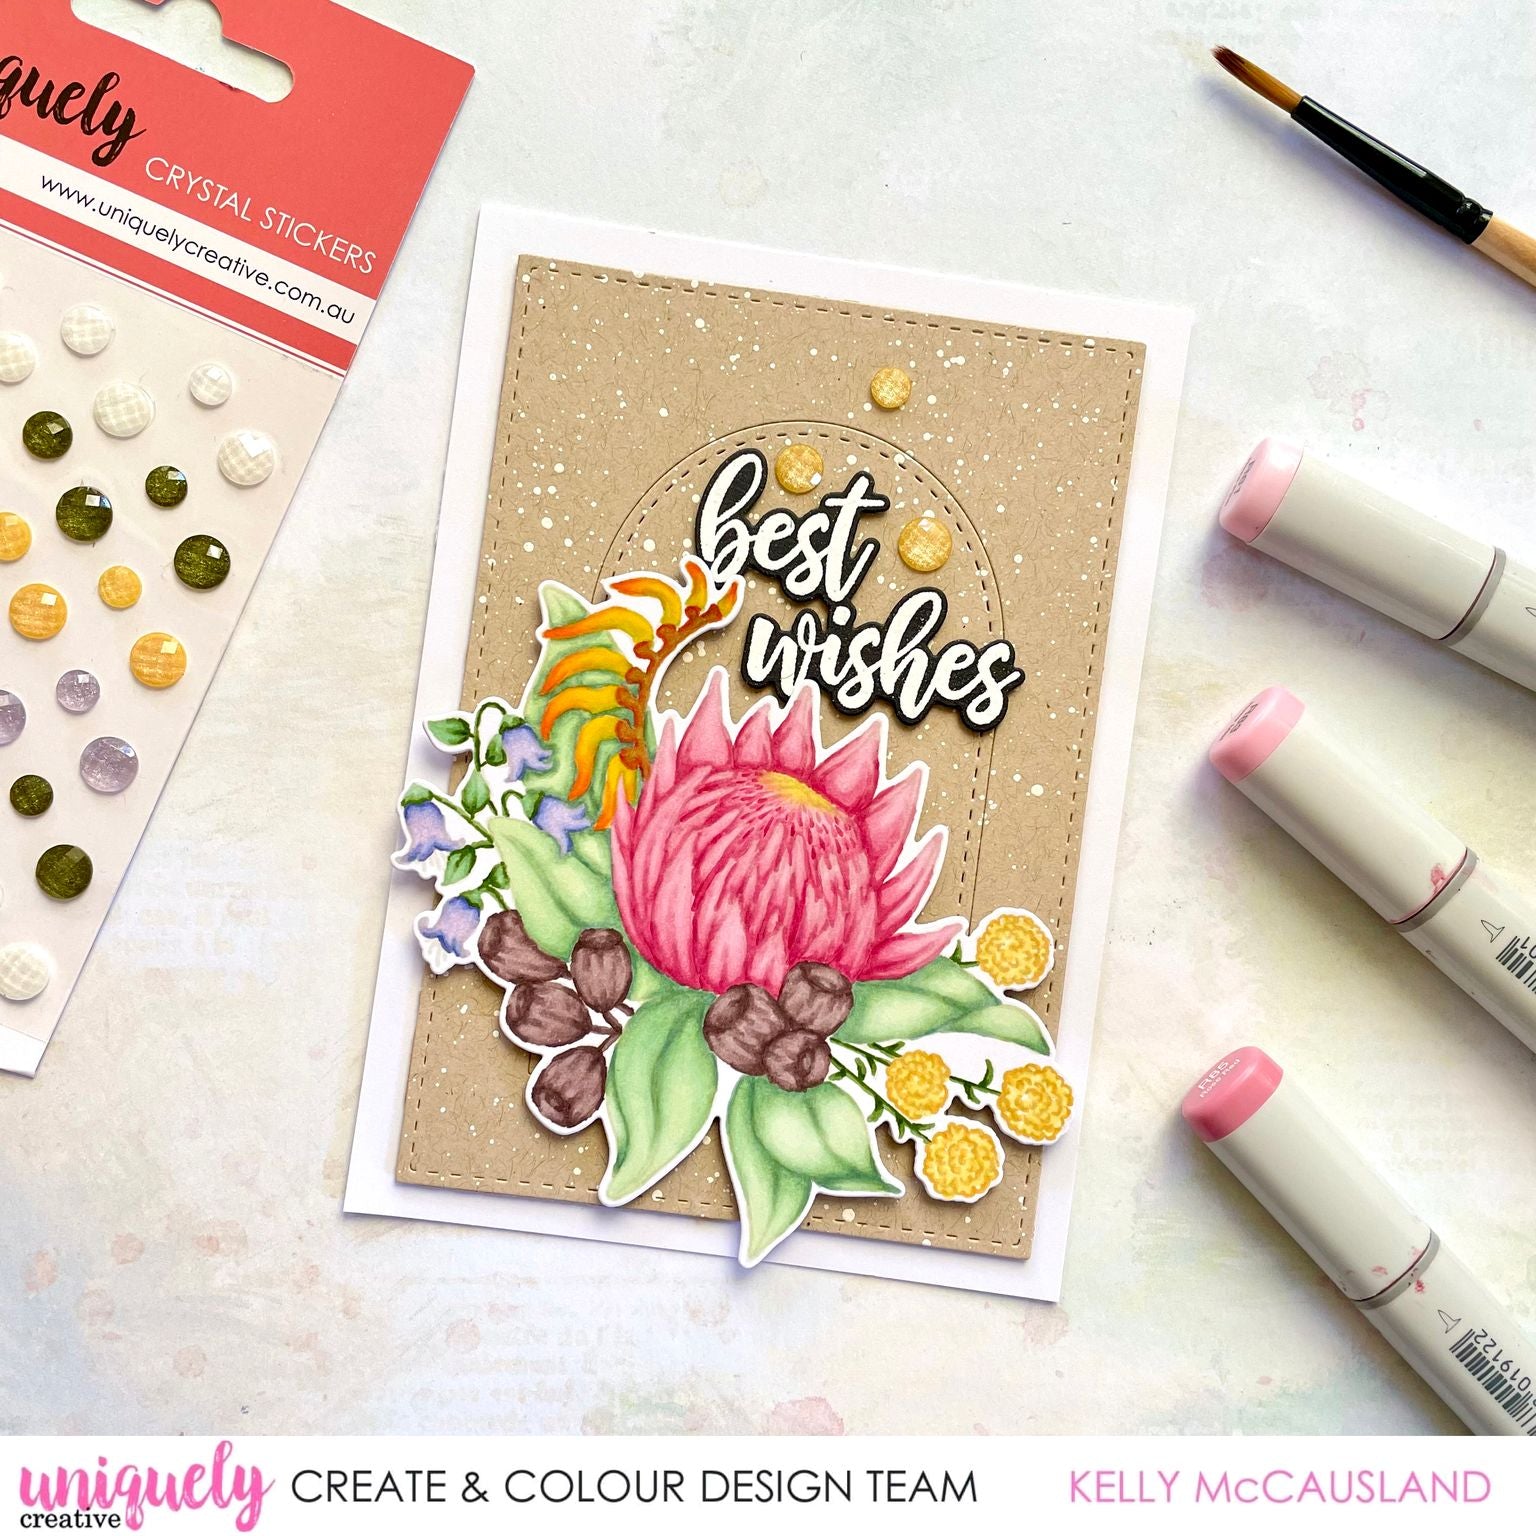
UC1885 Australian Natives Stamp UCD2087 Australian Natives Die - UCD2070 Stitched Arches Die
UCD1974 Stitched Nesting Rectangle Dies - UCE1954 Garden Path Shimmer Crystal Stickers
Foam Mounts
Other Products Used:
- Foam Tape
- Light Kraft Cardstock
- White Embossing Powder
- White paint for splattering
- Heat gun
-
Copics Used: G40, G12, G21, BG72, G24, YG67, YG03, R81, R83, R85, Y11, Y13, Y35, E71, E74, E77, BV00, BV02, BV04, YR04, R22, R24
Instructions:
1.

2.

3. Next start on your protea. Using your darkest pink, R85 start to lay down colour where your shadows will be. Think about the middle of the petals and use the stamp as a guide to add a little shadow to the middle of your petals too. Next extend your colour a little with your mid colour R83 and finally blend out with your R81.

4. For the centre of your Protea start to fill in the around the top of the petals with your R85. Be careful to just use a small amount of your darker colour. Extend this out just a small amount with your mid colour R83.


5. Next add a little Y11 to the top of the centre of the flower. Extend the pink with your R81 into the edge of your Y11. Blend the pinks together but also get a nice little blend between the yellow and pink but still leave a small amount of yellow too. Use your R81 to just lightly blend over the petals again just to smooth out any ‘edges’ between the light and dark of the petals so they are not so harsh.


6. Lastly, very lightly add some tiny lines to the centre of your flower drawing up to the top middle. Start with R85 and add a few at the bottom then go to R83. Add a few in between the R85 lines but extend past them. Do the same with R81 and extend these lines almost into the yellow at the top.

7. Gumnuts are next. Using your E77 draw in your shadows and draw in some lines from the bottom and top of the nuts too. Extend your shadow lines out with E74 and then blend with E71. Use E77 and E74 to lightly draw in the stems.

8. Next are the yellow flowers. Use your Y35 to draw in the lines. Remember they don’t need to be exactly the same as the stamp! If your ink is light enough, then you won’t see the stamped lines under your coloured flowers. Use Y13 to dot in colour over the Y35 but leave white spaces. Continue dotting with your Y11 still leaving a little white space if you can. Use a little YG67 and G24 to draw in the stems and small leaves.

9. For the little purple flowers use some BV04 to create some shadow at the top of the flower and the bottom of the petals. Extend out with BV02 then BV00 to blend it all together. Use Some YG67 and G24 to draw in the stems and leaves then add a little G21 to blend out the tips of the leaves.

10. Kelly has used a few colours for the Kangaroo Paws. Start by adding a small amount of R22 to the tips of the flowers and then add some YR04 over the top. You want the orange colour to be on the tip and to extend about two thirds up the underside of each flower. Next use some YG03 to draw in the line between the flower and the stem and extend this back to meet the orange. Use your Y35 to then blend all the colours together. If you need to add more of colour just repeat and blend with your Y35.
11. For the Stems use a little R24 to draw in the shadows. Next add YG03 and then blend out with R22. If you think your stem is too red and needs a little more green just add a little more YG03.

TIPS:
- Use your colours to outline the shape, remember you have ‘no lines’ so it helps to use your markers to draw in the lines
- You don’t have to follow the stamp exactly! Remember no one will see what was stamped under your colouring so if the detail is too much then just draw what you can colour. It’s ok to colour your version
- If you are having trouble seeing the details because the ink is very light, have another stamped image handy in a darker ink to refer to. Always helpful to compare to if you can’t work out which line belongs to which image!