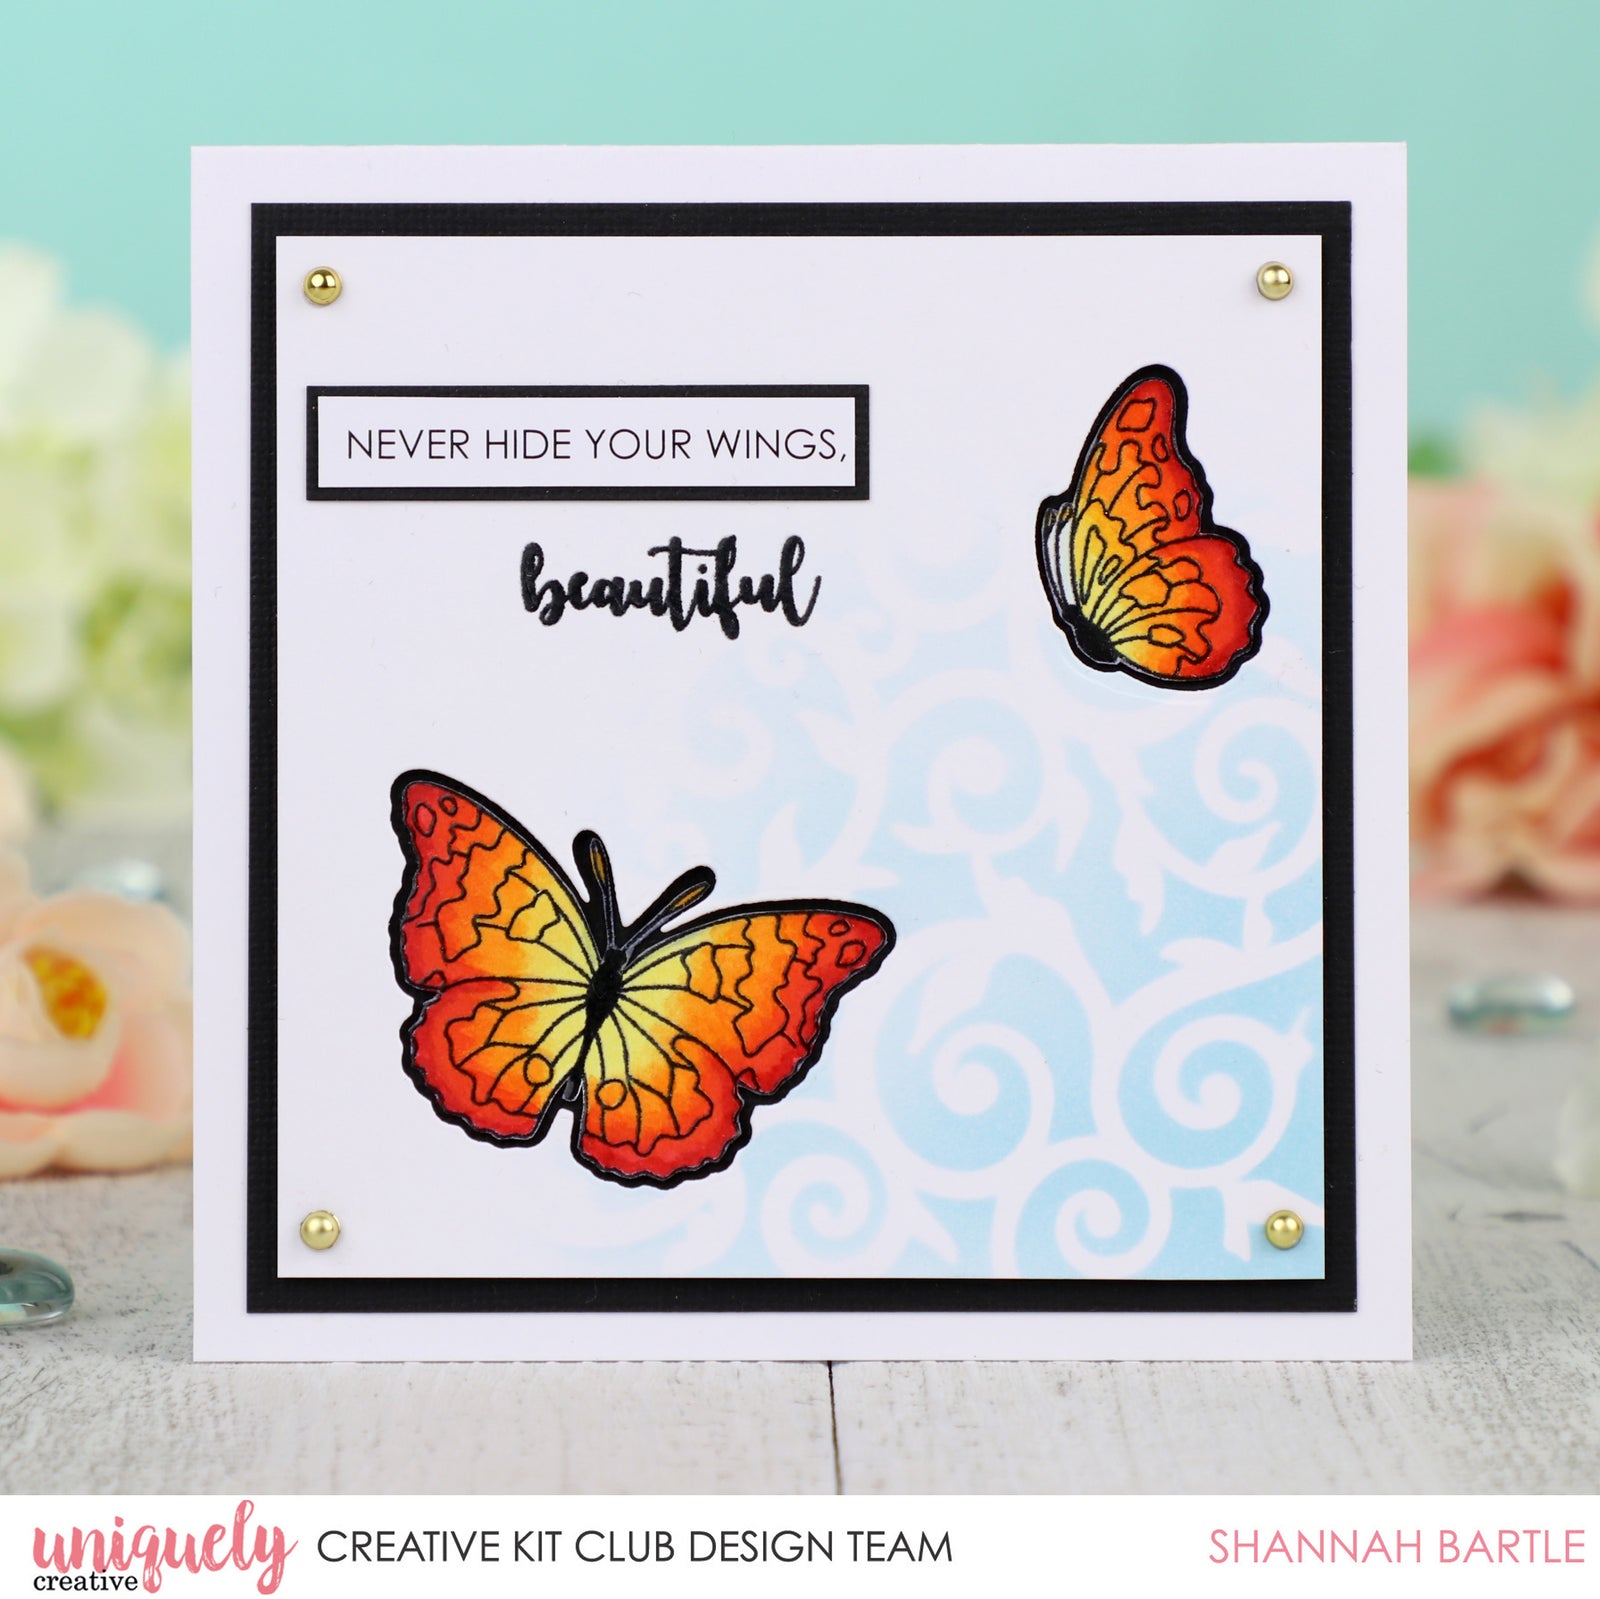
Never Hide Your Wings - Shannah Bartle

Card Size: 5" x 5"
Uniquely Creative Products Used
UC1810 Butterflies Stamp, UCD1923 Butterflies Die, Butterflies Cut-a-Part sheet, UCMM1733 Garden Flourish Stencil, UCE1729 Gold pearls
Other Products Used
5” square card base, smooth white & black cardstock, blending card, Tuxedo Memento ink, VersaMark ink, clear embossing powder, Tumbled Glass Distress Ink, adhesives, sponging tool, die cutting machine, heat tool
Colours Used
Copic Markers:
R24, R27, YR04, YR07, Y13, Y17, Y38
Instructions
1. Lay the stencil onto a piece of smooth white cardstock and hold in place with repositionable tape. Sponge Tumbled Glass Distress ink outward from the bottom right corner, gradually fading as you go. Cut to 4¼” square.

2. Stamp ‘beautiful’ in black ink about 1” from the left and 1½” from the top of the panel using a stamp positioning tool. Without moving the stamp or paper, stamp again using VersaMark ink, then sprinkle with clear embossing powder and set with a heat tool.

3. Position two butterfly dies on the panel, and die cut.

4. Adhere the panel to a 4½” square of black cardstock using cardboard or foam tape for dimension, and attach to the centre of the card front.

5. Stamp two butterflies (matching the dies) onto blending card and colour with Copic markers. Fussy cut around the edges of the butterflies - If you use the matching butterflies dies, you will have a white border and lose the black shadow effect.

6. Shape the butterflies gently with your fingers, then adhere in the die cut apertures using double-sided tape or glue.

7. Trim a sentiment from the cut-a-part sheet, matt with black cardstock and adhere in the top left corner of the card. Add a gold pearl in each corner to finish.