30 day change of mind returns available
30 day change of mind returns available
Add description, images, menus and links to your mega menu
A column with no settings can be used as a spacer
Link to your collections, sales and even external links
Add up to five columns
Add description, images, menus and links to your mega menu
A column with no settings can be used as a spacer
Link to your collections, sales and even external links
Add up to five columns
PEACE, LOVE & JOY LAYOUT TUTORIAL - LISA AMIET
September 27, 2025

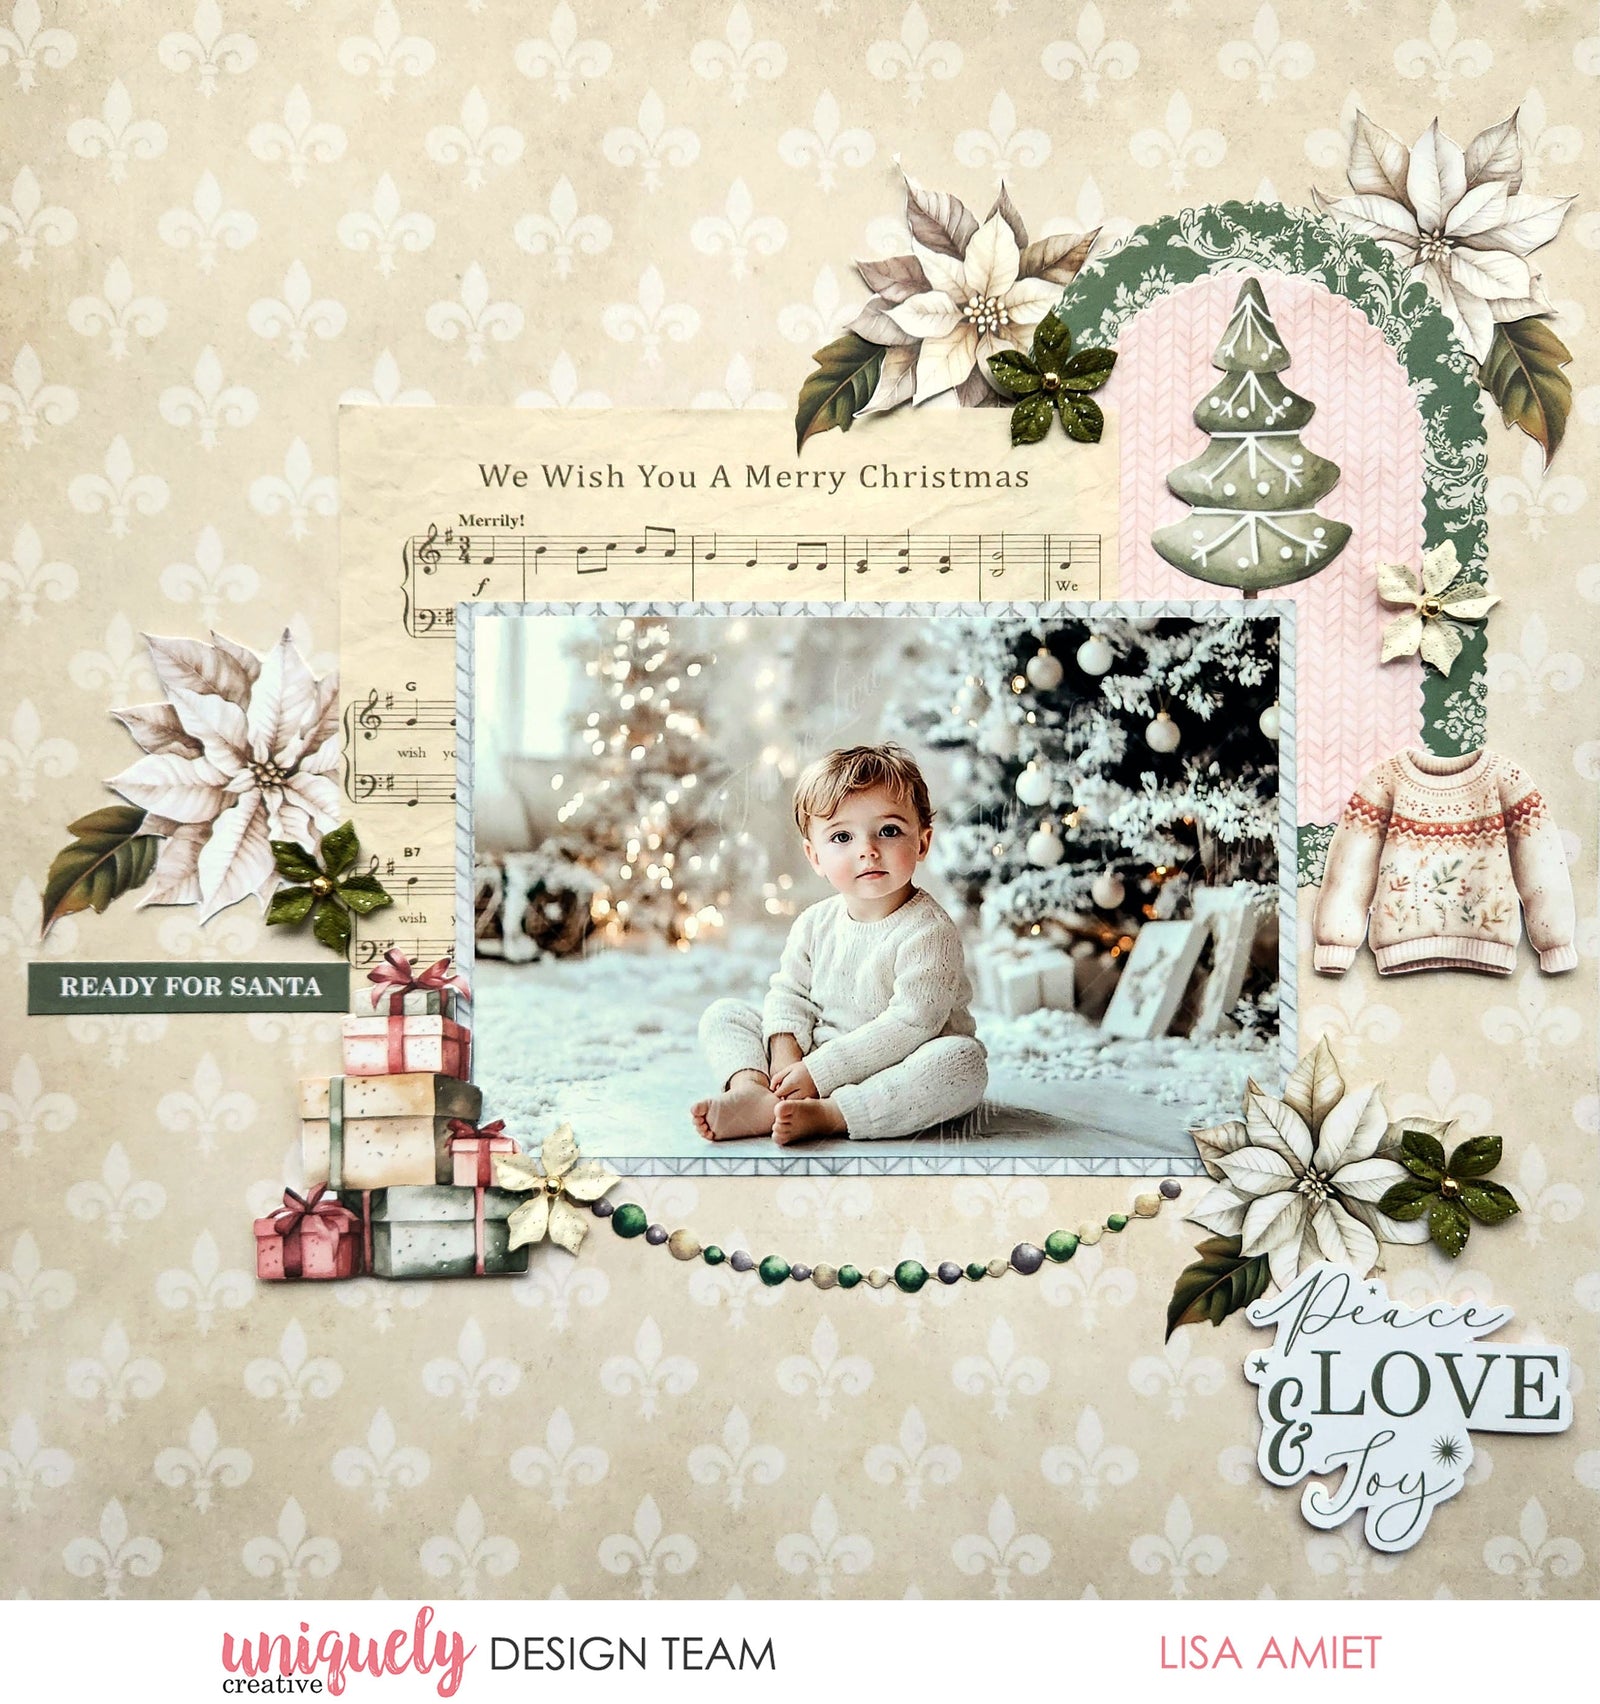
To recreate this beautiful layout created by Design Team member Lisa Amiet you can follow the steps below:
Uniquely Creative Products Used:
· UCP2986 Where the Heart Is Paper
· UCP2987 Little Traditions Paper
· UCP2988 Hearth & Home Paper
· UCP2989 Holly in the Hall Paper
· UCP2992 Ready for Santa Paper
· UCP2996 Home For Christmas Creative Cuts
· UCE2129 A4 Creative Paper – Festive Music
· UCD2205 Scalloped Arches Die
· UCE2121 Home for Christmas Flowers
· Cut-a-part Sheet
· Foam Mounts
Other Products Used:
· Die cutting machine, scissors, glue
Photo Size: 4” x 6”
Step 1:
Use Little Traditions (reverse) as your base paper. Fussy cut white poinsettias from Ready for Santa paper and Cut-a-part Sheet. Adhere poinsettias, two in the top right corner and one in the middle left of your page – See image 1
Step 2:
Using the Scalloped Arches Die to die-cut a large arch from Hearth & Heart (reverse) paper. Die cut middle sized arch from Where the Heart Is (reverse) paper. Adhere smaller arch to the centre of the larger one. Adhere arch in the top right, overlapping the two flowers - See image 2
Step 3:
Cut music paper piece from the A4 Creative Paper – Festive Music, and adhere to your page, overlapping previous pieces. Cut an 11 x 16cm piece of Holly in the Hall (reverse) paper. Matt your photo onto this piece and adhere to the centre of your page – See image 3
Step 4:
Fussy cut Christmas tree and sweater from Ready for Santa paper. Adhere tree above photo on the large arch, and using Foam Mounts adhere the sweater to the right side of your photo, overlapping arch. Fussy cut leaves from Ready for Santa paper and adhere, along with a leaf from the Creative Cuts, tucking under each of the poinsettia flowers – See image 4
Step 5:
Fussy cut present stack from Ready for Christmas paper and using Foam Mounts adhere to the bottom left corner of your photo. Adhere beaded garland Creative Cut under your photo. Adhere white poinsettia and leaf Creative Cuts to the bottom right corner of photo – See image 5
Step 6:
Fussy cut title from Ready for Santa paper and adhere using foam mounts to bottom right corner of your page. Adhere green and cream Home for Christmas Flowers next to poinsettia flowers and on the arch. Fussy cut sentiment from the Cut-a-part Sheet and adhere to the left side of your photo – See image 6
Leave a comment
Newsletter
Join our mailing list and never miss an update …
