Our Warehouse is Now Closed for Christmas - All Orders will Ship from 7th January 2026
Our Warehouse is Now Closed for Christmas - All Orders will Ship from 7th January 2026
Add description, images, menus and links to your mega menu
A column with no settings can be used as a spacer
Link to your collections, sales and even external links
Add up to five columns
Add description, images, menus and links to your mega menu
A column with no settings can be used as a spacer
Link to your collections, sales and even external links
Add up to five columns
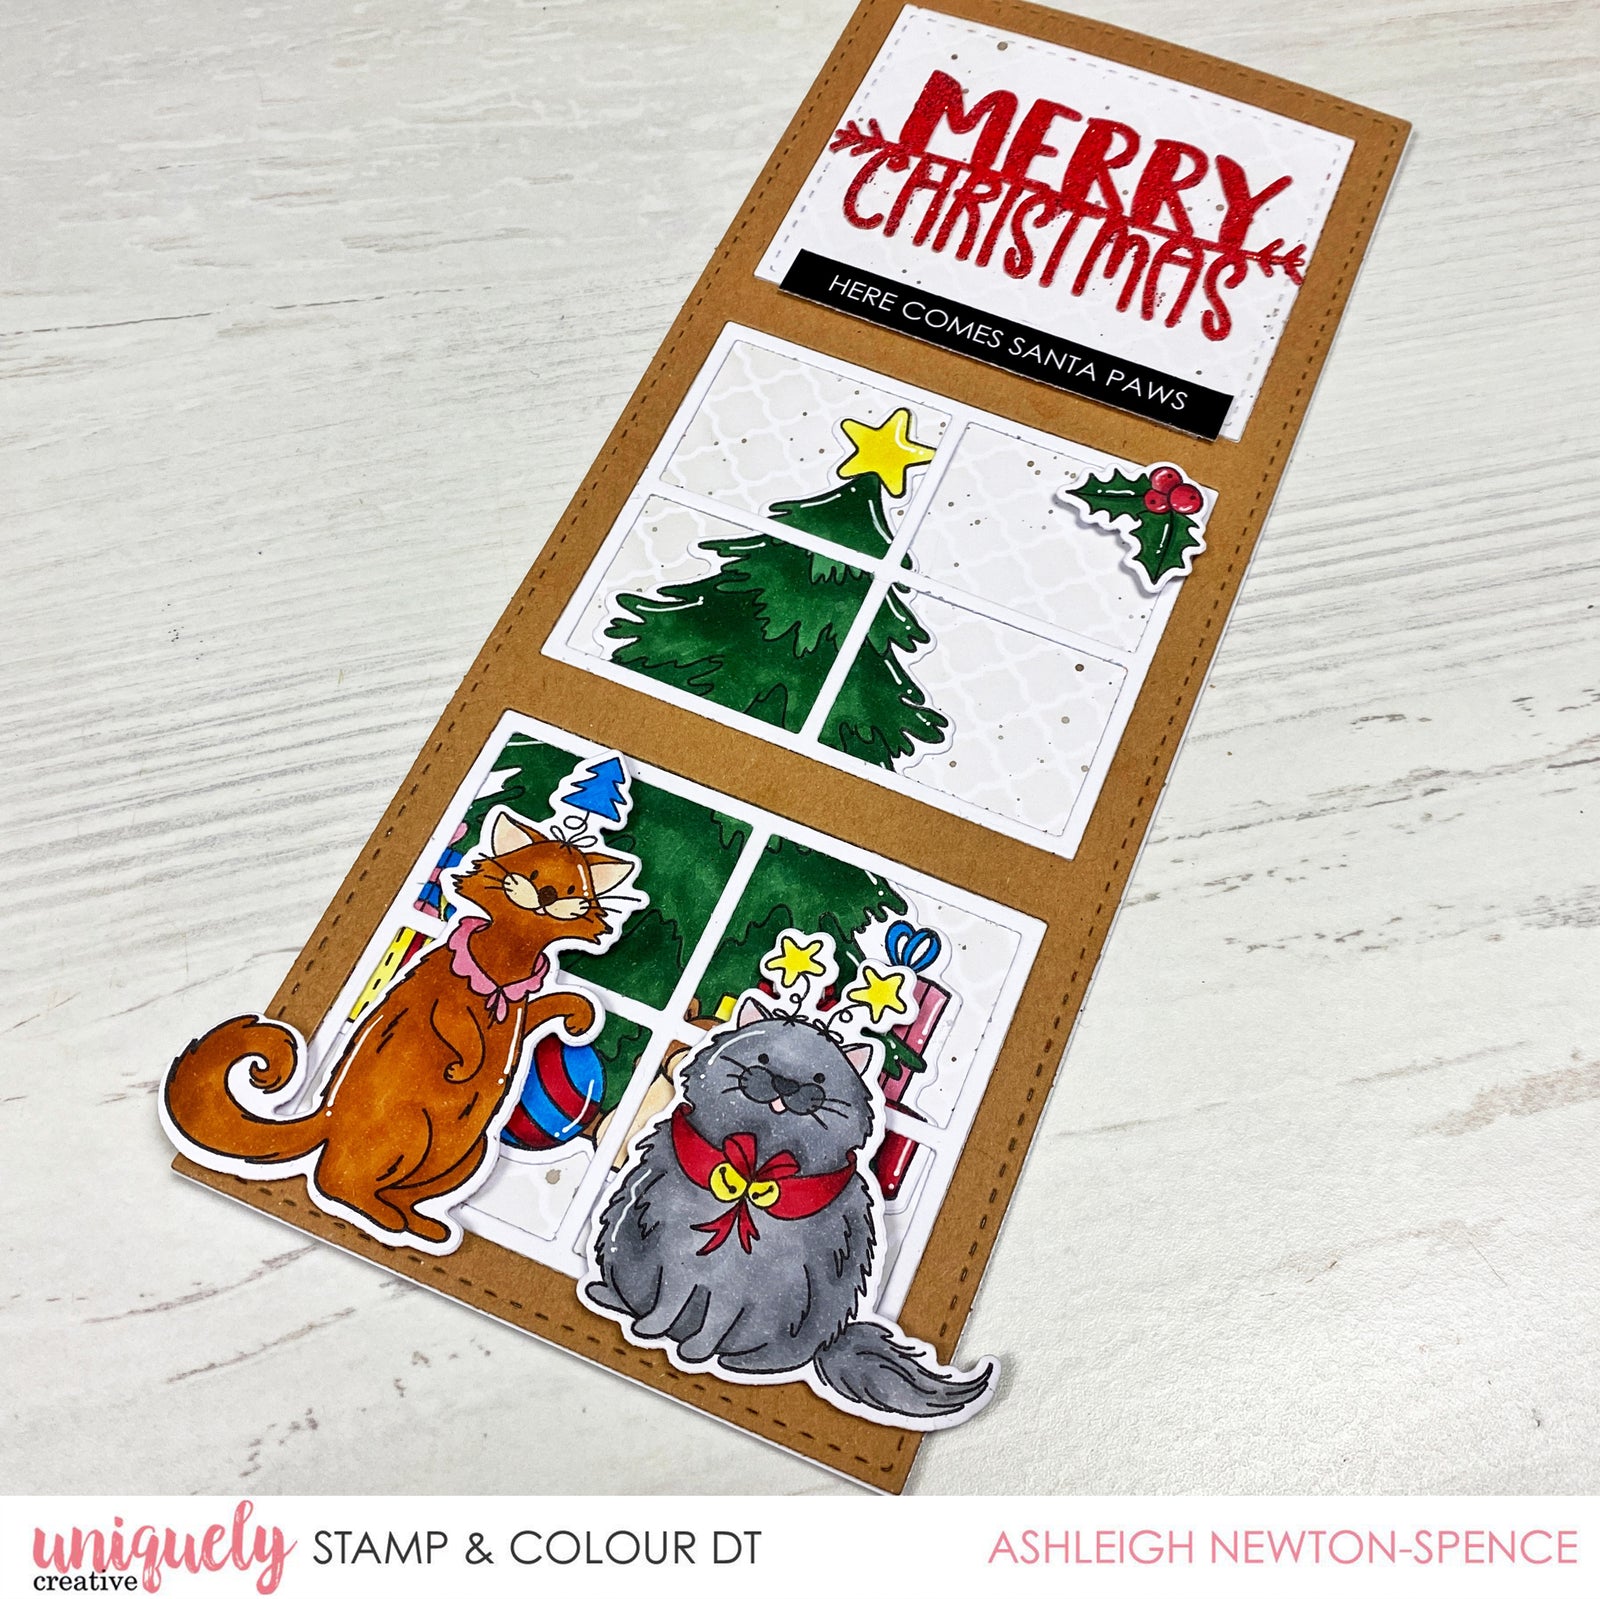
Slimline Window Card Tutorial - Ashleigh Newton-Spence
October 29, 2021

Uniquely Creative Products Used:
UC1720 Clear Sparkle Pen, UCD1972 Slim Stitched Nesting Rectangle, Santa Paws Cut-A-Part Sheet, Santa Paws Laser Cut Sheet, UC1851 Santa Claws Stamp Set, UCD2014 Santa Claws Die Set, UC1850 Santa Paws Stamp Set, UCD2013 Santa Paws Die Set, UC1817 O Christmas Tree Stamp Set, UCD1937 O Christmas Tree Die Set, UC Stencil – Trellis, UCD1958 Cut-a-Part Essentials Die #5, UCD1964 Slim 3 Window.
Other Products Used:
4mm Foam Tape, 2mm Foam Tape, Kokuyo Glue Dots, Tombow Mono Liquid Glue, Taylored Expressions Blending Brushes, Distress Ink – Pumice Stone, Distress Oxide – Pumice Stone, Sakura White Gel Pen, Versamark Ink, Red Sparkle Embossing Powder, Hero Arts Intense Black Ink, Misti Stamping Tool, X-Press It Blending Card
Copic Markers:
(G28, G29, R46, R59, R20, R83, R85, Y13, Y15, B06, B16, N1, N3, N5, N7, E21, E23, E25, E31, E37, E39, E79, E99)
Instructions:
1. For the frame and base, cut a Slim 3 Window die from both white and kraft cardstock. Hold onto the inset piece that cuts with the stitching on the inside.

2. On a piece of blending card, stamp and colour two of the cats from Santa Claws, a holly piece from Santa Paws and the tree from O Christmas Tree. Cut these out with the matching dies.

3. Cut a white cardstock piece with the second largest Slim Stitched Nesting Rectangle die. Use the Trellis stencil, and lightly blend Pumice stone distress oxide onto the bottom third of the piece. The stencil won’t cover the whole of the piece, but will cover the top with an inset.

4. Using watered down Distress Ink in Pumice stone, flick droplets onto the background. Repeat the inking and splatters onto the square inset piece also.

5. Cover the Merry Christmas mini laser cut piece with Versamark ink and cover with Red Sparkle Embossing Powder. Set with a a heat tool.

6. Set the window piece over the background and tuck the tree in underneath and off to the left. Stick the window piece down using glue tape.

7. Stick the laser cut piece to the inset and secure inside the top window with glue tape. Add in the white window pieces to the bottom two openings with liquid glue. Attach the cats and holly piece to the card using foam tape for dimension. Use the Essentials #5 Die to separate the cut-a-part sheet and use one of those as a sub-sentiment attached with a thinner piece of foam tape. Attach the panel to a card base.

Leave a comment
Newsletter
Join our mailing list and never miss an update …
