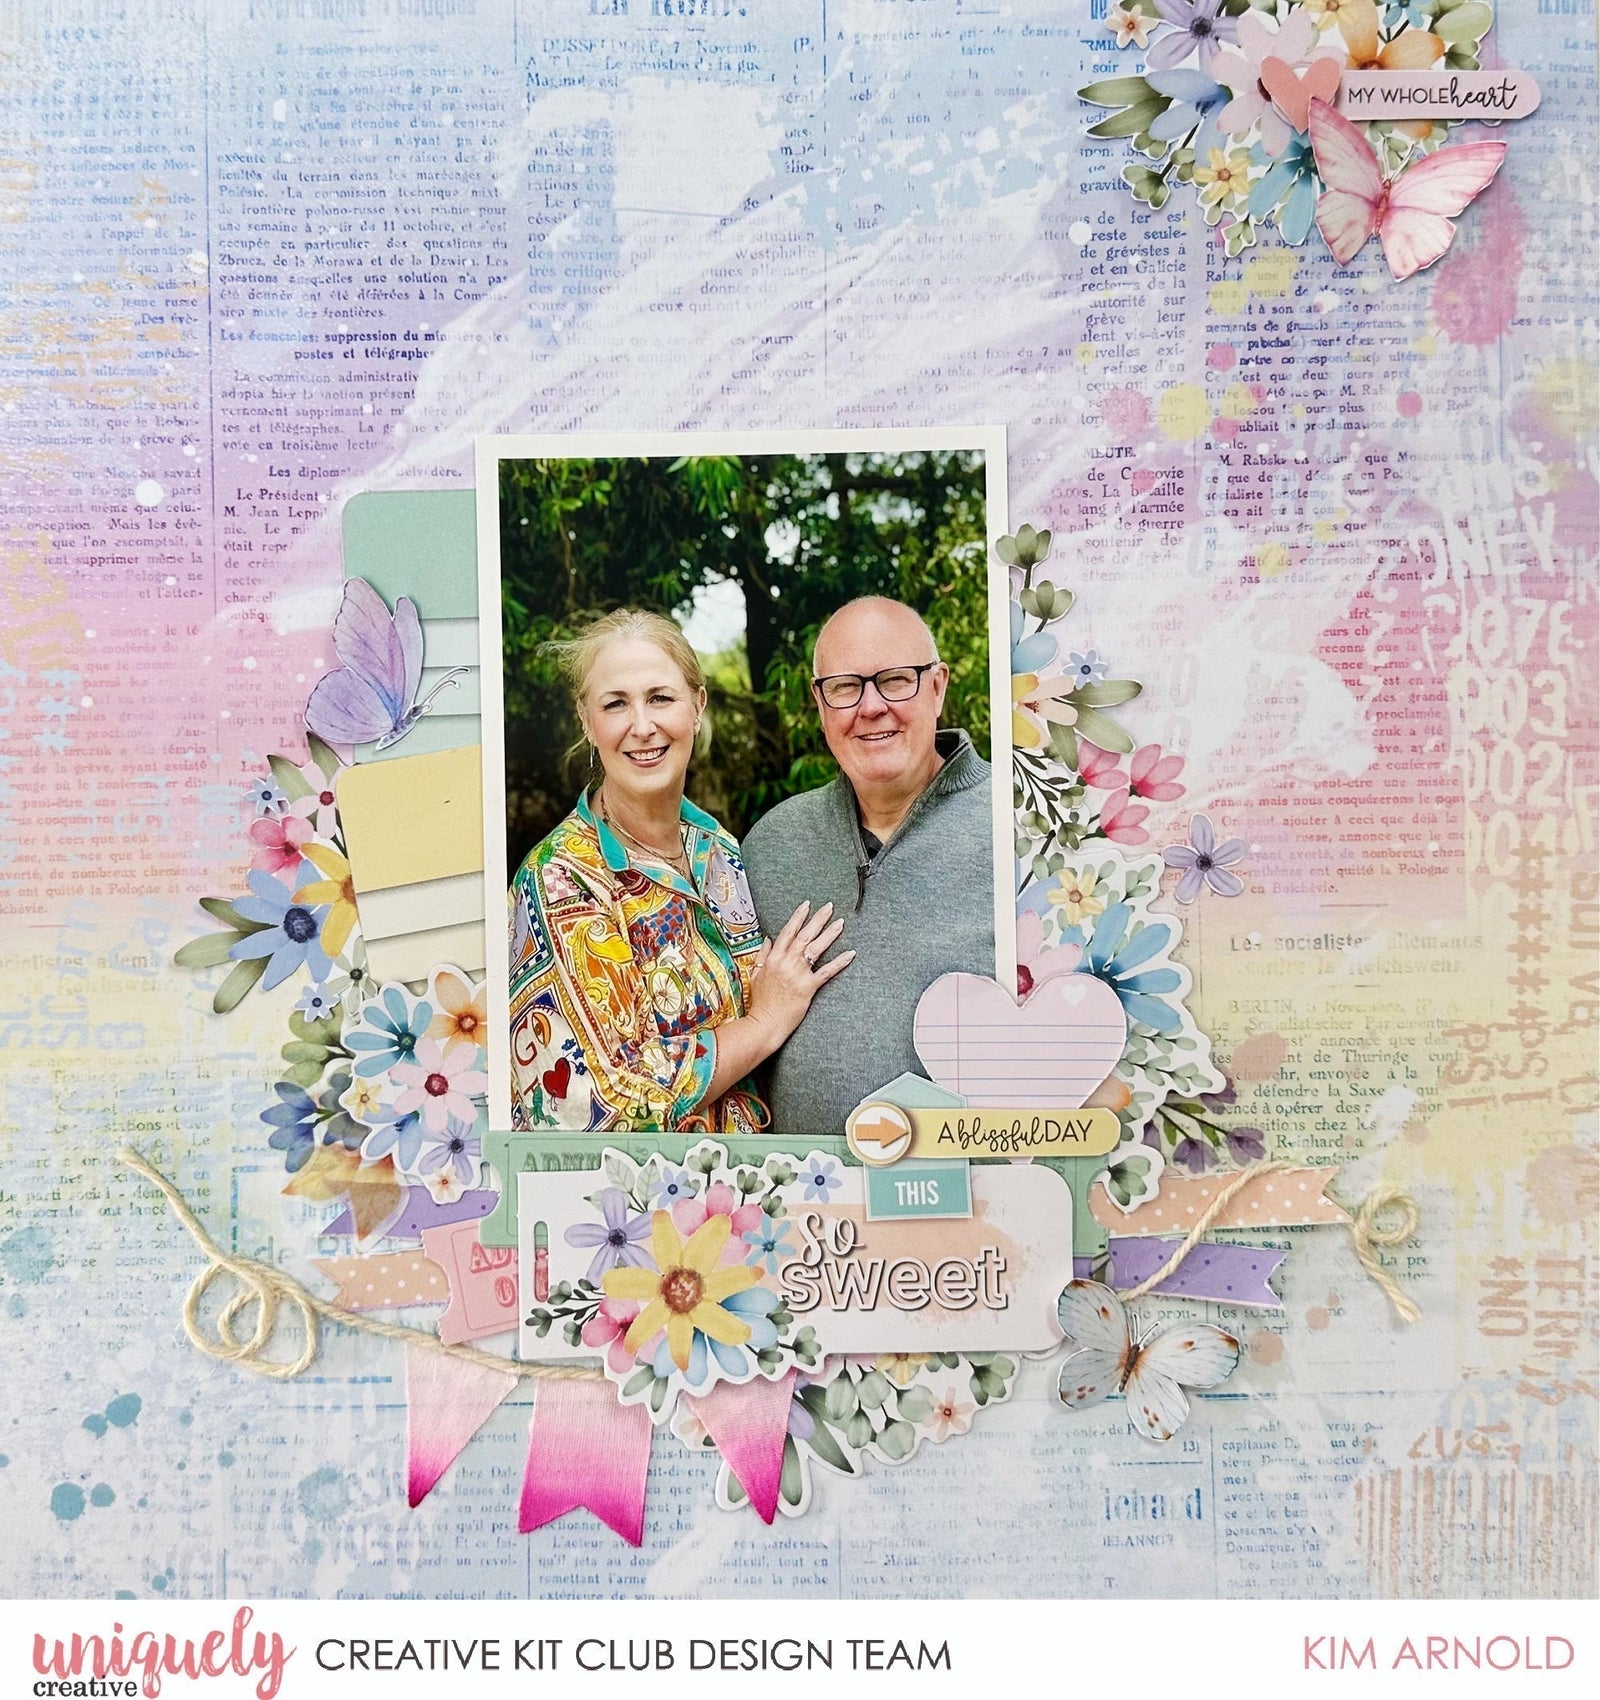
SO SWEET LAYOUT TUTORIAL - KIM ARNOLD

Welcome to our March Collection - Colour Rush!
To recreate this great layout created by Design Team member Kim Arnold you will need the products listed below:
Uniquely Creative Products Used:
UCP2882 Light & Bright
UCP2888 Radiant Life
UCP2885 Glowing Up
UCP2889 Colour Crush Creative Cuts
UCP2892 Colour Crush Vellum Creative Cuts
UCE2059 Art Medium Ephemera
UCE2068 UNIQOLOUR Pigment Powder Rose Pink
UCE2088 Glass Spray Bottle
UCE1986 Edge distressing tool
UCE1872 Fussy cutting scissors
UCE1978 Foam Mounts Dots and Strips
Other Products Used:
Paper trimmer and scissors
Small round Paint brush
Glue
Photo Size: 4x6 inch (portrait)
Step 1:
Fussy cut marked images from Radiant Life paper – See image 1
Step 2:
Attach photo 3 ½ inches from left edge and 3 ¼ inches from bottom edge with foam strips – leave space around photo so embellishments can be tucked under photo. Use salvage strips from patterned paper and cut notched ends to approx. 8 inches, distress edges and attach under photo – See image 2.
Step 3:
Create cluster at left edge of photo using Creative Cuts, Vellum Creative Cuts and fussy cut items – See image 3.
Step 4:
Create cluster at right of photo using Creative Cuts, Vellum Creative Cuts and fussy cut items – See image 4.
Step 5:
Using pigment powder, dilute a small amount in water and using a paint brush apply to three banner flags from the Art Medium Ephemera. Build layers of pigment to create an ombre effect – See image 5 
Step 6:
Create a cluster at bottom of photo using banner flags, Creative Cuts and fussy cut items – see image 5 above.
Step 7:
Add string with glue so that it sits across the top of the banner flags – see image 6 
Step 8:
Create a cluster in the top right corner of layout using fussy cut items – refer main image.

