Special Birthday Tutorial - Natalie Elphinstone

Uniquely Creative Products Used:
- UCD2074 Cut-a-Part Essentials #9 Die
- UCD1985 Cut-a-Part Essentials #6 Die
- UCD1958 Cut-a-Part Essentials #5 Die
- UCD2003 Stitched Nesting Circles Dies
- Uniquely Creative Mint Pearls
- 10mm Glass Domes
- Winter Mini Kit Cut-A-Part Sheet
- Foam Squares
Other Products Used:
- Trimmer
- Adhesives
- Coloured Paper
Instructions:
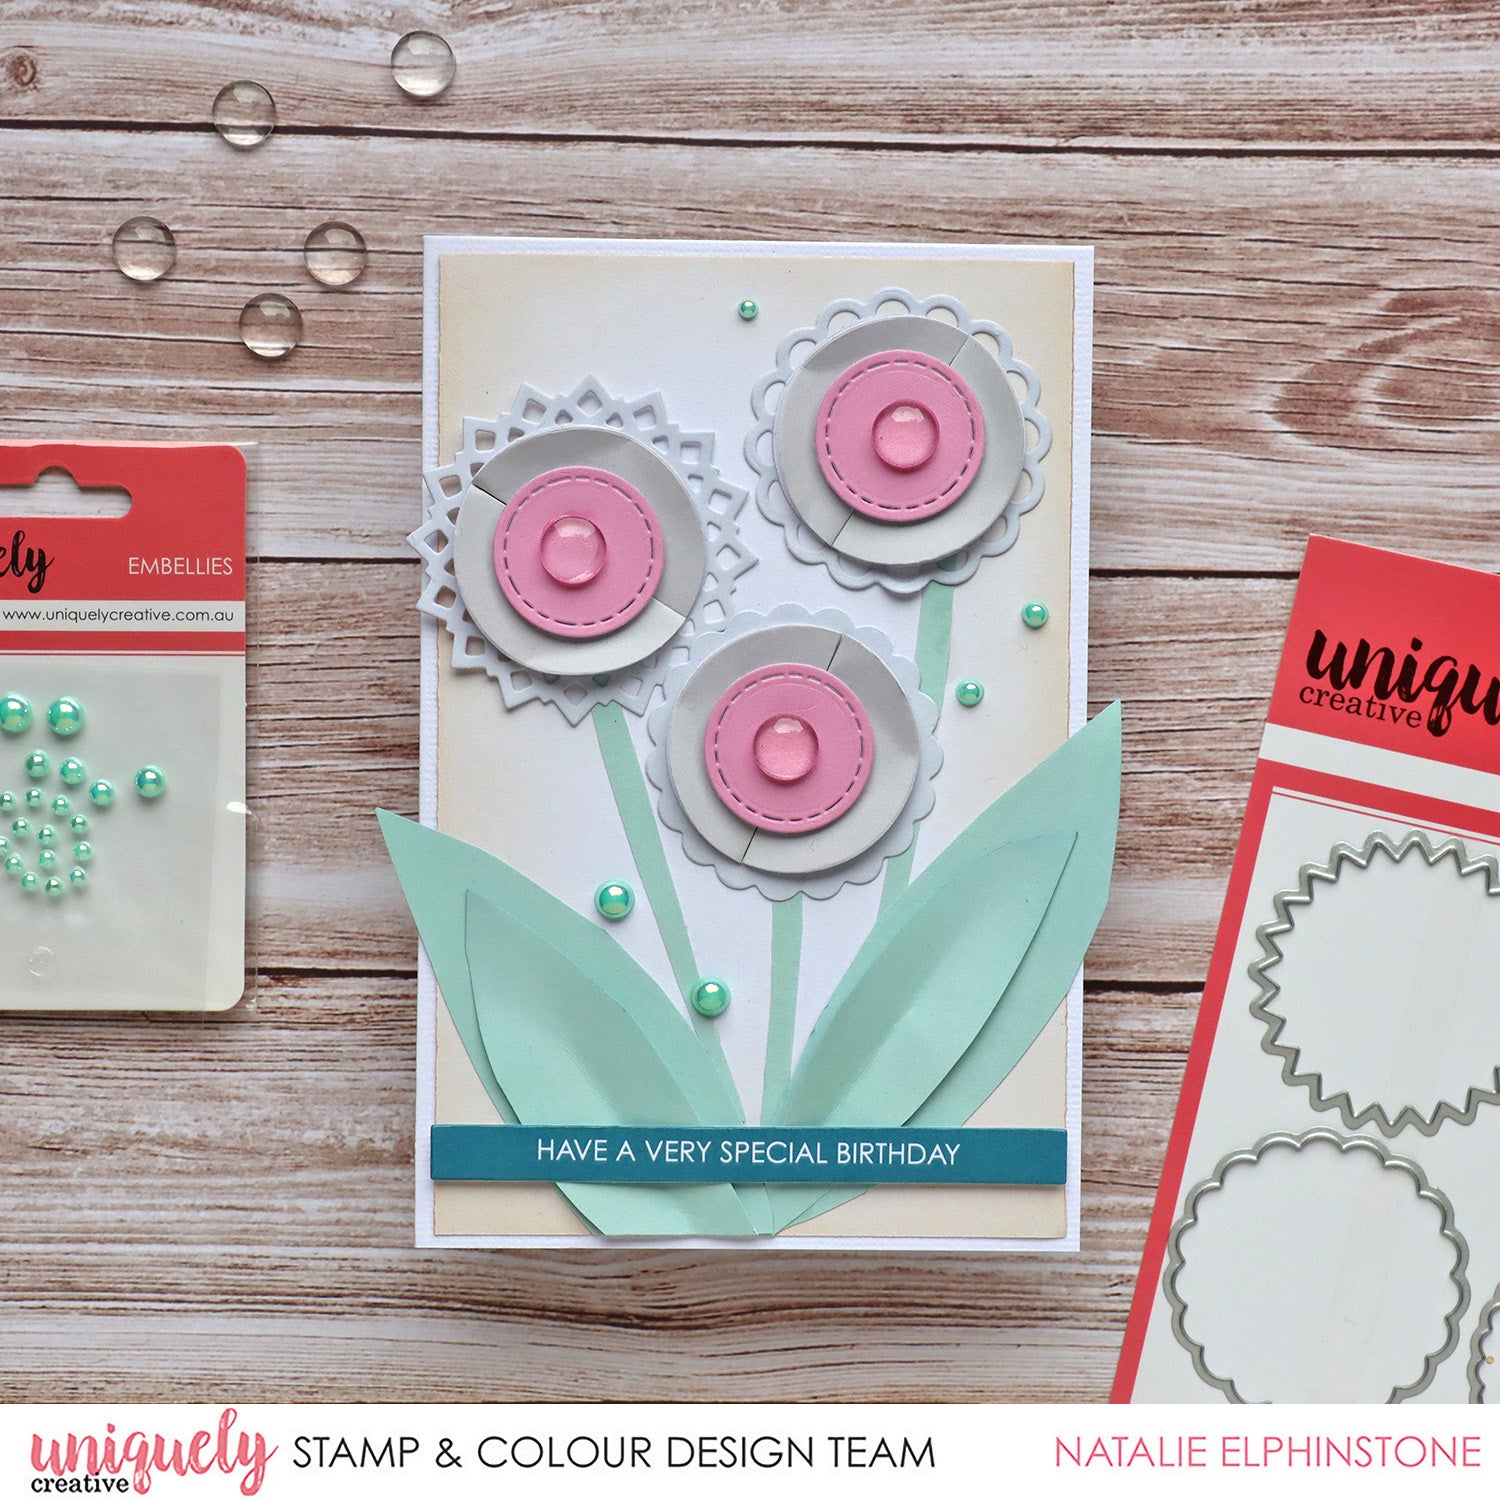
1. The three main layers for the flowers are… the funky decorated circles from Cut-a-Part Essentials #9 Die, the plain circles from Cut-a-Part Essentials #6 Die, the smallest circle from the Stitched Nesting Circles Dies. Cut them all out in different coloured paper or cardstock.

2. Fold each of the plain circles in half, using two for each flower. These will give a floral petal look. Adhere the pink middles using foam tape for even more lift, glued a glass dome onto the centre.

3. For the stems and leaves draw free-hand and cut them out.

4. Attach the flowers to a lightly blended background, and then onto a plain white card. Place a sentiment strip along the bottom with foam tape, scatter a couple of mint pearls around too.