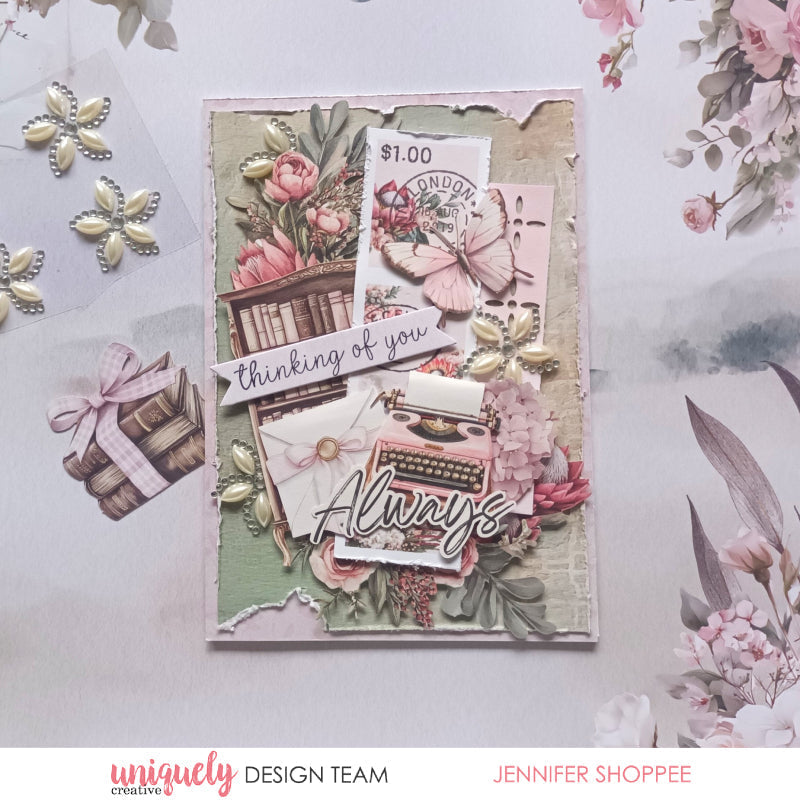
THINKING OF YOU ALWAYS CARD TUTORIAL - JENNIFER SHOPPEE

To recreate this gorgeous card created by Design Team member Jennifer Shoppee you can follow the steps below:
Uniquely Creative Products Used:
· UCP3078 Banksia Paper
· UCP3080 Layered Bloom Paper
· UCP3081 Native Air Paper
· UCP3084 Open Dreams Paper
· UCE2199 Decorative Base Layer
· UC1934 Celebration Sentiment Stamp
· UCE1967 Pearl Posy Stickers
· UCP3087 Paperbark Blooms Creative Cuts
· UCD1910 Cut-a-part Essentials #1 Die
· UCE1986 Edge Distressing Tool
· UCE1803 Foam Mounts Squares & Strips
· UCE1859 6mm Double Sided Tape
Other Products Used:
· Die Cutting Machine
· Glue
· Archival Ink Pad- Jet Black
Card size: 10.5cm x 14.8cm
Step 1:
Cut a 10.5cm x 14.8cm rectangle from the Native Air Paper and attach to the card. – See image 1
Step 2:
Cut a 9.8cm x 14cm rectangle from the Banksia Paper and distress the edges. Adhere to the card - See image 2
Step 3:
Cut a Floral creative cut and use foam squares to attach to the top left and bottom right corners of the card – See image 3
Step 4:
Cut the stamps from the Open Dreams paper and distress the edges. Cut a strip from the Decorative Base Layer and add to the side of the stamps. Layer this with the bookcase creative cut- See image 4
Step 5:
Stamp the sentiment on the Layered Bloom paper and die cut using the essentials die. Add the sentiment and creative cut letter, typewriter, Flowers and butterfly – See image 5
Step 6:
Add the Pearl Posy Stickers – See image 6