Tis The Season To Be Jolly Tutorial - Ashleigh Freeston

Uniquely Creative Products Used:
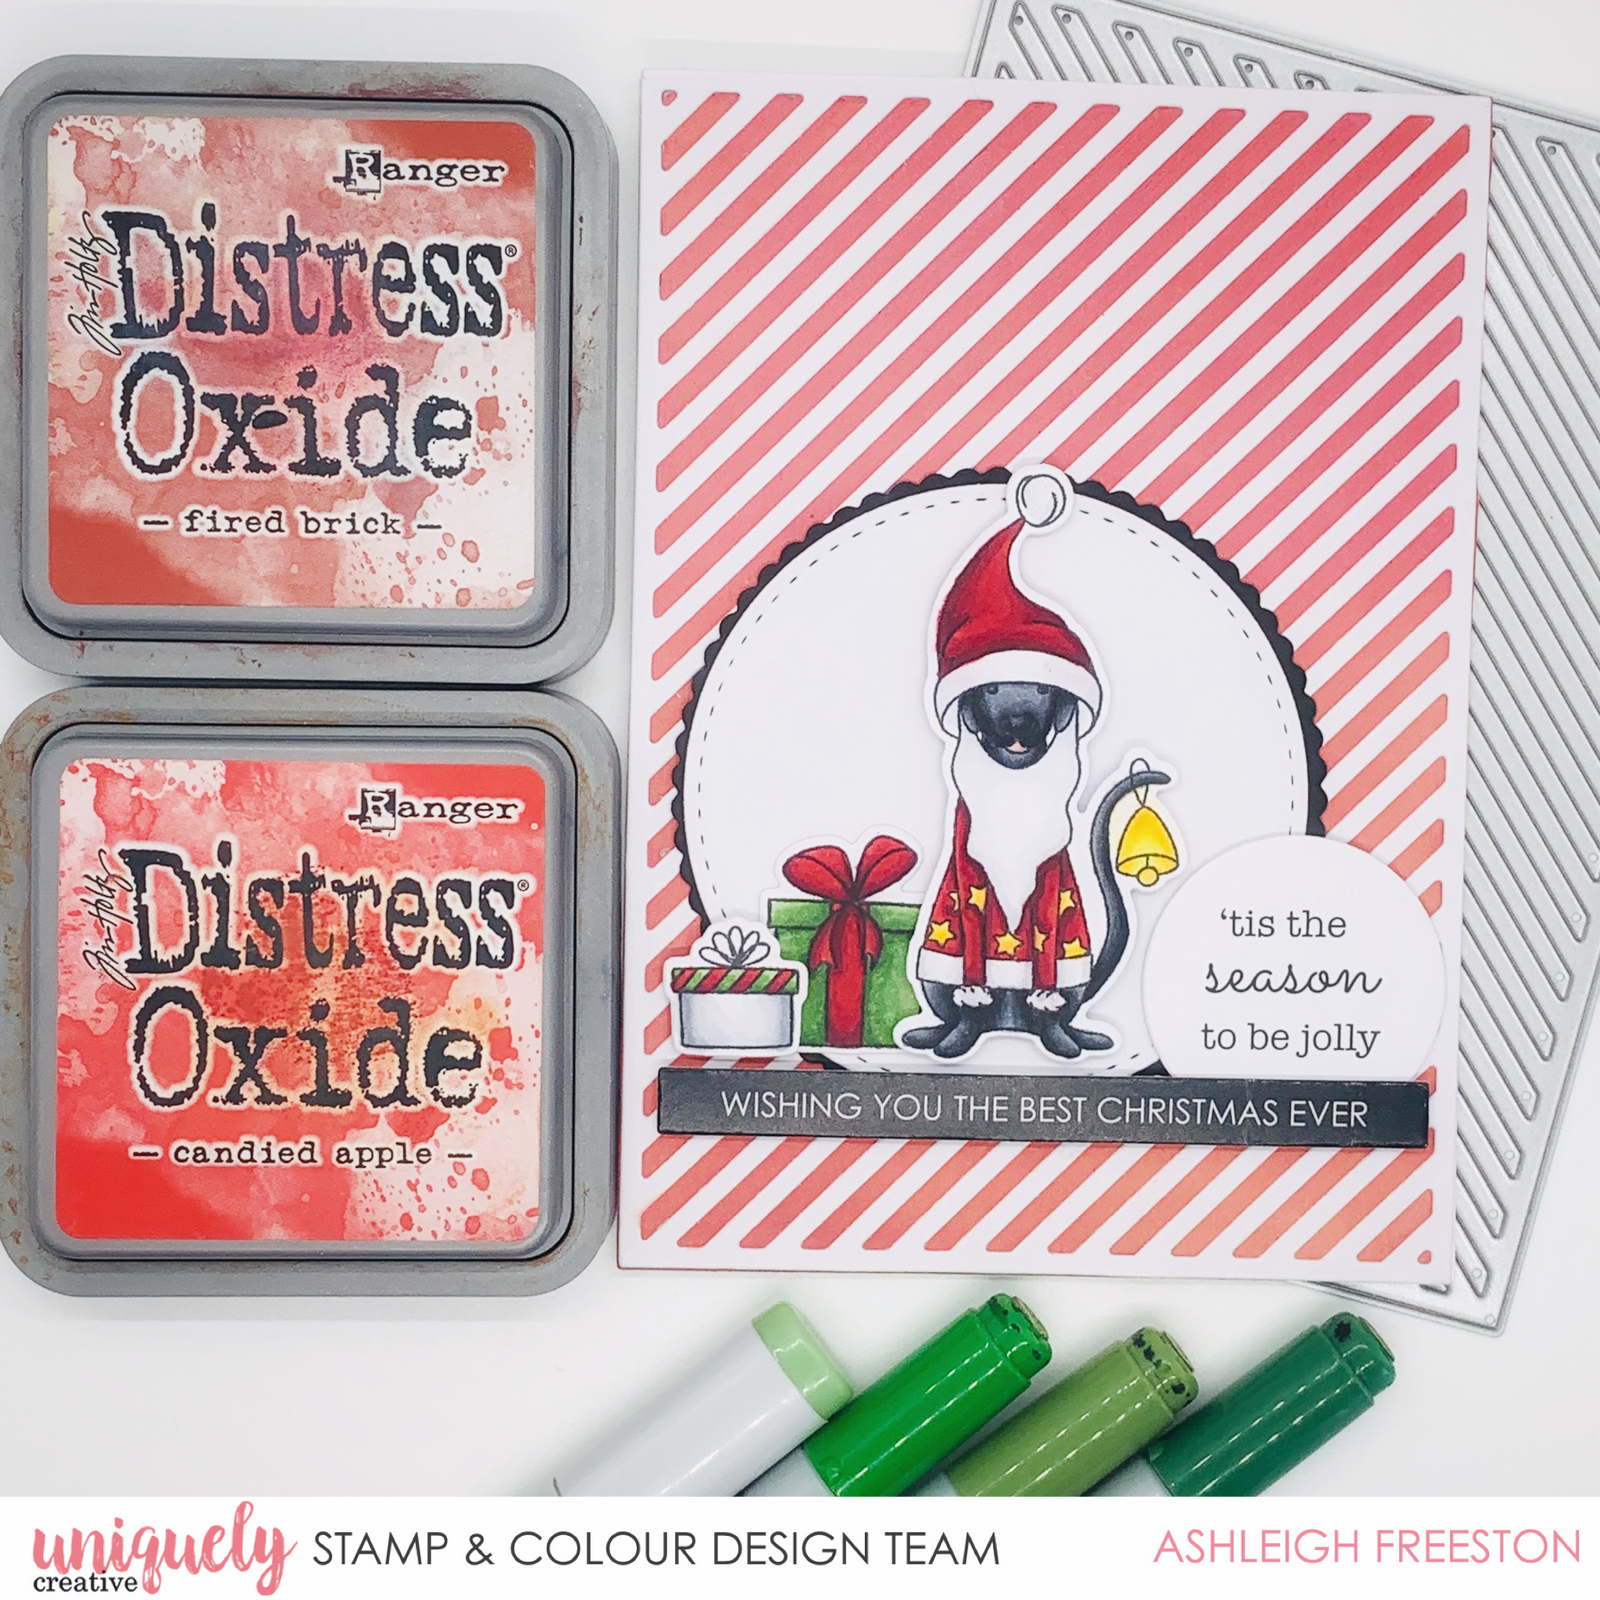
UC1850 Santa Paws Stamp Set, UCD2013 Santa Paws Die, Santa Paws Cut-a-Part Sheet, UCD2003 Stitched Nesting Circle Die, UCD2004 Scalloped Nesting Circle Die, UCD1974 Stitched Nesting Rectangle Dies, UCD1994 Candy Stripe Cover Plate Die, Cut-a-Part Essentials #5 Die, Cut-a-Part Essentials #6 Die, Rectangle Card & Envelopes, Foam Mounts, Uniquely Creative Blending Brush
Other Products Used:
Smooth White Cardstock, Black Cardstock, Distress Oxide: Fired Brick & Candied Apple, Adhesives, Die Cutting Machine
Instructions:
1. Die cut largest stitched rectangle die from white cardstock and ink blend with Fired Brick and Candied Apple Distress Oxide until entire background is covered.

2. Die cut Candy Stripe Cover Plate die from another piece of white cardstock. Adhere this to your ink blended background piece

3. Die cut Scallop Circle from black cardstock and Stitched Circle from white cardstock. Adhere together and place onto background piece.

4. Stamp your images and colour with your chosen colouring medium (I used Copic markers)

5. Die cut the Cut-a-Part sheet using Cut-a-Part Essentials #5 and Cut-a-Part Essentials #6.
6. Finish assembling the card by arranging the stamped images - I foam mounted the dog and smallest present to add some dimension. Complete the card by adhering the sentiment strip with foam mounts.
